Getting Started with BTT ViViD
BTT ViViD is a fully-specified design - unlike a modular design such as ERCF or Box Turtle, almost every menuconfig default is already correct the moment you pick it: board, pins, LEDs, environment sensor, heater and per-gate NFC readers all come pre-filled. What's genuinely left for you to decide is small: whether you have the official ViViD buffer board, and which of your computer's serial devices is which - because a ViViD unit and its buffer are two separate controller boards, not one.
The examples use the default Klipper object name unit0. You can choose a
different name under Name → Klipper object name on the first install, and set
a separate Display name for the UI. See
Naming an MMU unit; use your chosen name
where these examples show unit-specific names or pin prefixes.
Menuconfig Installer
First clone the Happy Hare repository as described in Cloning Happy Hare.
Then run the installer:
cd Happy-Hare
./install.sh
The first run opens menuconfig automatically because no .mmu_config exists
yet; no -i flag is needed.
Choosing the MMU type
Highlight MMU Type and press Enter, move down to BTT ViViD and press Space to select it. A second line appears indented directly underneath it - BTT ViViD buffer - already checked:
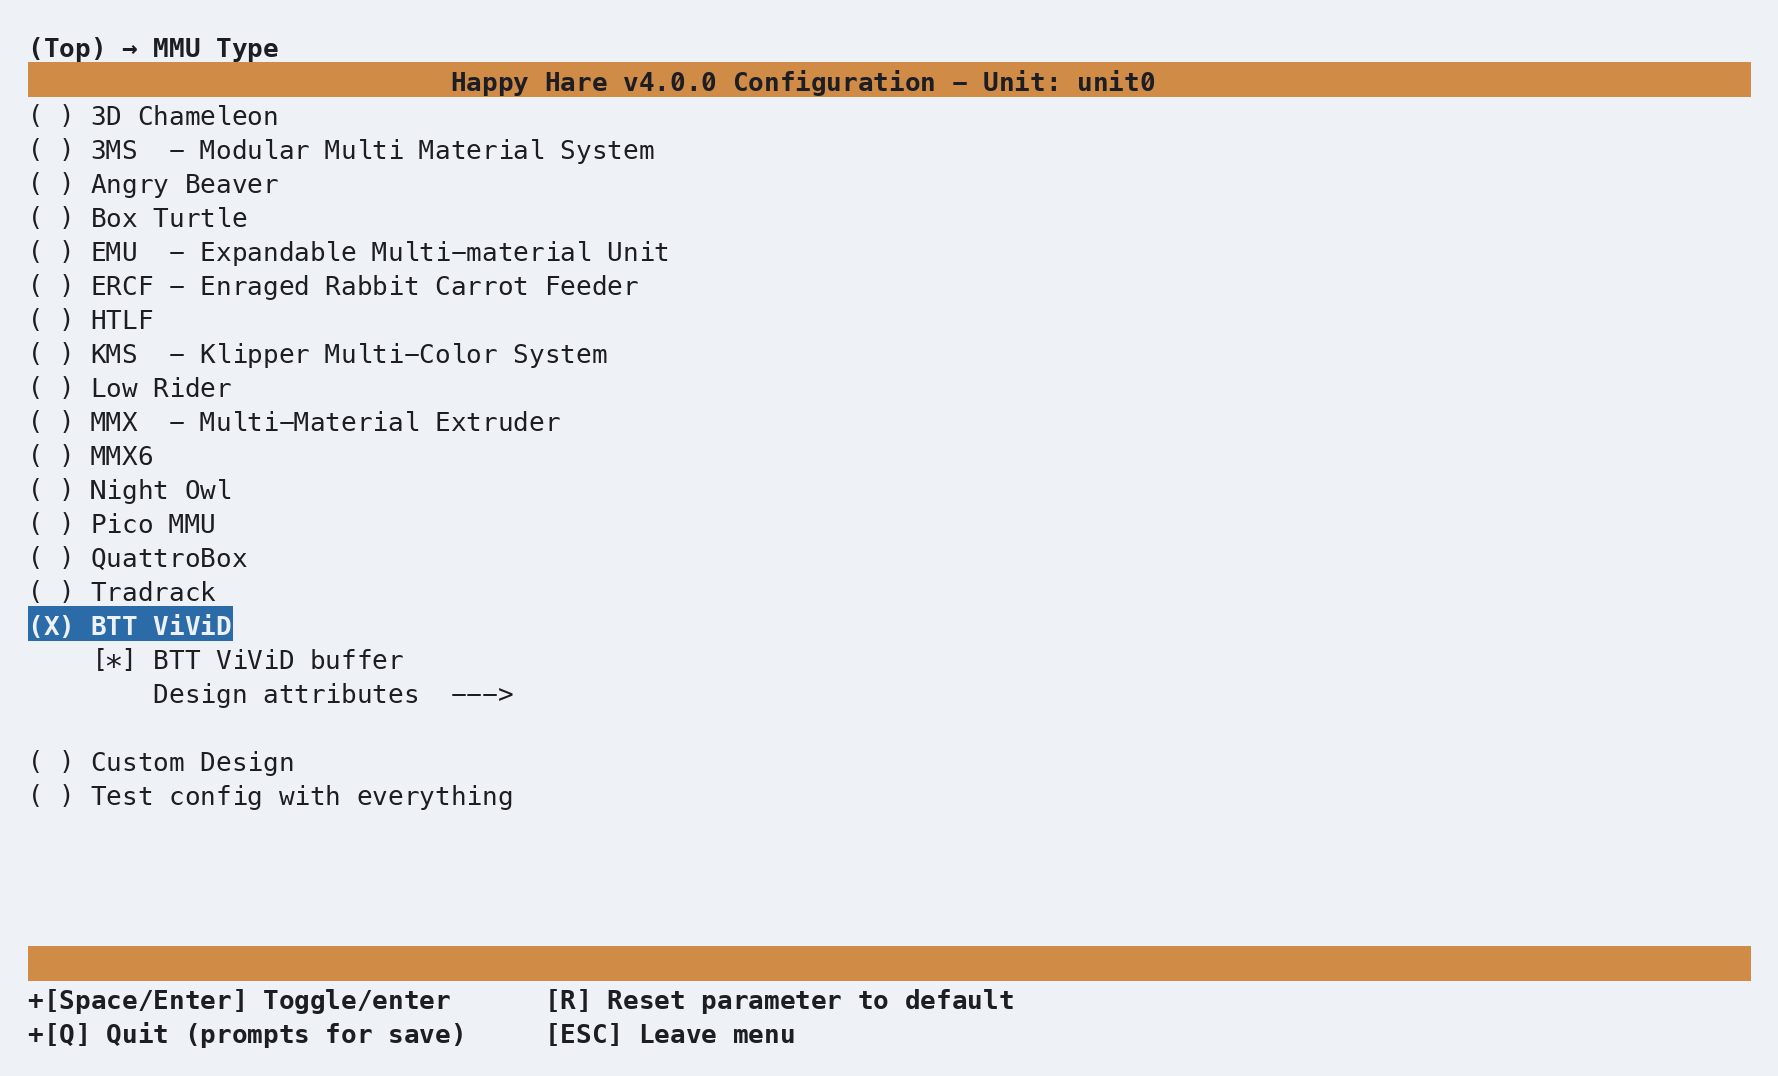
Leave BTT ViViD buffer checked if you have the official buffer board fitted on the bowden tube (its own separate MCU, with its own sync-feedback tension/compression sensors already wired) - that's the common case, and it's suggested on by default. Uncheck it only if you're using a different buffer mechanism entirely, which you'd then add under MMU Features / Additions instead.
Board type doesn't need a visit at all - ViViD only has one controller board, BTT ViViD MCU, and it's already selected:
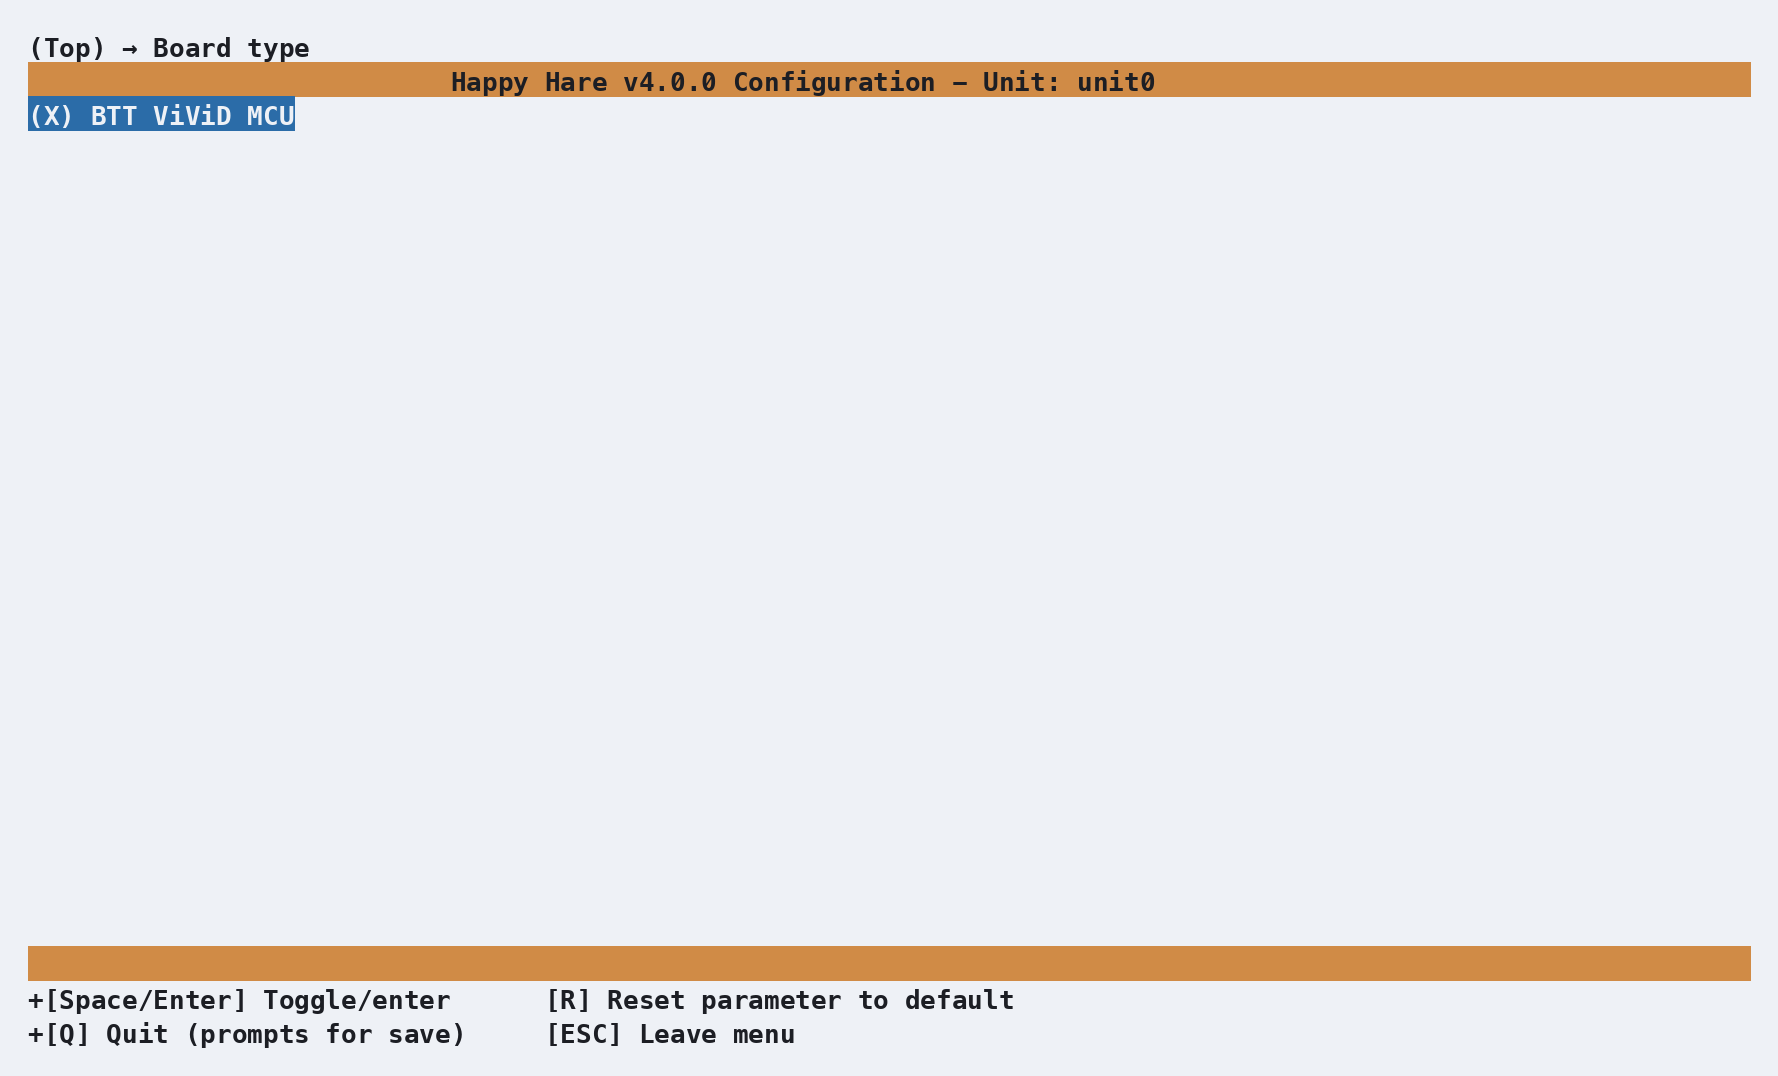
Gate count is fixed at 4 too; unlike a modular design, there's no separate
prompt for it.
MCU connections: two separate boards
This is the one part of ViViD setup that genuinely needs your input, and it needs it twice - once for the ViViD unit's own MCU, and once for the buffer's, because they're two independent boards that each show up as their own serial device.
From the top menu, enter MCU connection:
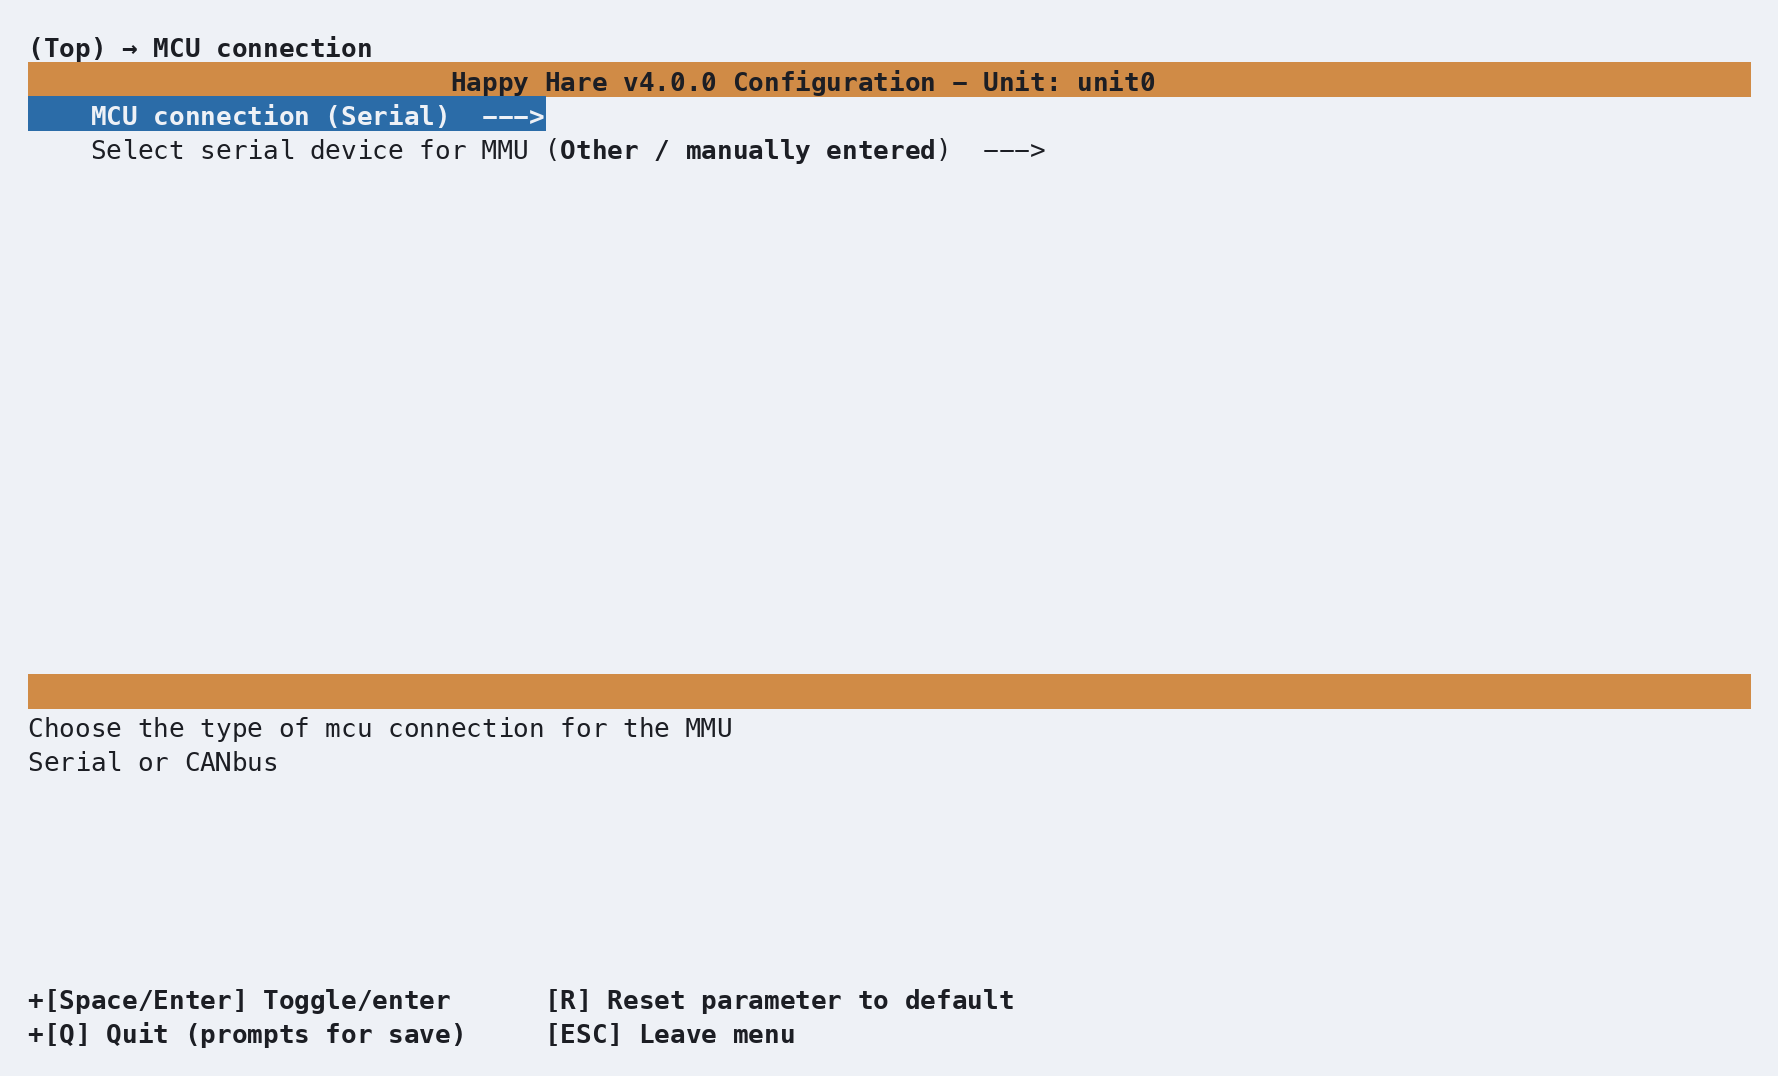
This is a small submenu, not a single screen: the first row is the
Serial/CANbus choice (already Serial, right for a USB-attached board), and
the second - Select serial device for MMU - is where you actually pick
which serial device. Enter that second row and every currently-connected
device shows up by its full /dev/serial/by-id/ name - BTT's own boards name
themselves clearly, so telling the two apart is normally just reading the
list:
Select serial device for MMU  --->
    ( ) usb-Klipper_stm32g0b1xx_vivid_410030000150505539323520-if00
    ( ) usb-Klipper_stm32f042x6_buffer_2D0001000143565335383320-if00
    ( ) Other / manually entered
The ViViD unit's device string contains vivid, the buffer's contains
buffer. Pick the vivid one here - it shows Other / manually entered
above only because nothing was plugged in when this screenshot was captured.
Back out to the top and enter the buffer's own connection screen, Buffer MCU connection:
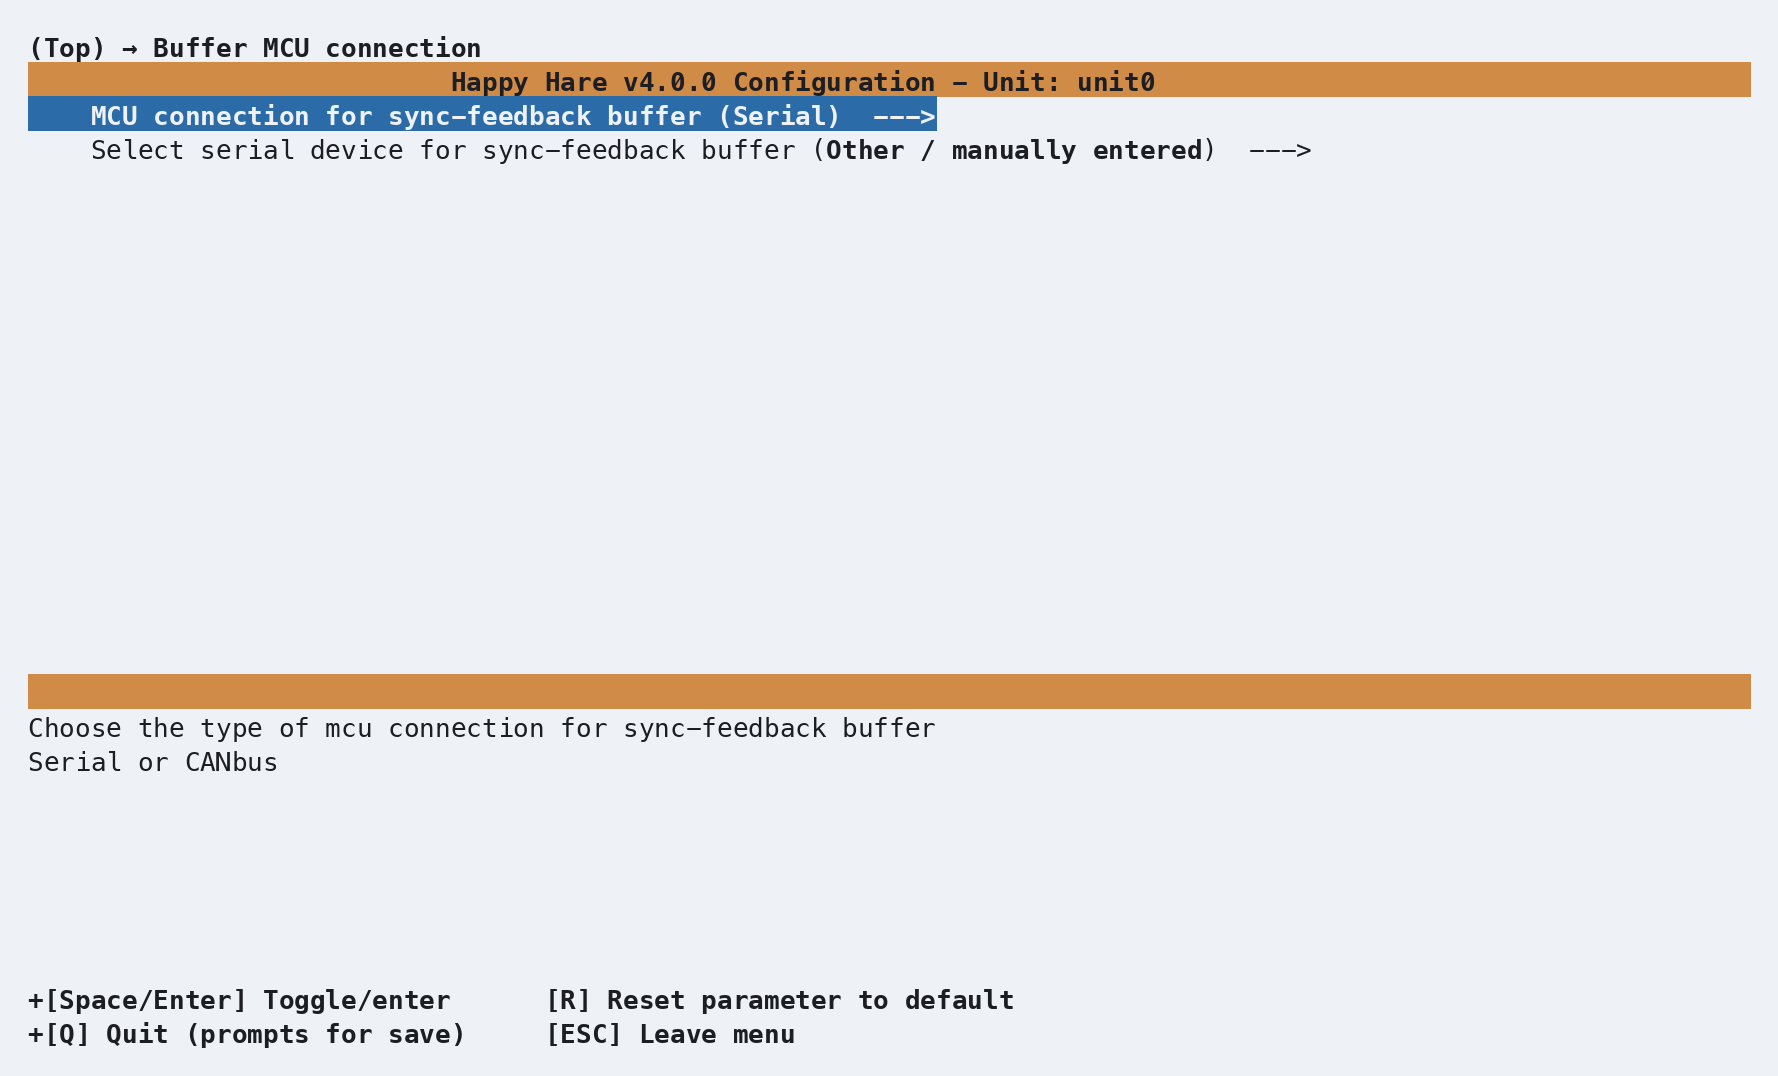
Same shape, same list, but this time enter Select serial device for
sync-feedback buffer and pick the buffer one instead:
Select serial device for sync-feedback buffer  --->
    ( ) usb-Klipper_stm32g0b1xx_vivid_410030000150505539323520-if00
    (X) usb-Klipper_stm32f042x6_buffer_2D0001000143565335383320-if00
    ( ) Other / manually entered
If a board you expect isn't listed at all, Klipper doesn't have a valid
serial connection to it yet - check that its firmware is flashed and it's
actually plugged in before assuming menuconfig is at fault. Other / manually
entered lets you type the exact /dev/serial/by-id/... path directly,
which works identically to picking it from the list once the device does
show up.
MMU Features / Additions
Worth a glance even though there's nothing to add for a stock ViViD:
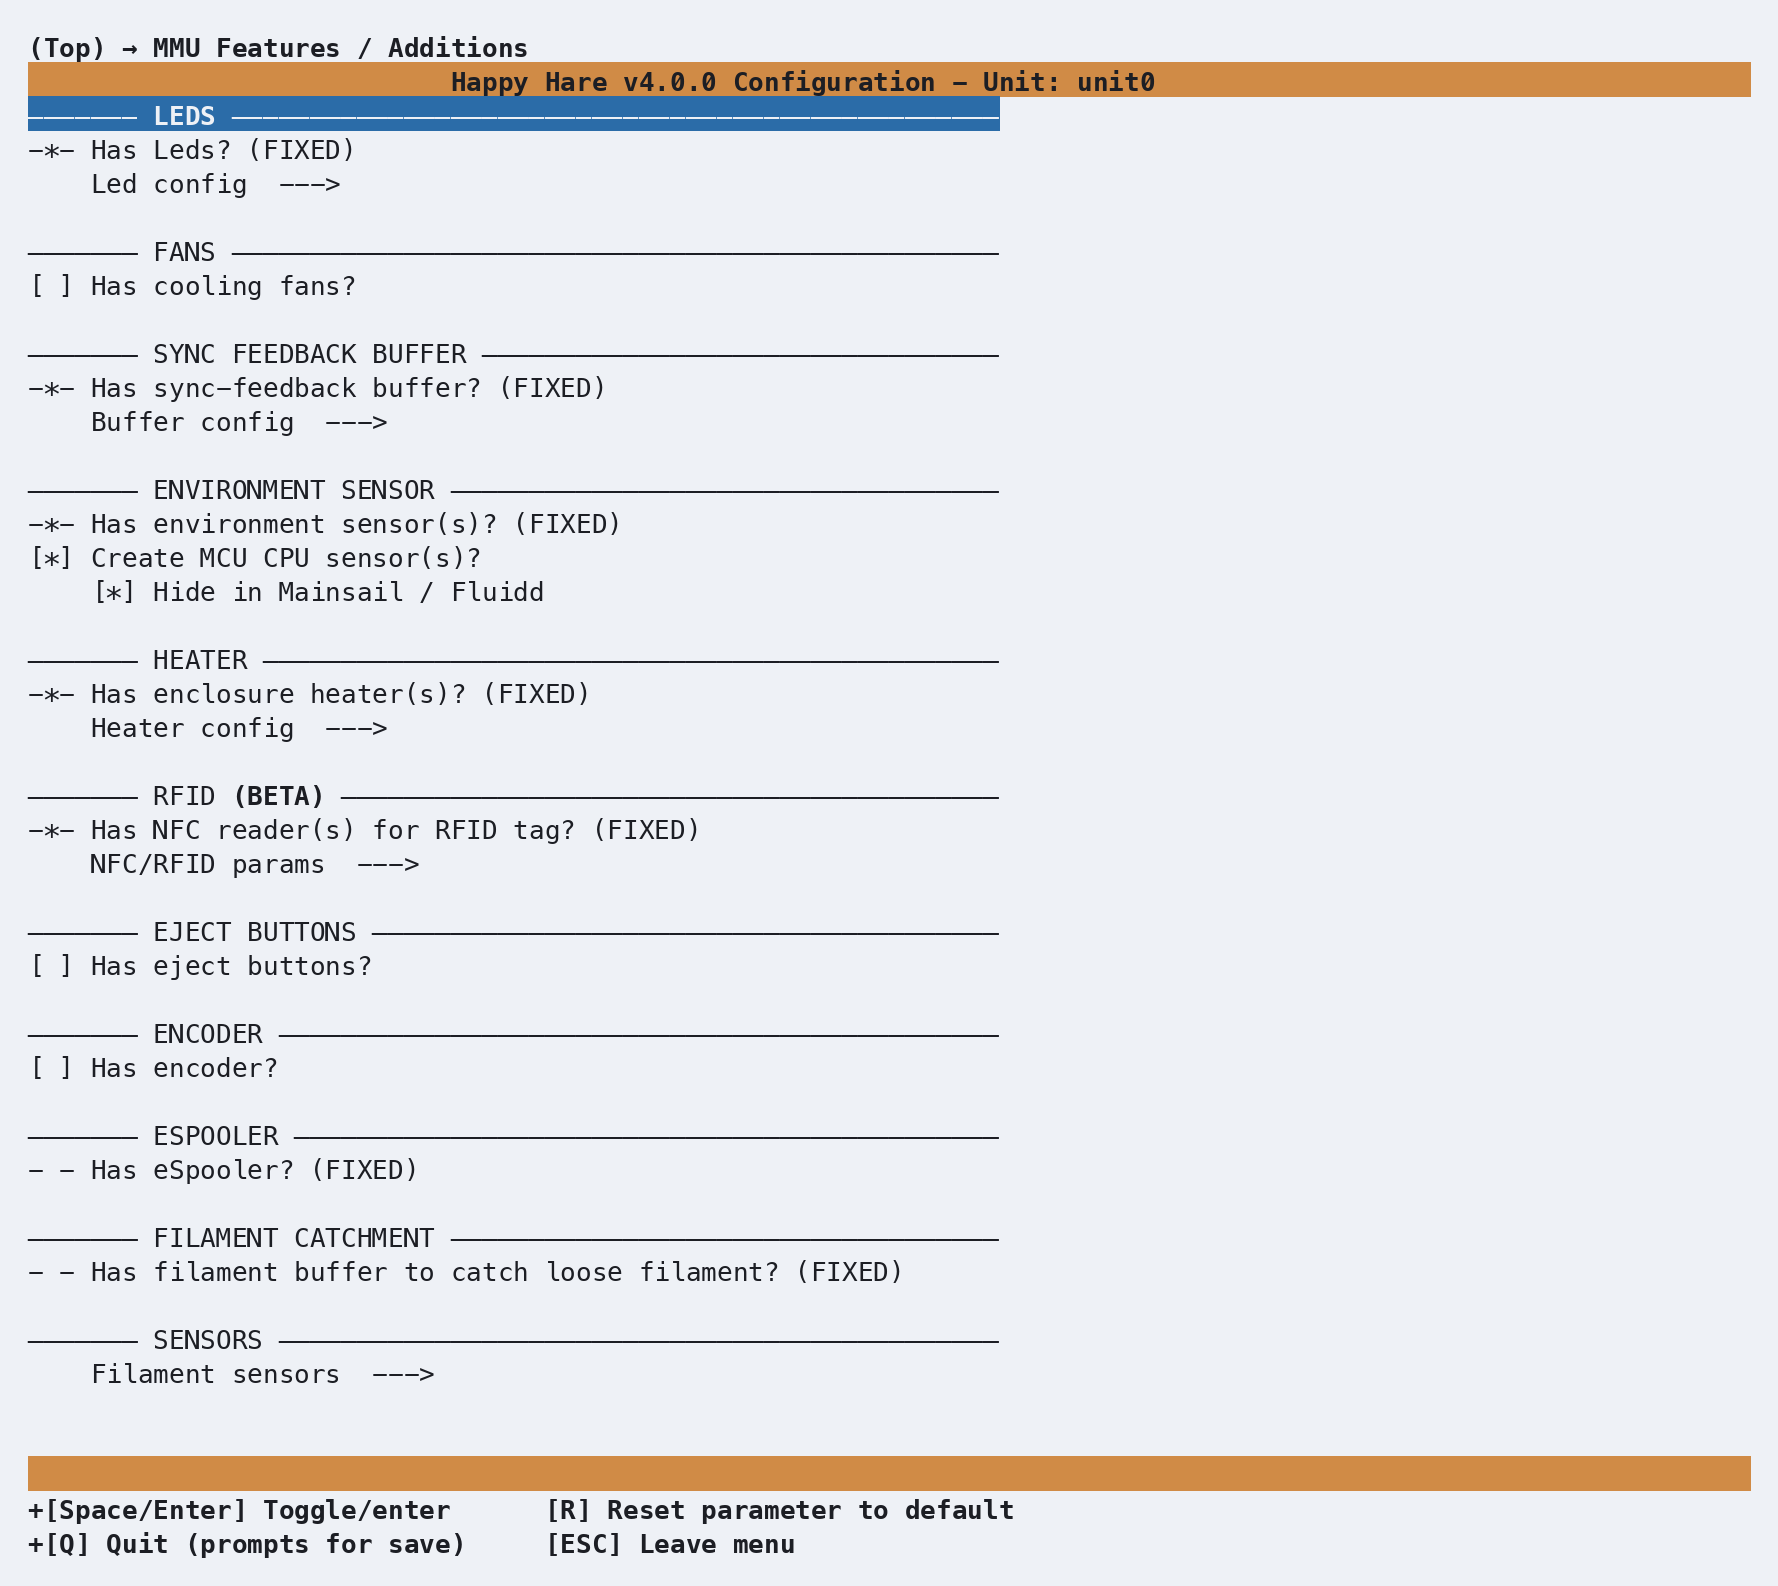
LEDs, the sync-feedback buffer (supplied by the buffer board from the
previous step), the environment sensor, controller fan, heater,
and NFC readers are all already switched on and marked (FIXED),
because every stock ViViD ships with them. The profile supplies its heater
fan and controller fan directly, so their hardware settings do not appear as
editable generic fan hardware menus. The dimmed file hint identifies the
board-supplied configuration. See Fans & Airflow
for the distinction between these fans and managed fans. The old-style
filament buffer to catch loose filament is fixed off instead - the
filament movement also moves the spool on this design. Eject buttons and
an encoder are the genuine options here and default off; enable whichever
ones you actually built.
Picking a toolhead
From the top menu, enter Toolhead:
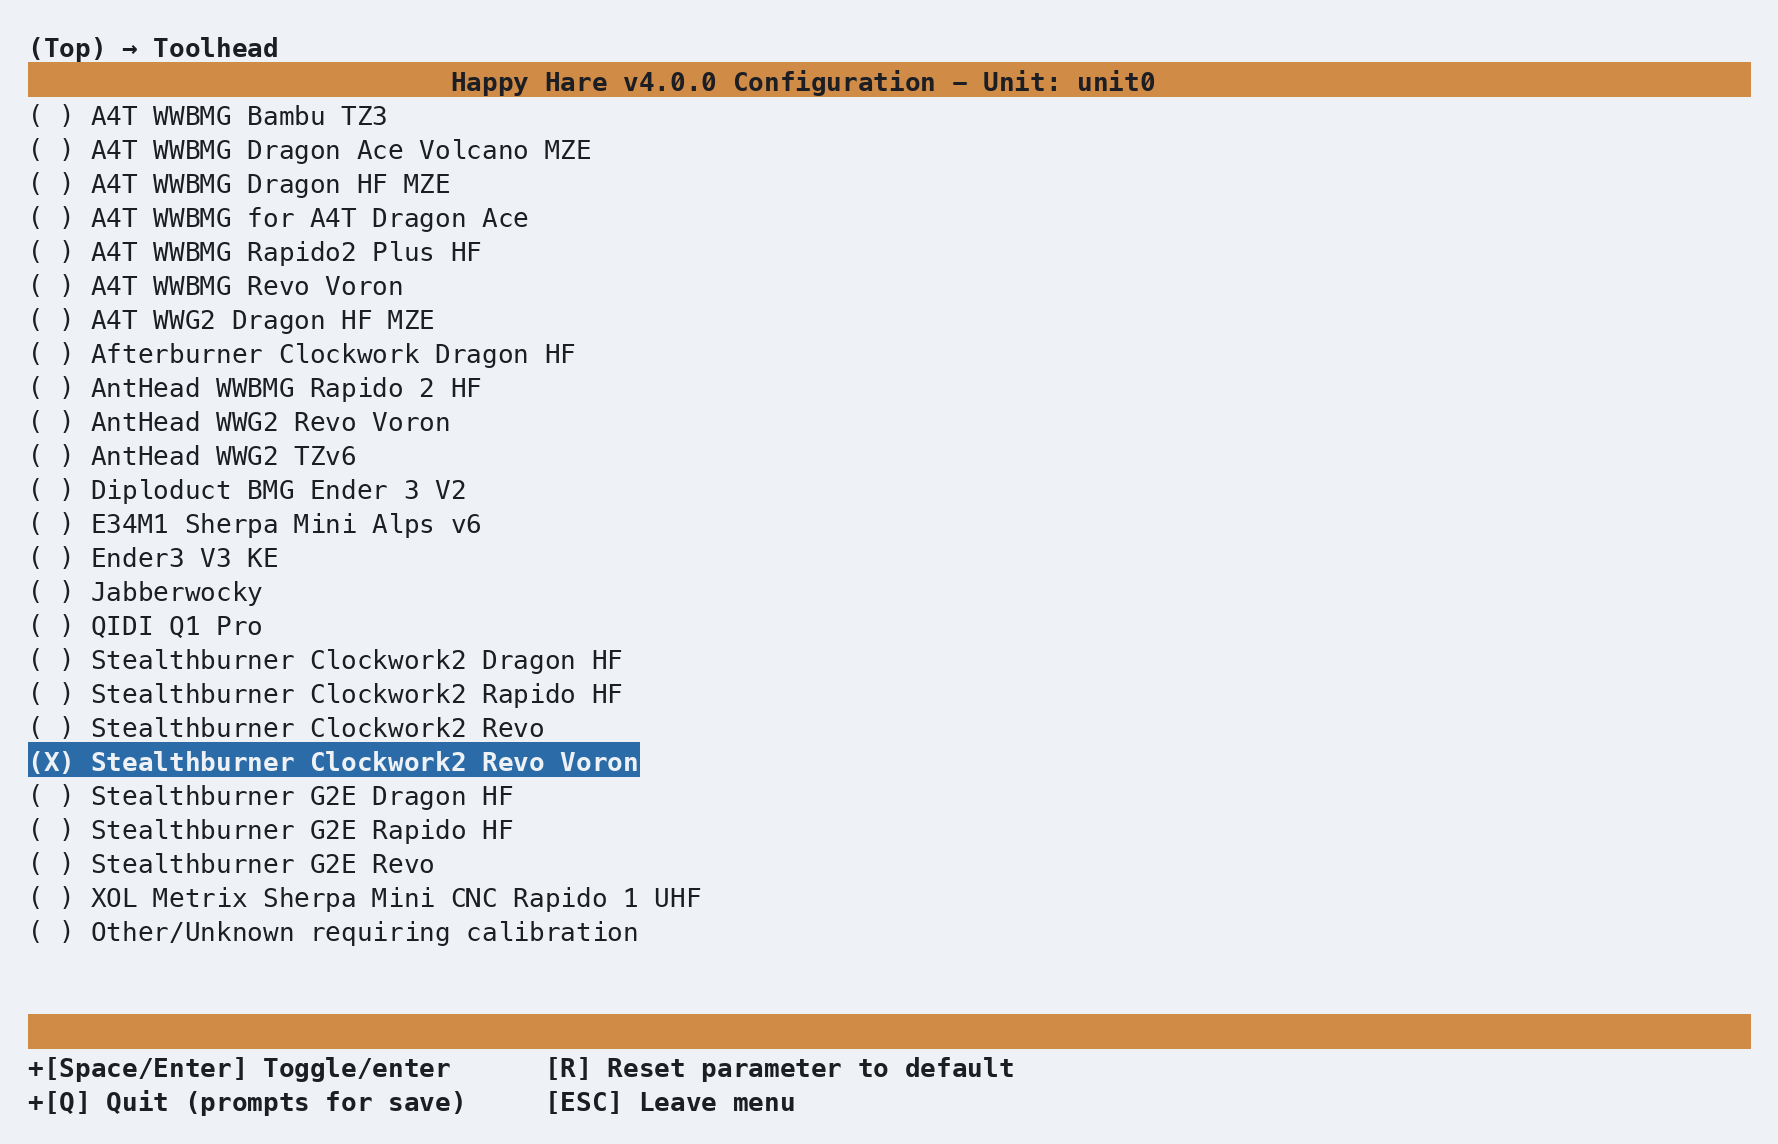
This step is entirely optional - skip it and Happy Hare falls back to generic "Other/Unknown" dimensions, a perfectly normal starting point. If your toolhead (extruder + hotend combo) happens to be in the list, though, picking it fills in real, community-measured values (extruder-entrance-to-nozzle distance, residual filament) instead of guesses, for free - here we've picked Stealthburner Clockwork2 Revo Voron at random, just to show what selecting one does. This choice is the same regardless of MMU type - it isn't ViViD-specific.
Contributions to the toolhead list are always welcome! If you would like to contribute your parameters to this toolhead database, please visit here to add your parameters to future installer updates.
An example software option: Spoolman NFC auto-create
From the top menu, enter Software Options. Since a stock ViViD already has an NFC reader on every gate, one option in the Spoolman section here is worth calling out specifically rather than skimming past: Auto-create a Spoolman spool from an unknown NFC/RFID tag?
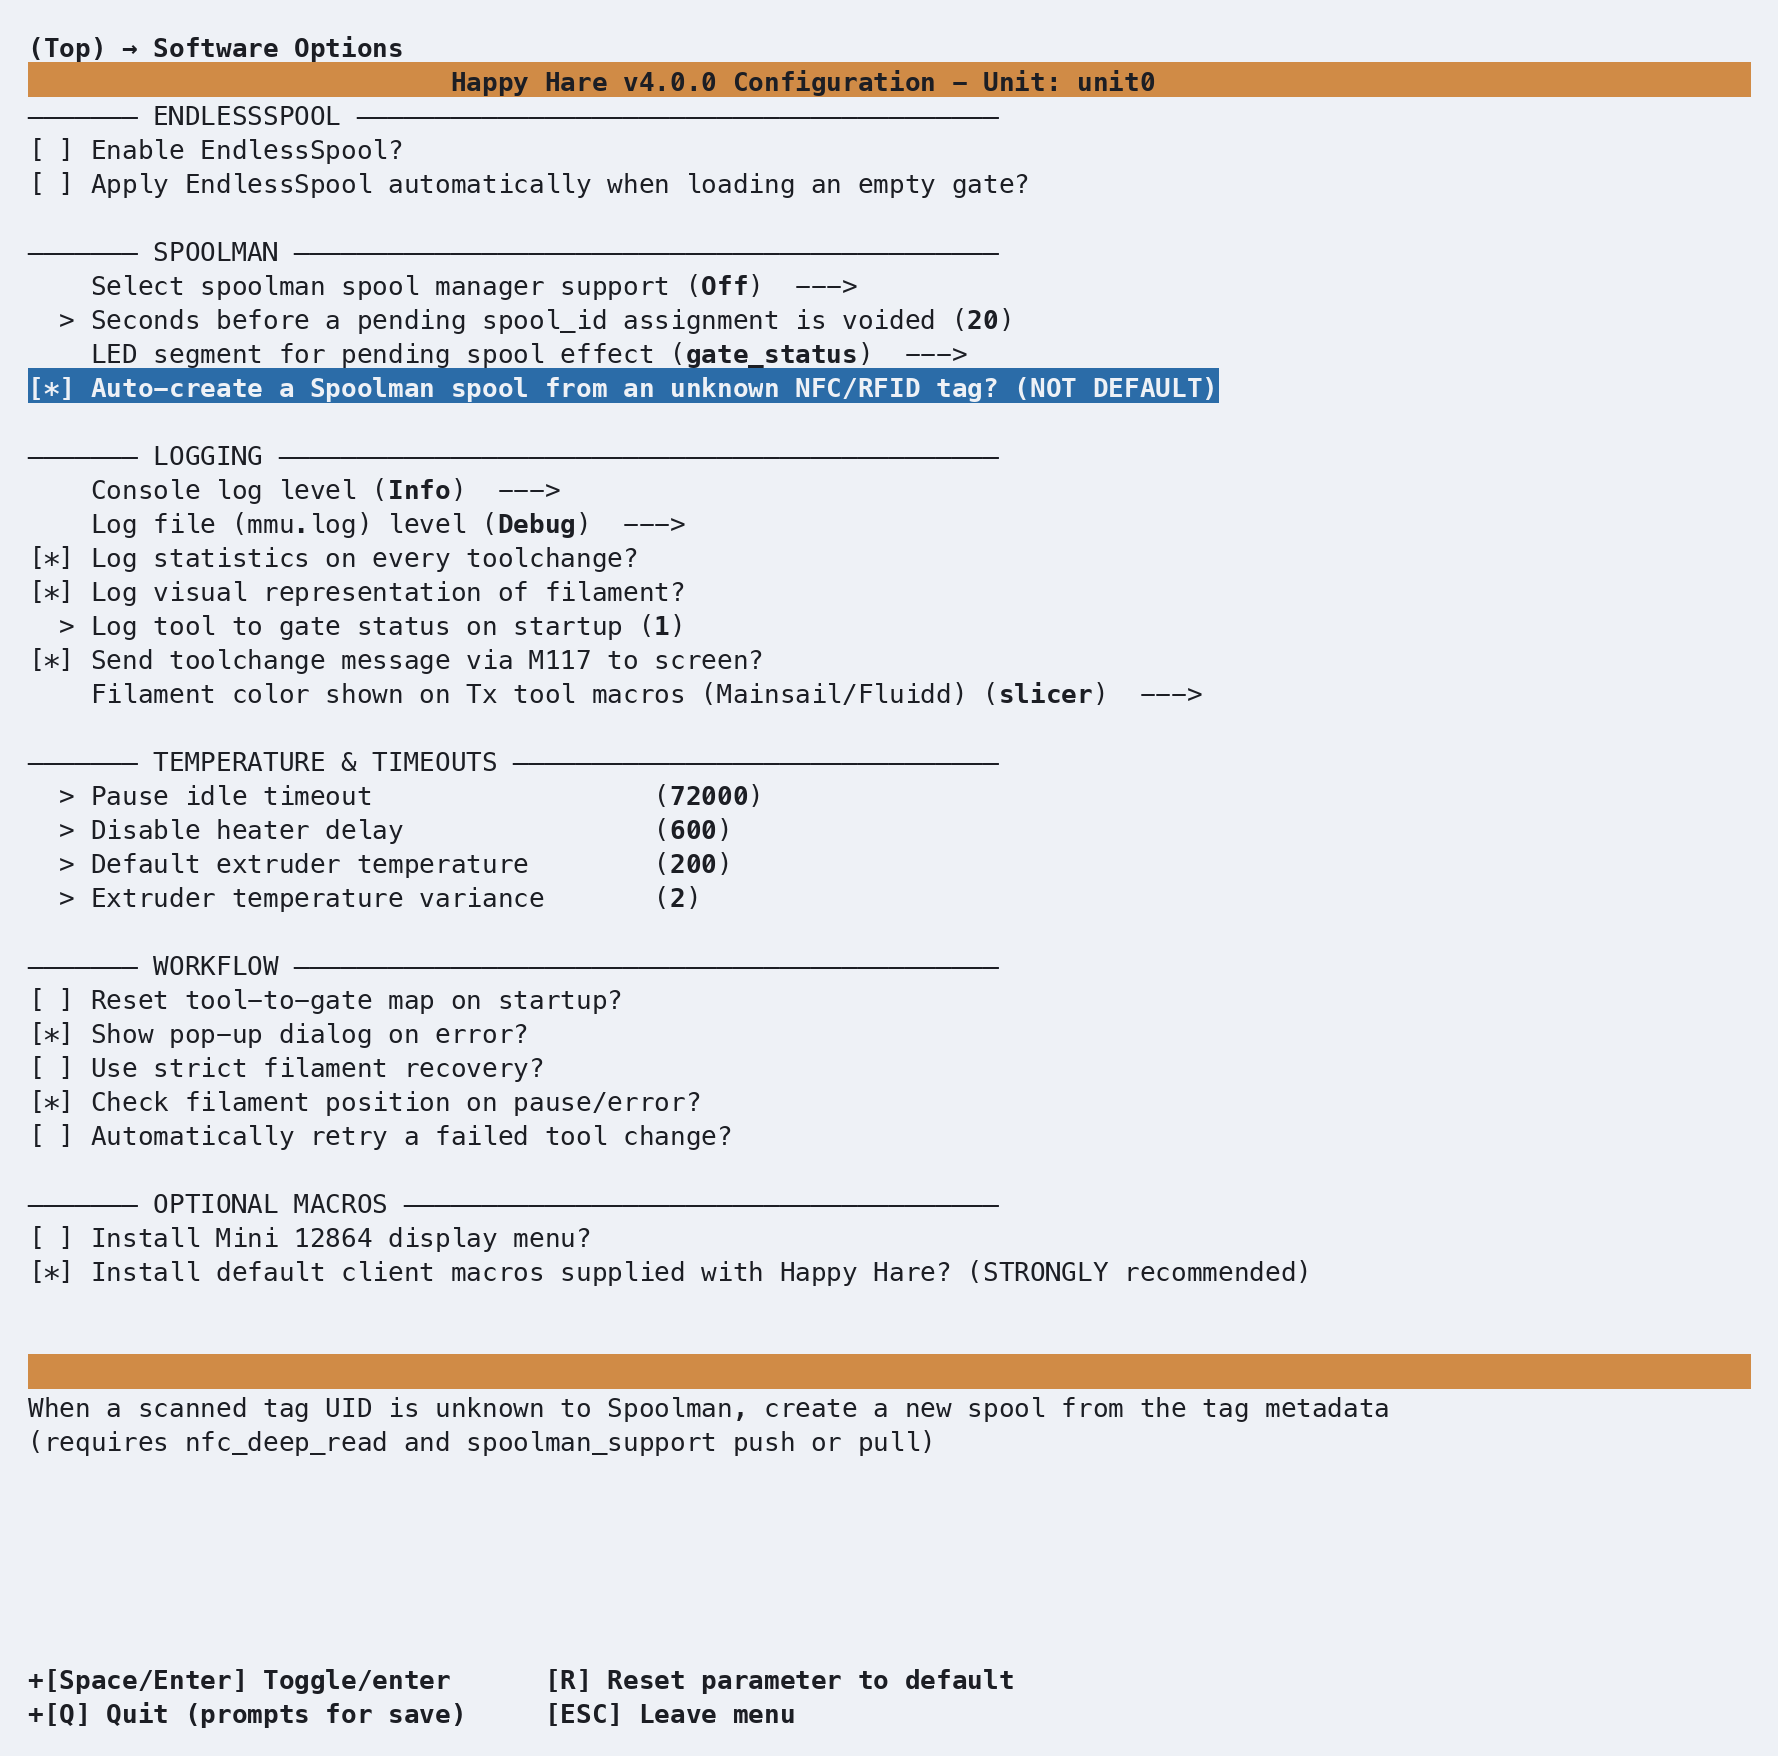
Select spoolman spool manager support defaults to Off regardless of MMU
type - ViViD's built-in NFC readers don't change that default, they just make
the feature genuinely worth turning on. Auto-create itself needs deep NFC
reads enabled and Push or Pull selected above it, not just
Read-only - creating a spool record is itself a write back to Spoolman, so
a mode that only reads isn't enough. With both set, scanning a tag Spoolman
has never seen creates a new spool record from the tag's own metadata
automatically, instead of the print pausing for you to assign one by hand.
That kind of dependency is exactly what the on-screen help for any option
spells out, so read it before assuming a checkbox alone will do something.
Explore the rest
That covers everything genuinely specific to a stock ViViD, but it's only a
fraction of the menu. Endstops and Bowden movement, Tip Forming /
Cutting, Purging and the rest are all worth a look - scroll all the way
from the top to Paths & Services at the bottom at least once. Nothing you
look at will break anything: moving the highlight and pressing ? for help
costs nothing, and R resets whatever's highlighted back to its default.
Saving, and coming back later
When you're done, press Esc from the top level (or Q) to get the
save prompt, and confirm. Happy Hare writes your .cfg files from what you
chose.
The installer only forces menuconfig open automatically on that very first
run. After that, running ./install.sh again just upgrades in place - it
won't reopen the menu. To go back in and change something, use:
cd ~/Happy-Hare
./install.sh -i
This is the normal way to revisit any setting on this page - there's no need
to ever hand-edit the generated .cfg files directly.
Note
The one thing worth knowing: each time you rerun -i over an existing
configuration, it asks how to reconcile menuconfig with any edits made
directly to your .cfg files. Merge/Refresh (option 1, the default) keeps
your manual edits, offers to import them into menuconfig first, and applies
only the settings you change there. Replace (option 2) regenerates
everything from menuconfig, discarding direct edits.
If you only ever configure through menuconfig, as this page assumes,
Replace is the recommended choice because it rebuilds your Happy Hare
Klipper configuration files, ensuring a clean configuration that includes
future Happy Hare software updates. See
Choosing an upgrade mode for
the differences.
Validating Hardware Setup
The shared Hardware Validation checklist covers the same checks in more depth. The sequence below calls out the stock ViViD hardware specifically.
With Klipper accepting the configuration and no startup errors, first confirm that both controller boards are connected: the ViViD MCU drives the selector, gear, entry sensors and built-in accessories, while the separate buffer MCU provides the four exit sensors and the tension/compression switches. An error for either MCU needs fixing before movement tests will be meaningful.
Entry and exit sensors. Run MMU_SENSORS, then insert a short piece of
filament into gate 0. Its mmu_entry_0 sensor should change to TRIGGERED.
Move the filament through the selected path to the buffer and confirm
mmu_exit_0 triggers there too. Remove the filament and make sure both return
to Open, then repeat for gates 1, 2 and 3:
MMU_SENSORS
The exact order in the output is not important; what matters is that only the sensor belonging to the gate under test changes state. A neighboring sensor changing instead usually means the gate wiring or buffer tube routing is crossed.
Indexed selector. Remove all filament before moving the selector. ViViD has a switch at every selector position, so there is no conventional home switch to find at startup. Exercise the selector motor, then select all four gates:
MMU_TEST_BUZZ_MOTOR MOTOR=selector
MMU_SELECT GATE=0
MMU_SELECT GATE=1
MMU_SELECT GATE=2
MMU_SELECT GATE=3
The buzz should make a small back-and-forth movement. Each selection should
stop cleanly at the requested gate without a missed-index error. The physical
order around the selector is not numerical (0, 3, 1, 2 is the stock ViViD
order), so don't diagnose a fault merely because the mechanism doesn't visit
the printed gate numbers clockwise.
Gear direction. ViViD has one shared gear stepper, so this test only needs to pass once. Select gate 0, insert some scrap filament, and make a short positive move:
MMU_SELECT GATE=0
MMU_TEST_MOVE MOVE=50
The filament should move away from the spool and toward the buffer. If it
moves backward, invert the Gear dir pin under Pins / TMC → Gear pins
in menuconfig by adding or removing !, restart Klipper, and test again.
Sync-feedback buffer. With the buffer unloaded, query its state, then move it gently through its travel by hand:
MMU_SYNC_FEEDBACK
The stock ViViD profile expects the spring to rest at Tension when unloaded. Moving away from that end should pass through neutral, and the opposite, excess-filament limit must report Compression. If tension and compression are reversed, swap the buffer's pin assignments rather than compensating elsewhere. See Sync-Feedback Buffer for the full sensor test and troubleshooting procedure.
A stock ViViD has no encoder or eSpooler, so skip those parts of the shared validation checklist unless you enabled the optional hardware yourself.
Calibration
Most ViViD values are already supplied by the installer. Bowden length is
auto-calibrated the first time filament is loaded through the stock buffer,
and the indexed selector ships with the correct gate order and a usable
endstop-width default. The calibration worth doing before regular use is the
shared gear stepper's rotation_distance.
Gear rotation distance (recommended)
Manufacturing tolerances in the drive gear change how much filament actually moves for a commanded distance. The installed value is a good starting point, but measuring your own improves load and unload accuracy.
- Select gate 0 and advance filament until it emerges from the ViViD/buffer path at a point where you can cut and measure it accurately.
- Cut it flush with that reference point.
-
Command a 100 mm move while retaining gear grip:
MMU_TEST_MOVE MOVE=100 GRIP=1 -
Measure the actual length emitted and pass that number to the calibration command. For example, if the move produced 102.5 mm:
MMU_CALIBRATE_GEAR MEASURED=102.5 -
Cut the filament flush again and repeat the 100 mm test move to verify the result.
ViViD uses the same gear drive for all four gates, so calibrate it once—there is no per-gate gear calibration to repeat. See Calibration: Gear Rotation Distance for longer test moves, resetting the saved value, and the calculation Happy Hare performs.
Selector indexes (normally optional)
If every gate selected correctly during hardware validation, the stock index settings are sufficient. You can optionally let Happy Hare detect the physical gate order and center point of every index switch:
MMU_CALIBRATE_SELECTOR_INDEXES
Run this only with filament fully unloaded. It automatically measures and saves the switch widths; there is nothing to align by hand. This is most useful after selector work, a sensor replacement, or if selection is reliable but slower or less centered than expected. See Calibration: Selector Movement for the reporting-only and reset options.
The first real MMU_LOAD will learn the Bowden length automatically. Toolhead
calibration remains optional if you selected a known toolhead during install;
otherwise follow Calibration: Toolhead when you're
ready to replace the generic dimensions with measurements from your printer.
Checking Basic Operation
With the hardware checked and gear rotation distance calibrated, test one complete filament cycle outside a print:
MMU_SELECT GATE=0
MMU_LOAD
MMU_UNLOAD
The first load can take longer because Happy Hare is also learning the Bowden length. Each command should then complete without a pause or unexpected calibration warning. Repeat the cycle on the other three gates so every index switch, entry sensor and buffer exit path is exercised before your first multi-material print.
If the hotend must be heated for the unload/tip-forming method you selected, preheat it to a safe temperature for the loaded material first. See Operation: Debugging Problems if a load or unload fails.
Slicer Setup
Add the Happy Hare hooks to your slicer's start g-code, end g-code, after-layer change and toolchange sections. Slicer Setup provides the exact snippets and placement for each supported slicer. Make those changes before trying a multi-material file.
Printing with MMU
The remaining choice before a first print is how to purge the previous color at each toolchange:
- Slicer-controlled — use the slicer's wipe tower. This is the simplest starting point, but consumes bed space and filament.
- Happy Hare-controlled — disable the wipe tower and use Purge: Simple for a purge line, or Purge: Blobifier with a dedicated purge station. The complete hand-off is covered under Purging without a wipe tower.
Toolchange retraction, z-hop and parking positions live in
mmu_macro_vars.cfg and are exposed under Macro Variables in
menuconfig. Review Toolchange Movement before
changing those defaults.
Once the slicer hooks and purge method are set, slice a small two-color test object and run the first print. Starting with two gates keeps diagnosis simple while still exercising a real unload, selector move and reload.
What Next?
- Configure NFC/RFID reading and Spoolman if you want ViViD's built-in gate readers to identify and assign spools automatically.
- Review the Sync-Feedback Buffer page to understand how the stock buffer assists filament motion and detects tension.
- Install KlipperScreen (Happy Hare edition) for a touchscreen front end, or use the Mainsail / Fluidd integration.
- Explore the remaining Features as you need them rather than enabling everything before the first print.