Getting Started with MMX
This guide walks through the first Happy Hare menuconfig pass for the
original four-gate MMX. MMX uses one shared gear stepper and an MG-996R servo
to rotate a cam between four filament paths. It is a servo-cam selector, not a
linear-selector machine and not the separate six-gate MMX6 design.
The MMX project documentation remains the best source for printed parts, assembly, power and wiring. This page starts once the mechanism is built and the controller is flashed, and covers the Happy Hare choices that turn that hardware into a working Klipper MMU.
Before You Begin
Confirm the following before starting the installer:
- The cam and all four filament paths move freely.
- The MG-996R servo is powered from a suitable regulated supply. Do not power it from a controller pin that cannot supply its current.
- Each of the four pre-gate switches changes state when filament is inserted.
- The sensor after the selector, before the shared Bowden path, changes state. Happy Hare calls this the shared exit sensor. Some MMX drawings label it as a toolhead sensor, but its physical position makes it the MMX gate-homing reference.
- The controller is flashed for the connection you intend to use and is visible to the Klipper host.
The reference MMX build uses a BTT EBB42 v1.2. If your controller or wiring is different, select the real board and enter the pins from your build rather than copying the reference values below.
Menuconfig Installer
First clone the Happy Hare repository as described in Cloning Happy Hare.
Then run the installer:
cd Happy-Hare
./install.sh
The first run opens menuconfig automatically because no .mmu_config exists
yet; no -i flag is needed. If Happy Hare is already installed, use the
existing checkout; do not clone another copy over it. See
Installation for non-standard Klipper paths and the full
installer flag reference.
Coming from an existing installation
The installer preserves the existing MMU configuration automatically before it changes anything. For a major upgrade, follow Upgrading from v3 to v4 rather than trying to load an old configuration layout directly.
Choose the MMX Profile
Open MMU Type, select MMX - Multi-Material Extruder, and leave the selector servo type at MG-996R.
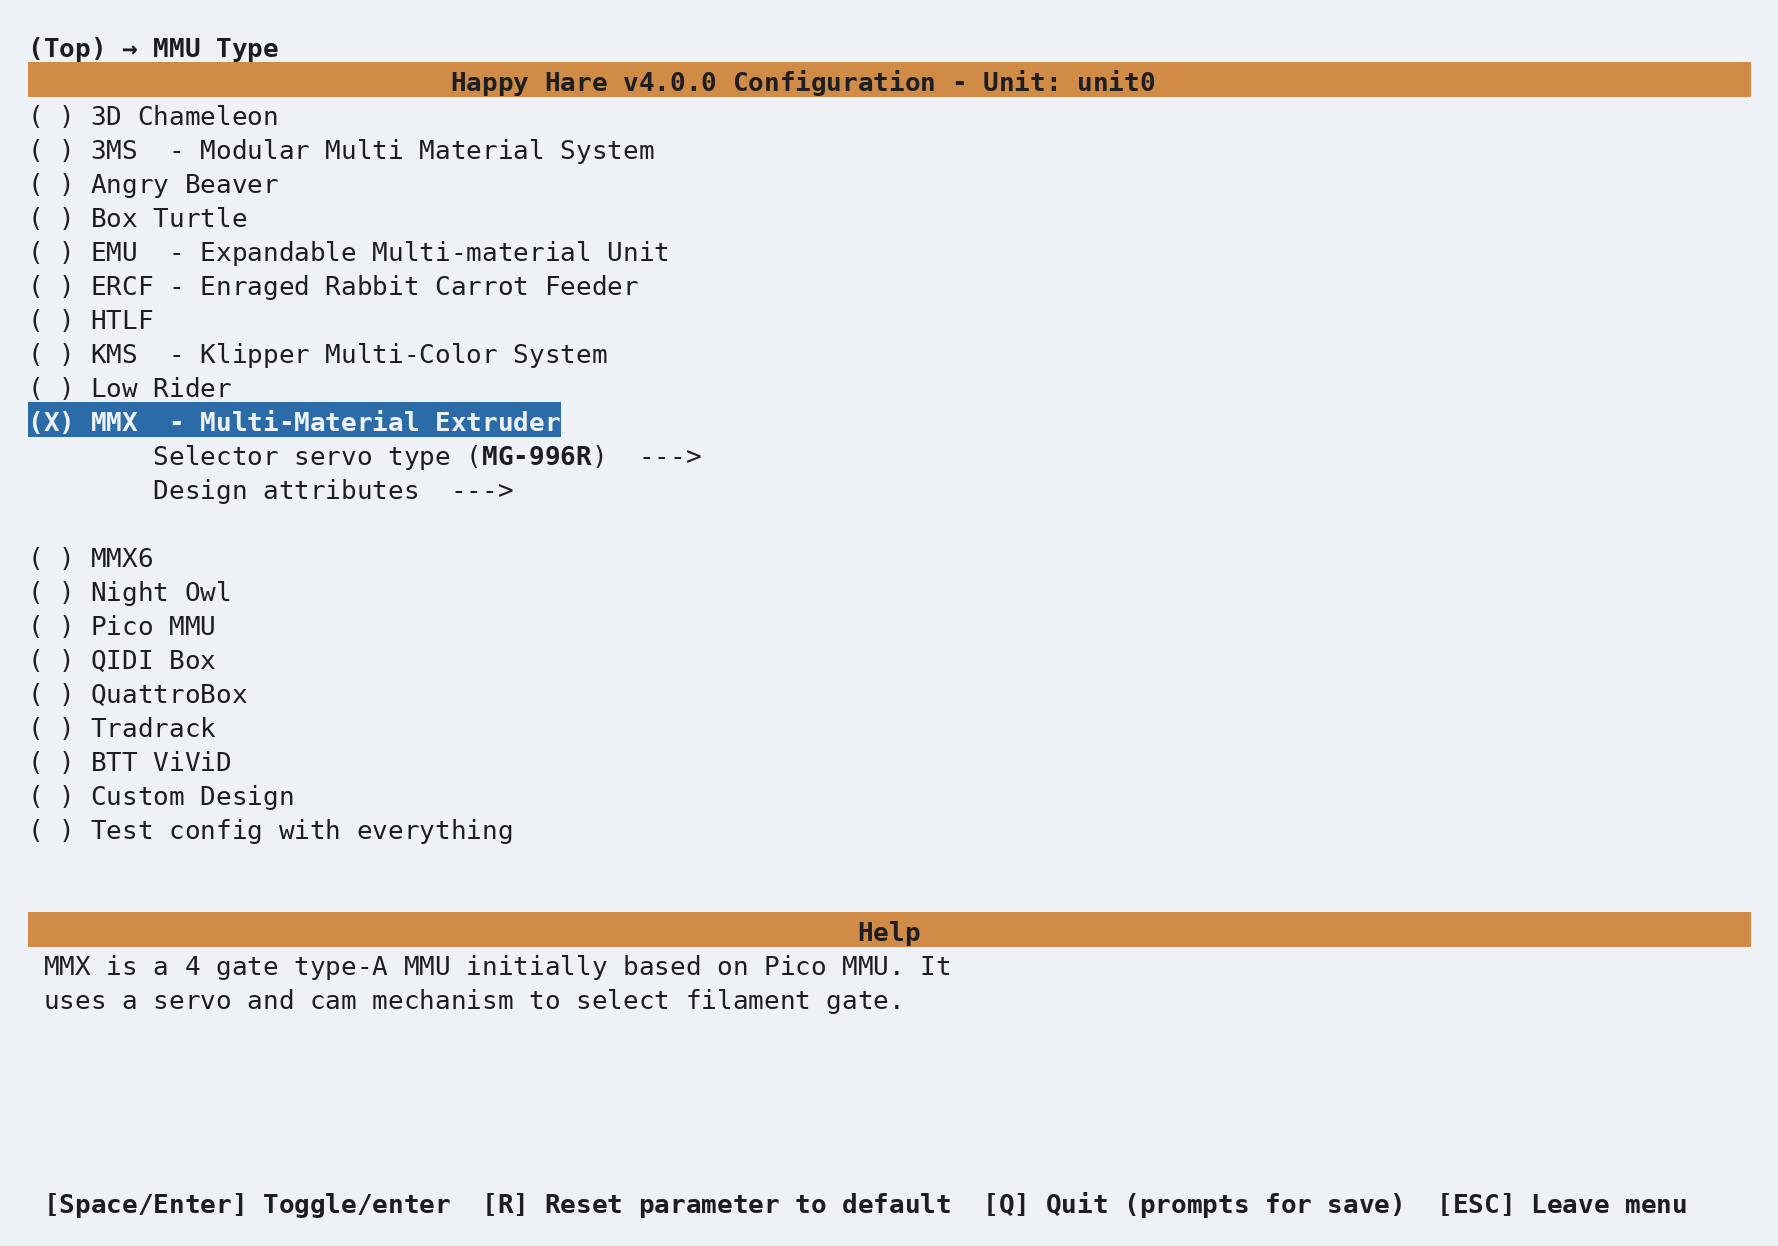
This profile fixes the gate count at four and supplies the MMX starting geometry, gear ratio, motor currents and servo gate angles. Do not select MMX6: that is a different six-gate rotary-stepper design.
Choose the Controller and Connection
Open Board type and select the controller actually installed. For the MMX reference wiring, choose BTT EBB 42 CANbus V1.2:
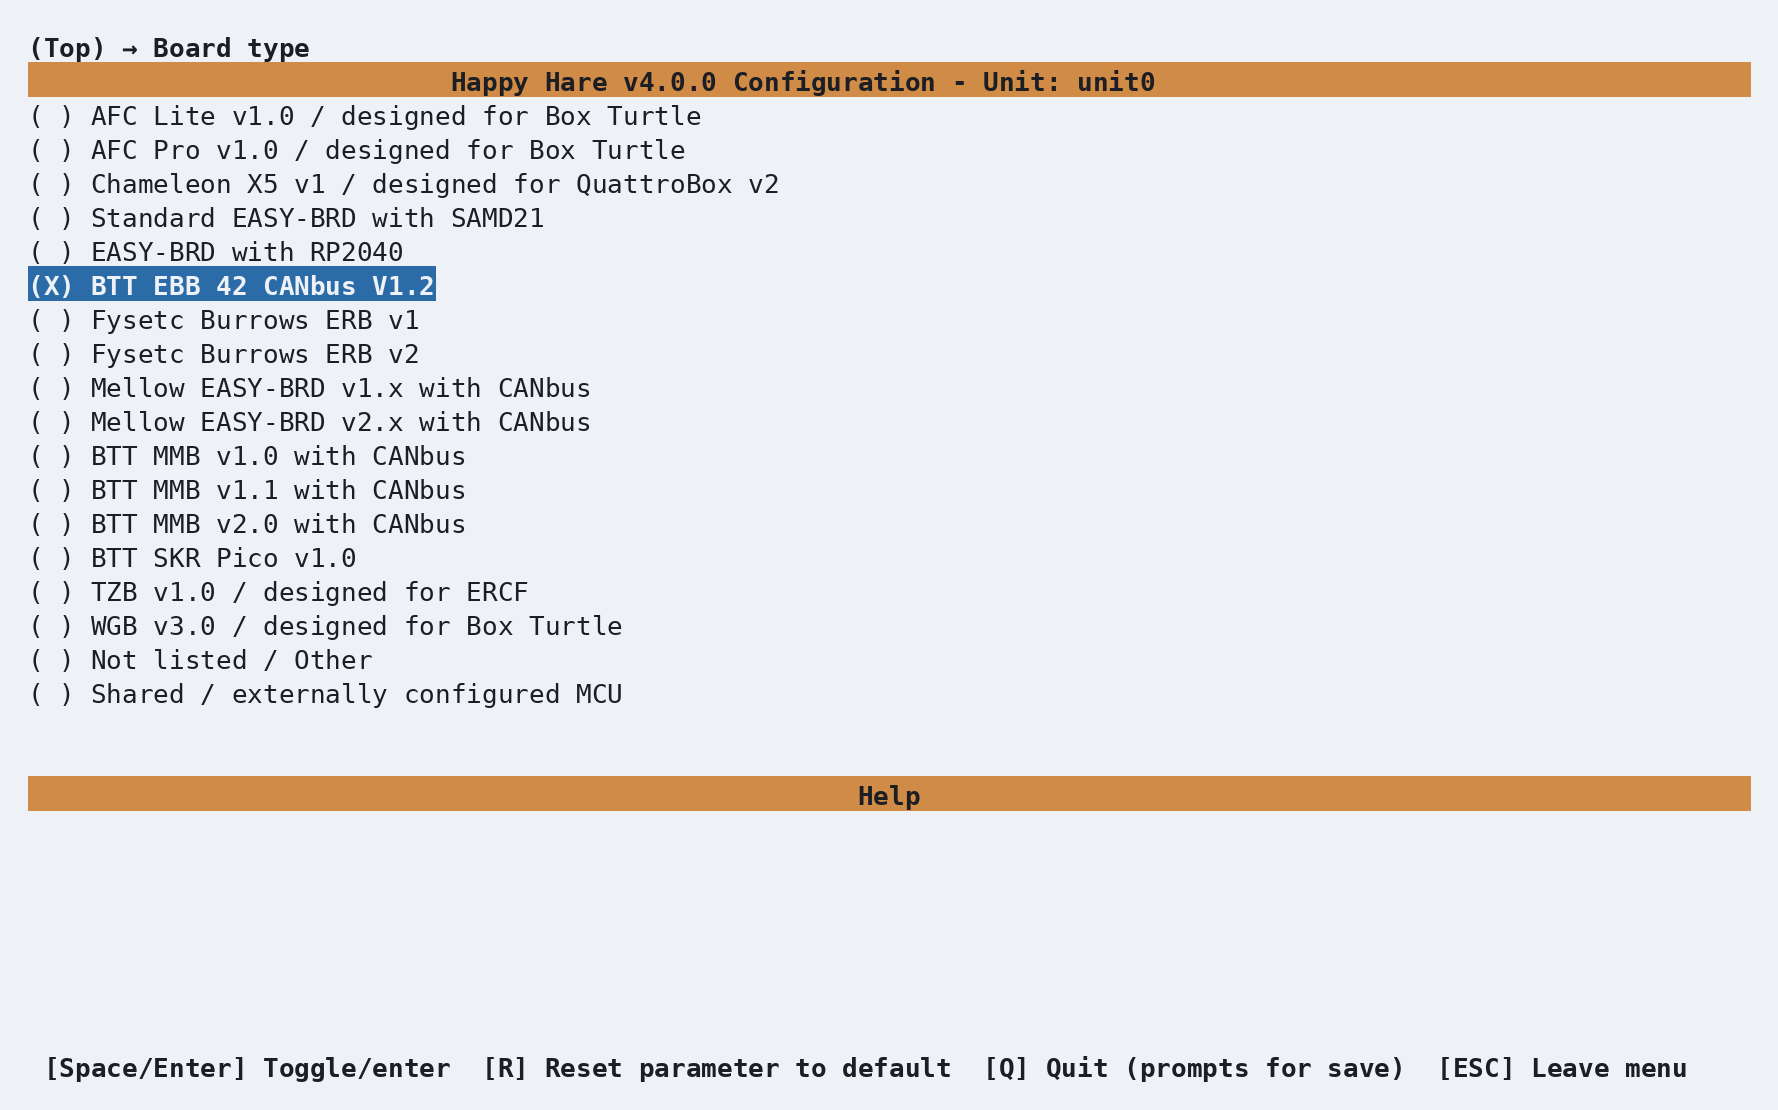
Next open MCU connection and select Serial or CANbus to match the firmware on the board. Select the discovered serial device or CAN UUID when offered; if it is not discovered, enter its stable device path or UUID manually.
See MCU Reference for board firmware and connection details, and Hardware Validation for connection checks after the configuration is generated.
Enable the MMX Sensors
Open MMU Features / Additions. LEDs are fixed on for the MMX profile. Leave the sync-feedback buffer, encoder, eSpooler and other additions off unless your particular build really includes them. Enable managed fan(s)? is available because the default MCU CPU sensor can be used as its temperature source; do not enable it unless you have also wired a fan output.
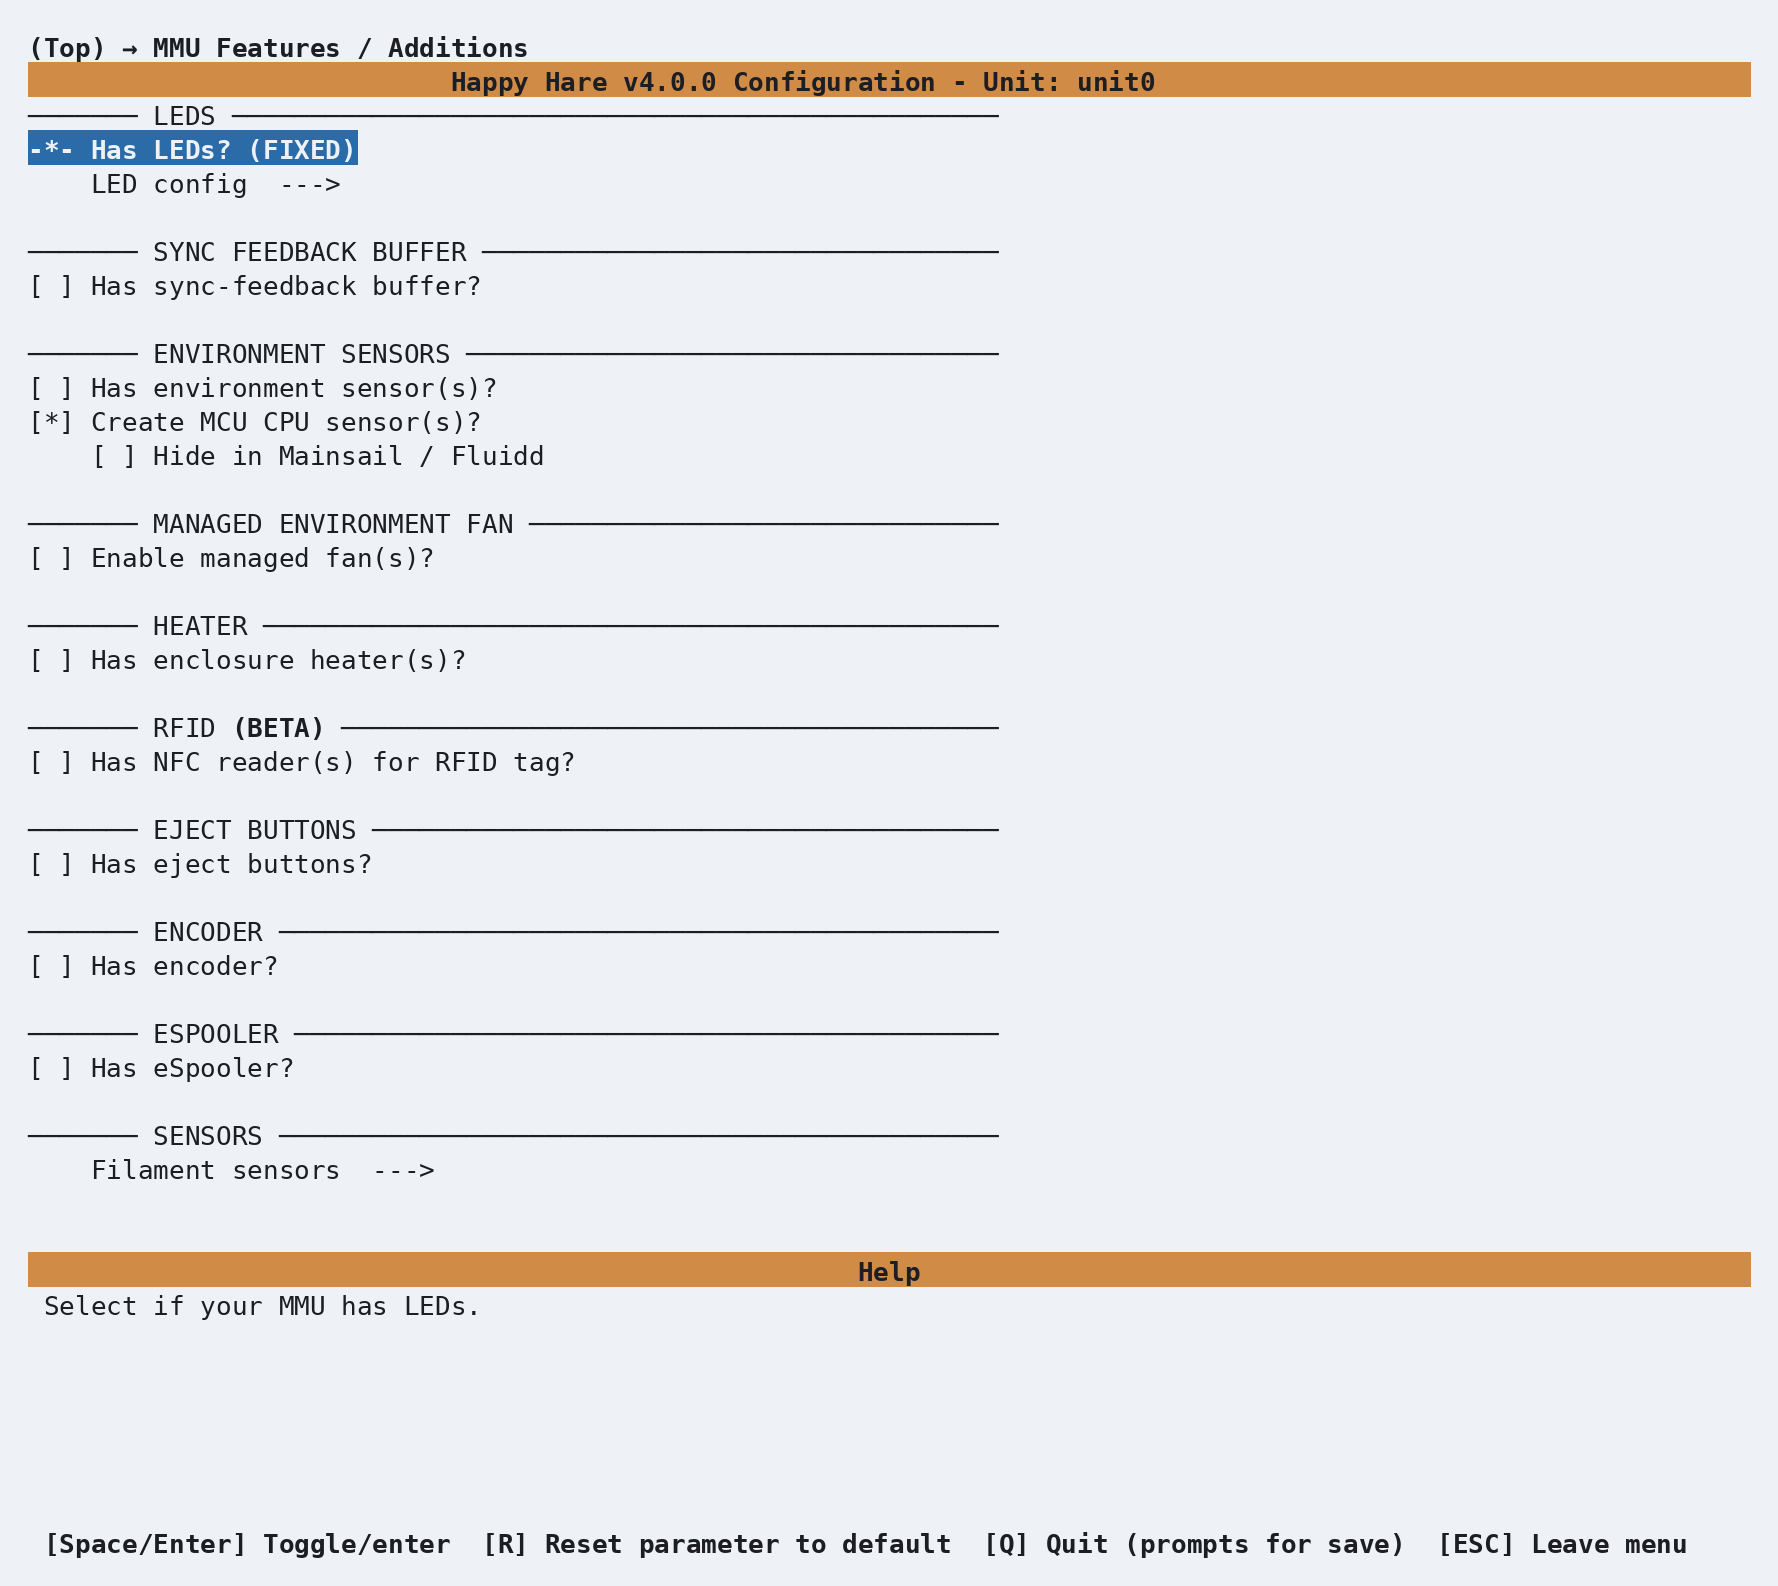
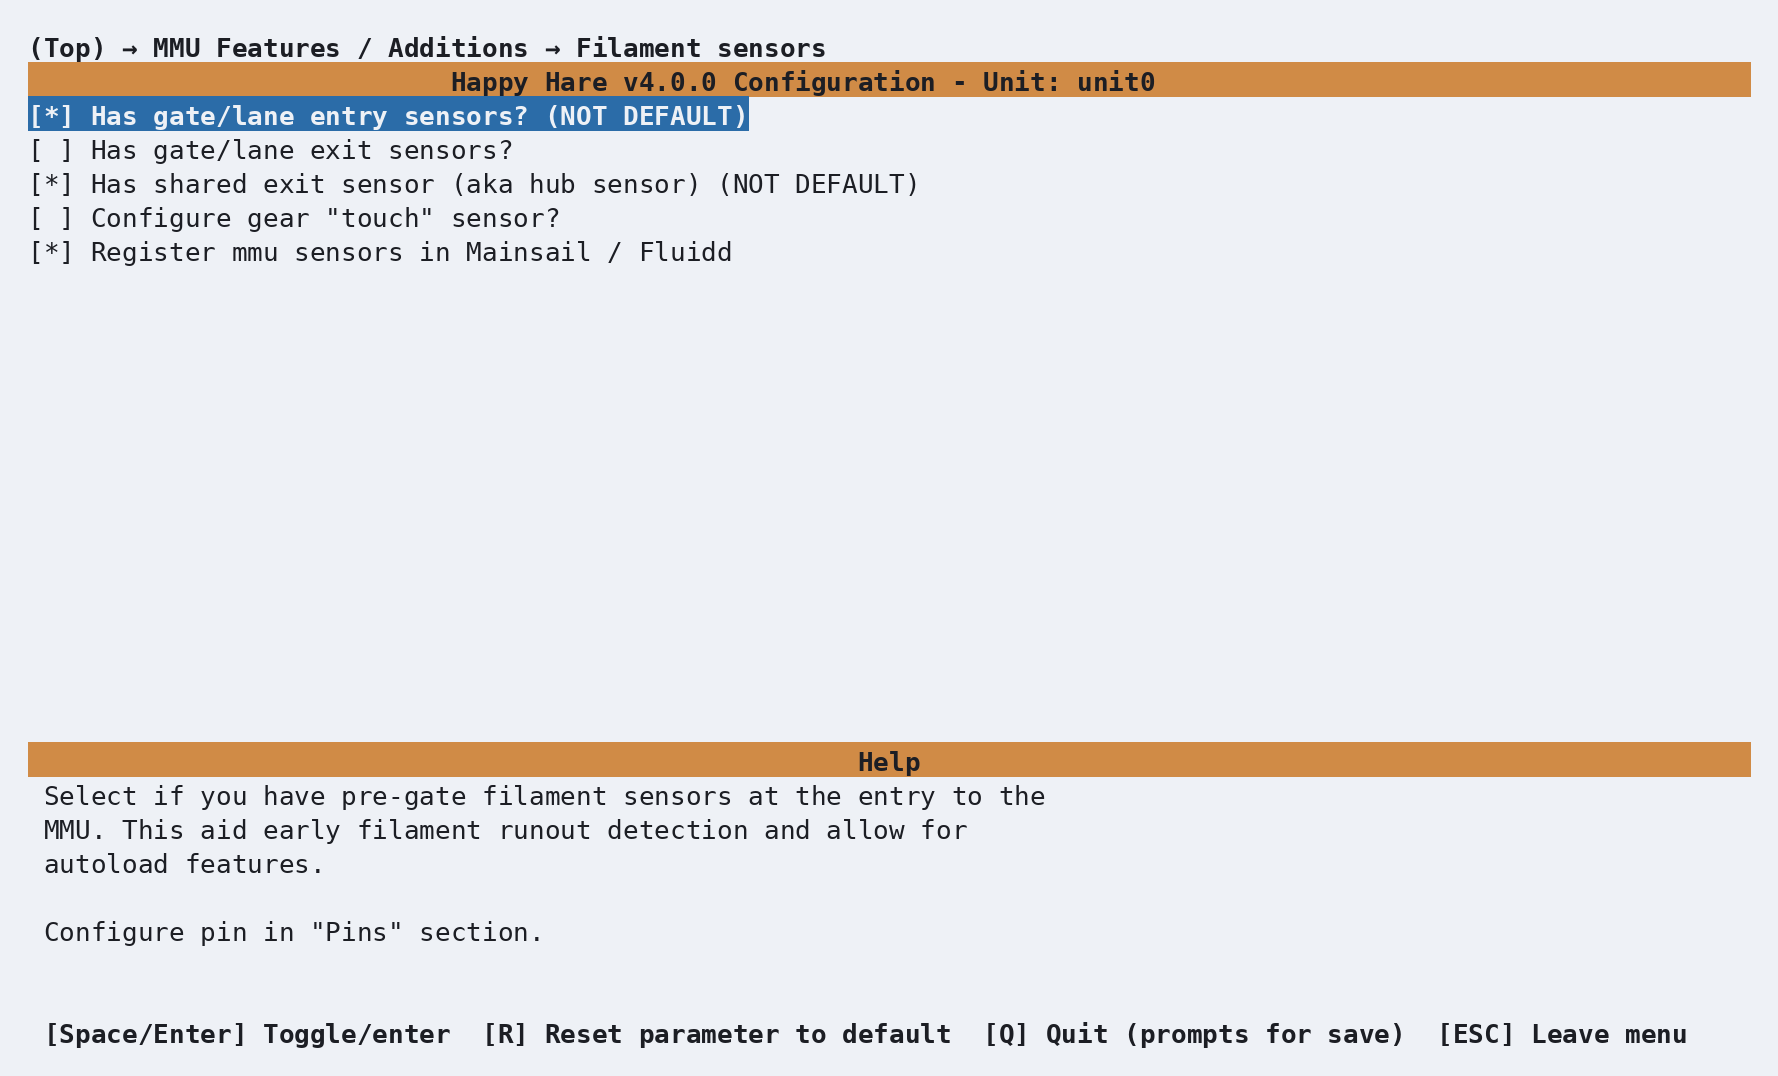
Open Filament sensors and enable both:
- Has gate/lane entry sensors? for the four pre-gate switches.
- Has shared exit sensor (aka hub sensor) for the switch after the selector and before the shared Bowden path.
Use the sensor's physical location
In the reference EBB42 wiring, PB4 is the shared MMX exit sensor. Do not configure that switch as a toolhead sensor merely because a wiring drawing uses that label, and do not disable it to work around an incorrect triggered state. Correct its pin, pull-up or inversion instead. A genuine toolhead sensor is mounted after the extruder entry and is configured separately under Toolhead sensors/settings.
Review the Generated Pins
Selecting the EBB42 fills the MMX reference pins directly in Pins / TMC.
Happy Hare v4 uses fully qualified pins such as unit0:PD0; there is no
separate pin-alias block to create in mmu.cfg.
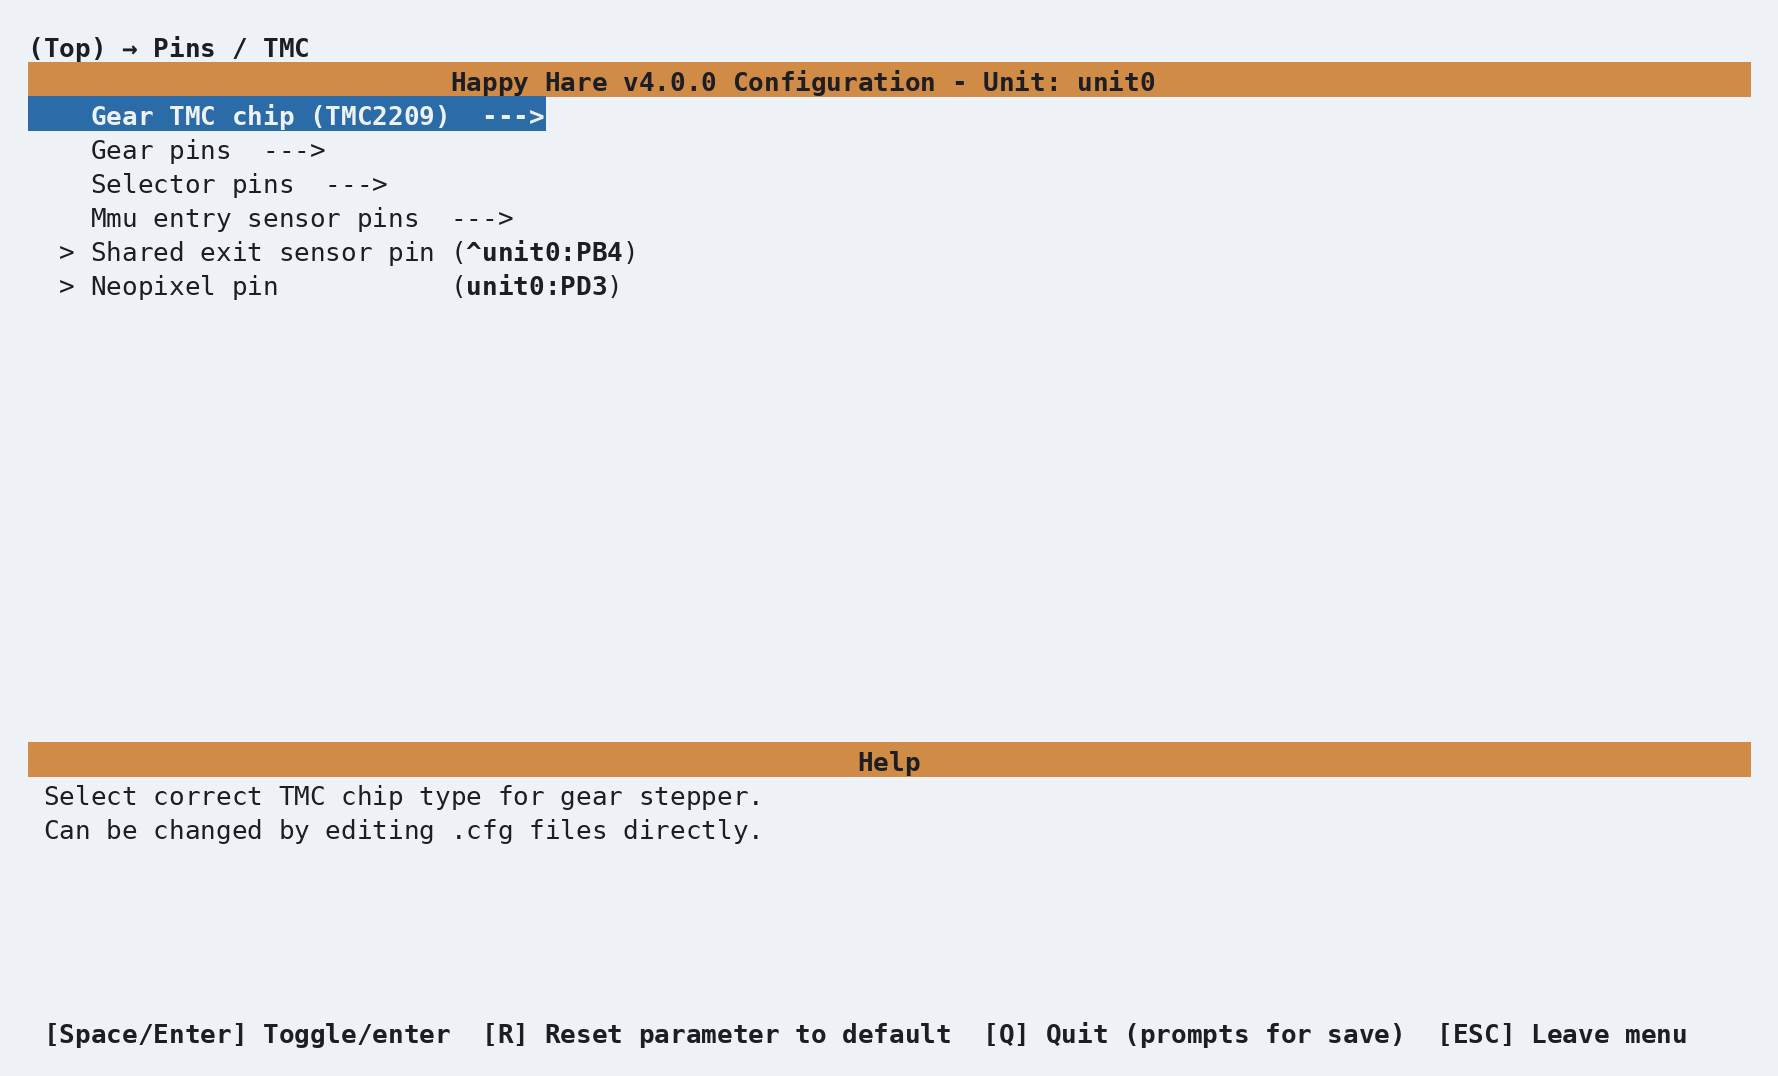
The reference profile generates:
| Function | Generated pin |
|---|---|
| Gear UART | unit0:PA15 |
| Gear step | unit0:PD0 |
| Gear direction | unit0:PD1 |
| Gear enable | !unit0:PD2 |
| Selector servo | unit0:PB9 |
| Entry sensors 0-3 | ^unit0:PB7, ^unit0:PB5, ^unit0:PB6, ^unit0:PB8 |
| Shared exit sensor | ^unit0:PB4 |
| NeoPixel | unit0:PD3 |
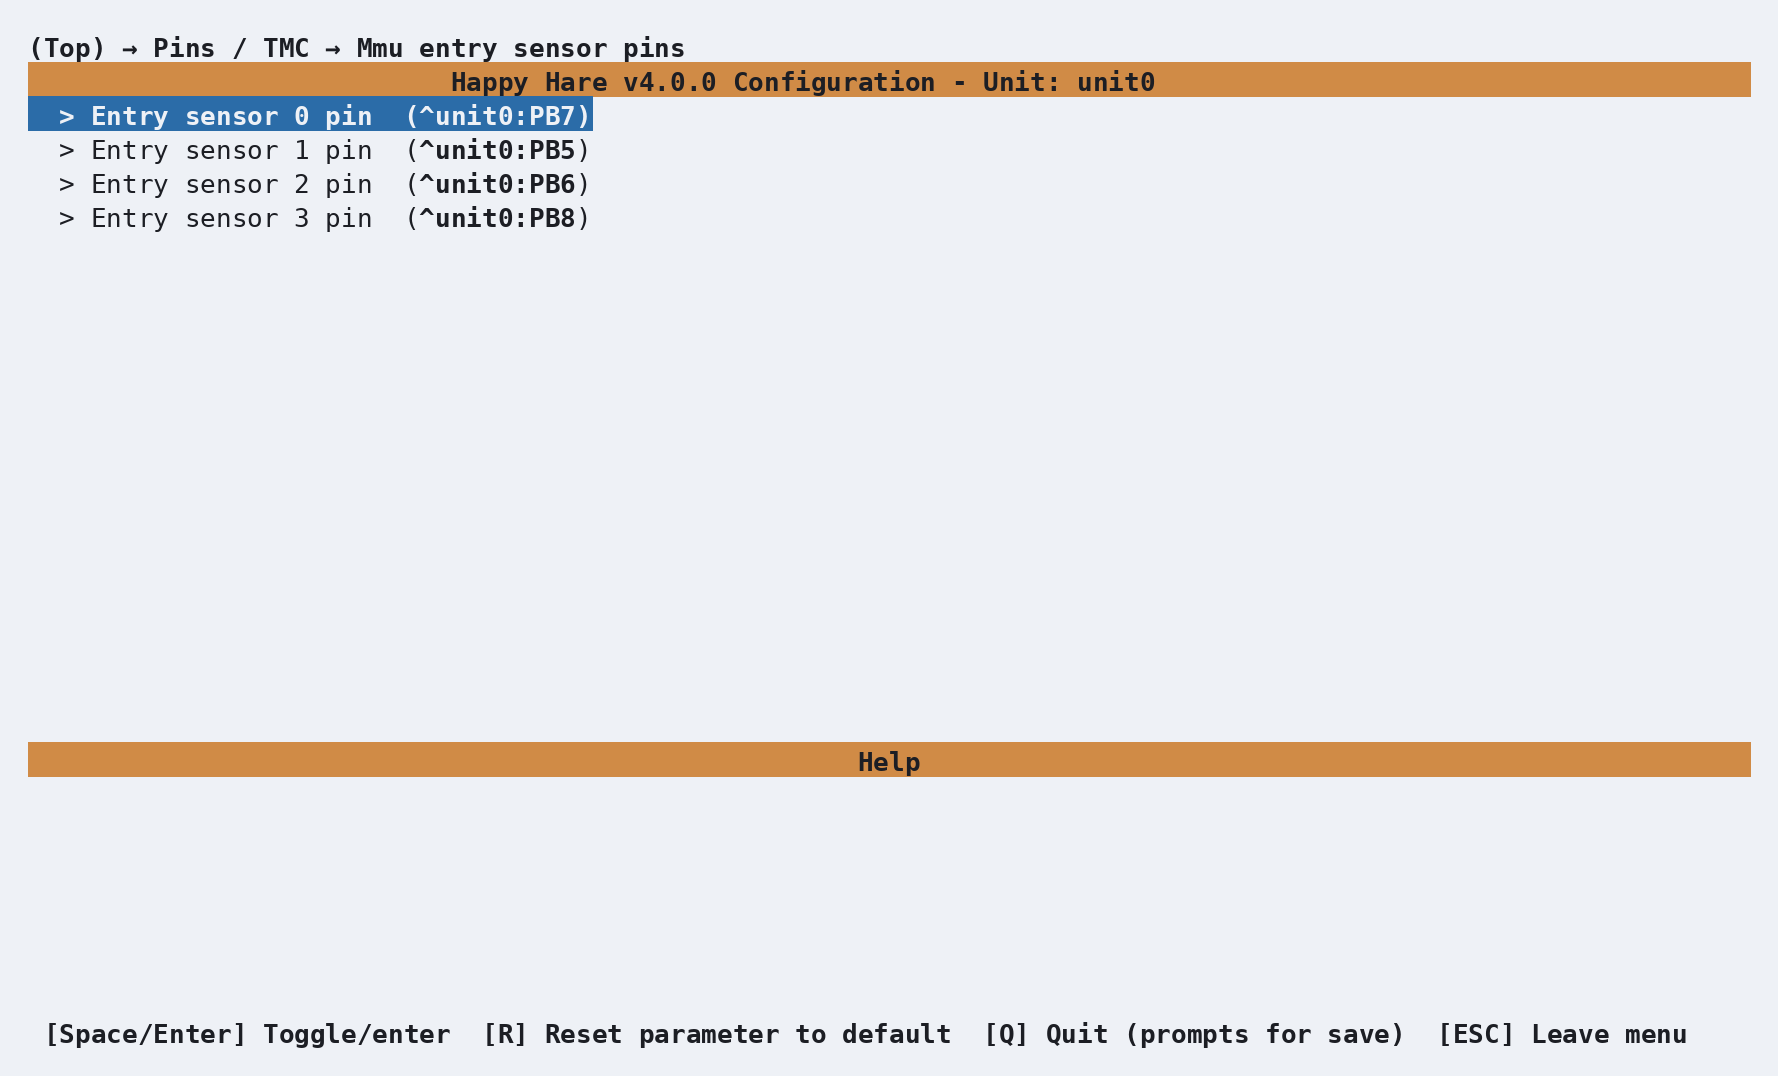
Compare every value with the MMX wiring you actually built. Change a pin here
when needed. In particular, gear direction depends on the motor wiring; add or
remove ! on Gear dir pin if validation shows that positive movement feeds
toward the spool rather than toward the extruder.
Check Homing and Toolhead Choices
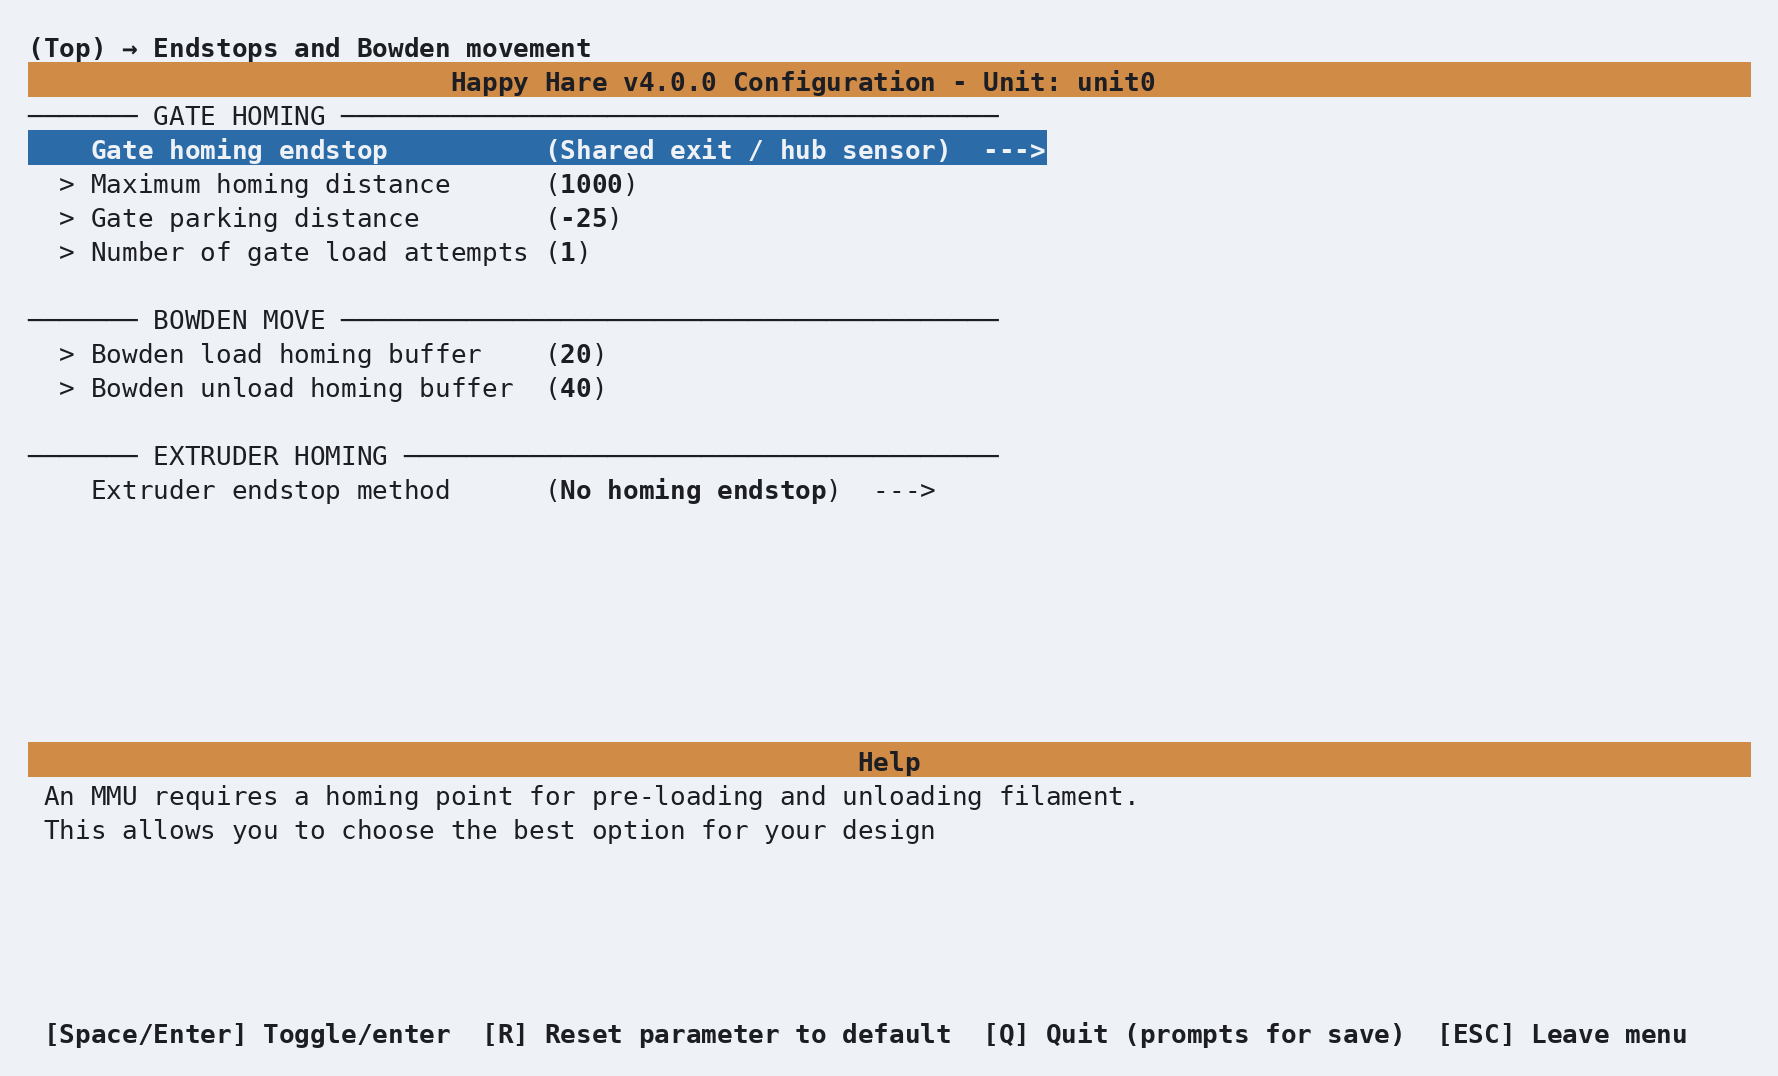
With the shared exit sensor enabled, Endstops and Bowden movement selects it as the gate-homing endstop and applies the MMX starting distances:
The standard MMX has no sync-feedback sensor. Leaving that feature disabled is
enough; there is no separate sync_feedback_enabled value to hand-edit for a
normal build.
Under Toolhead, select your real extruder/hotend combination if it is listed. Under Toolhead sensors/settings, enable only sensors physically fitted at the toolhead or extruder and enter their actual pins. These are printer choices, not fixed properties of the MMX.
Review Software Options and keep the supplied client macros enabled for a first installation. When the configuration has no unresolved errors, press Q or leave the top menu and confirm that you want to save and install.
Backups and Recovery
You do not need to make a manual copy before running install.sh. Every normal
install or configuration update preserves the existing mmu directory as a
timestamped sibling such as mmu.old-20260831-115007 before writing the new
one.
To inspect the available backups and recover one, run:
cd ~/Happy-Hare
./install.sh -i --prev
The installer lists the current configuration first and timestamped backups
from newest to oldest. If you select an older backup, it first preserves the
configuration you are replacing, restores the chosen directory and opens the
recovered choices in menuconfig. See
Menuconfig: Recovering Configuration from a Backup
for the complete recovery workflow.
Returning to a preserved v3 installation
If this MMX was upgraded from v3, the upgrade preserves the original directory
as mmu.V3. To remove v4 cleanly and return to that saved installation:
cd ~/Happy-Hare
./install.sh -d
cp -a ~/printer_data/config/mmu.V3 ~/printer_data/config/mmu
./install.sh -b v3
The uninstall step backs up the active v4 configuration, removes its installed
modules and configuration, and leaves mmu.V3 untouched. Copying rather than
moving keeps the original v3 backup available. The final command switches the
checkout and Moonraker update manager to the v3 branch, then runs the v3
installer against the restored mmu directory.
Warning
Use the Klipper configuration path supplied with -c if your printer does
not use ~/printer_data/config. If more than one mmu.V3-* directory
exists, identify the correct saved v3 configuration before copying it. Do
not run the copy command over an existing mmu directory.
Validate the Hardware
Restart Klipper and resolve every configuration or MCU error before moving the mechanism. Then work through Hardware Validation, paying particular attention to these MMX checks.
Sensors
Run the sensor report with every filament path empty:
MMU_SENSORS
Insert a short filament fragment into each gate in turn. mmu_entry_0 through
mmu_entry_3 must each change state independently. Then operate the sensor at
the MMX outlet and confirm mmu_shared_exit changes state. Correct any pin,
pull-up or inversion problem before continuing.
Gear direction
Select gate 0, grip the filament and make a short positive move:
MMU_SELECT GATE=0
MMU_TEST_MOVE MOVE=50 GRIP=1
MMU_TEST_MOVE MOVE=-50 GRIP=1
Positive movement must feed toward the extruder; negative movement must return toward the spool.
Servo-cam selector
The MMX has no physical selector zero mark, so verify every gate visually. Use
the dedicated servo-selector calibration command rather than the linear
selector's MMU_SERVO POS=up/down workflow:
MMU_CALIBRATE_SERVO_SELECTOR
MMU_CALIBRATE_SERVO_SELECTOR ANGLE=83
MMU_CALIBRATE_SERVO_SELECTOR GATE=0 SINGLE=1
Tune and save gates 0 through 3, then exercise each one with MMU_SELECT. Use
MMU_GRIP and MMU_RELEASE when you need to test the cam's filament grip and
release positions. See Selector Calibration: Servo-cam selectors
for the complete command behavior.
Continue through Calibration for gear rotation distance, Bowden length and toolhead calibration before attempting the first print.
Troubleshooting
- Happy Hare reports filament loaded while the path is empty: query
MMU_SENSORS. Check the PB4 shared-exit switch wiring, pull-up and inversion; do not remove the homing sensor from the configuration to hide the symptom. - No gate-homing reference is configured: enable the shared exit sensor in MMU Features / Additions → Filament sensors and verify its pin under Pins / TMC.
- Klipper rejects copied alias names: remove the old alias-based pin setup
and enter fully qualified pins through
menuconfig. - The selector calibration commands do not match the mechanism: confirm that MMX, not MMX6, is selected.
- The MMU panel is missing: update Mainsail or Fluidd and see
Mainsail / Fluidd. Hardware can still be
validated from the console with
MMU_SENSORSand the commands above.
See Also
- MMX assembly and reference wiring
- Installation
- Menuconfig
- Hardware Validation
- Calibration
- Feature: Sensors