Getting Started with EMU
This page walks through the first menuconfig pass for an EMU Type-B MMU — the
screens you'll see, in the order you'll see them, and the handful of choices
worth pausing on. It's the first of a set of getting-started pages; other pages
cover toolhead calibration and multi-unit setups in more depth. Here we're just
getting an EMU installed and talking to Klipper.
Menuconfig Installer
First clone the Happy Hare repository as described in Cloning Happy Hare.
Then run the installer with EMU support enabled:
cd Happy-Hare
./install.sh -e
The first run opens menuconfig automatically because no .mmu_config exists
yet; no -i flag is needed.
Note
-e ensures multi-mcu (mcu per gate) support, you may omit it on later
iterations. menuconfig may take longer to start up as a result, but it is
required for a typical EMU setup with small mcu per device.
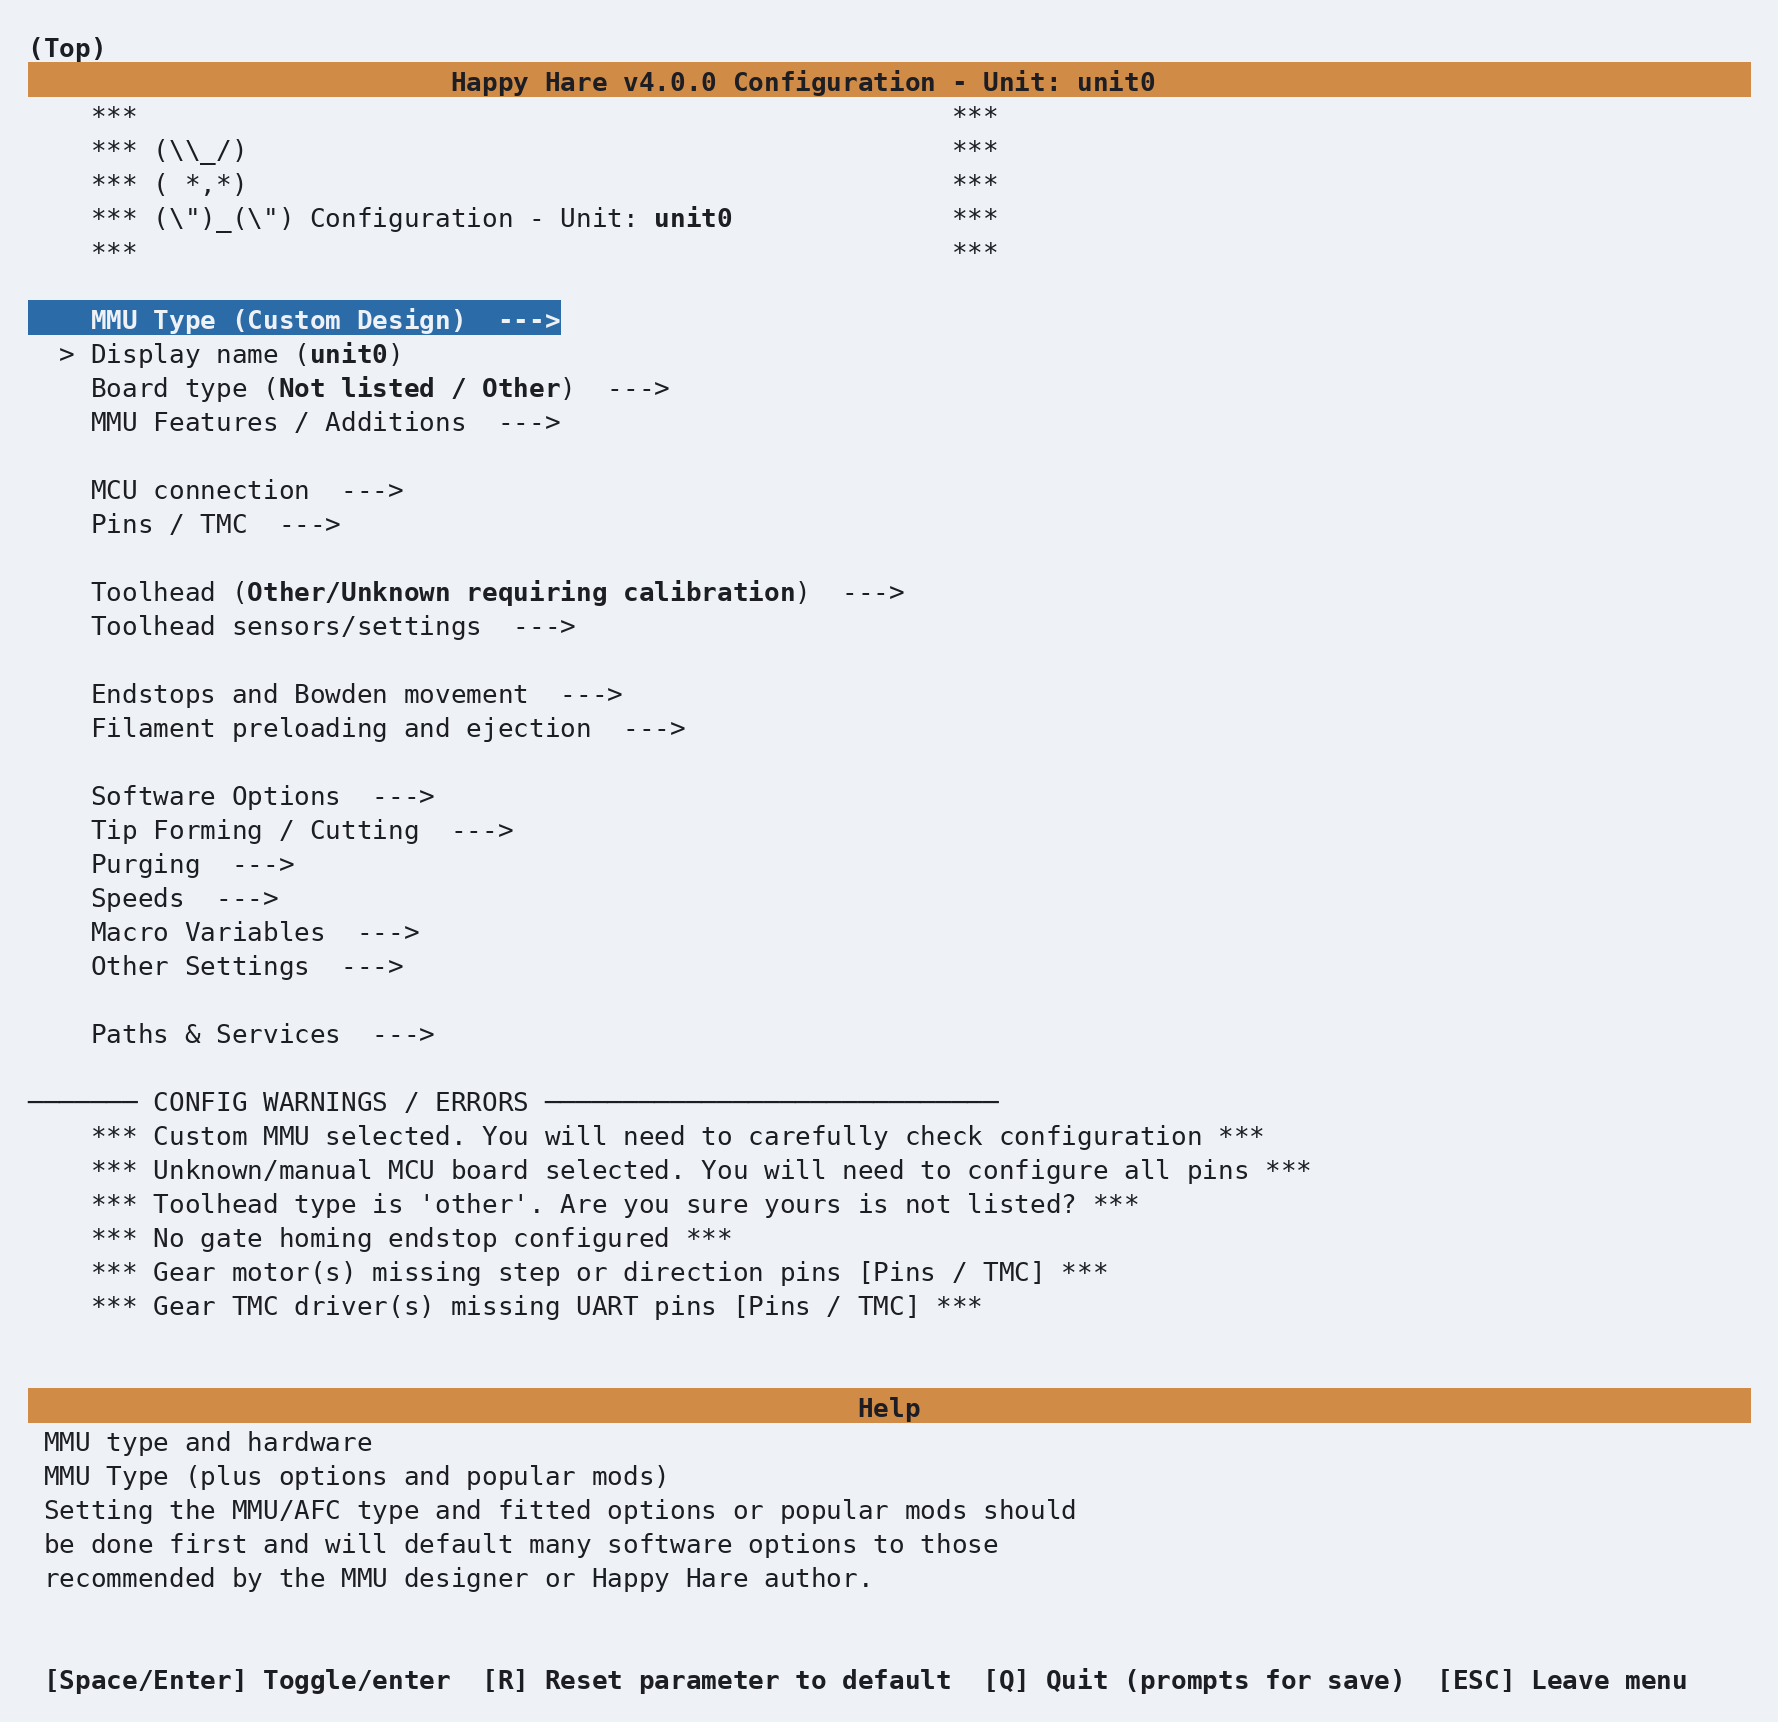
This is the installer's default state: MMU Type is Custom Design, the board
is unknown, and the CONFIG WARNINGS / ERRORS panel at the bottom lists
exactly that — four things still need a decision. As soon as you pick a real MMU
type, most of these clear themselves.
A quick word on the controls, since you'll use them constantly:
- Arrow keys move the highlight; Enter (or Space) opens a submenu or toggles/selects the highlighted item.
- Esc or Left Arrow key backs out one level; from the top level it offers to save.
- R resets the highlighted parameter back to its default — useful any time you've typed something and want to back out cleanly without hunting for the original value.
Choosing the MMU type
Highlight MMU Type and press Enter:
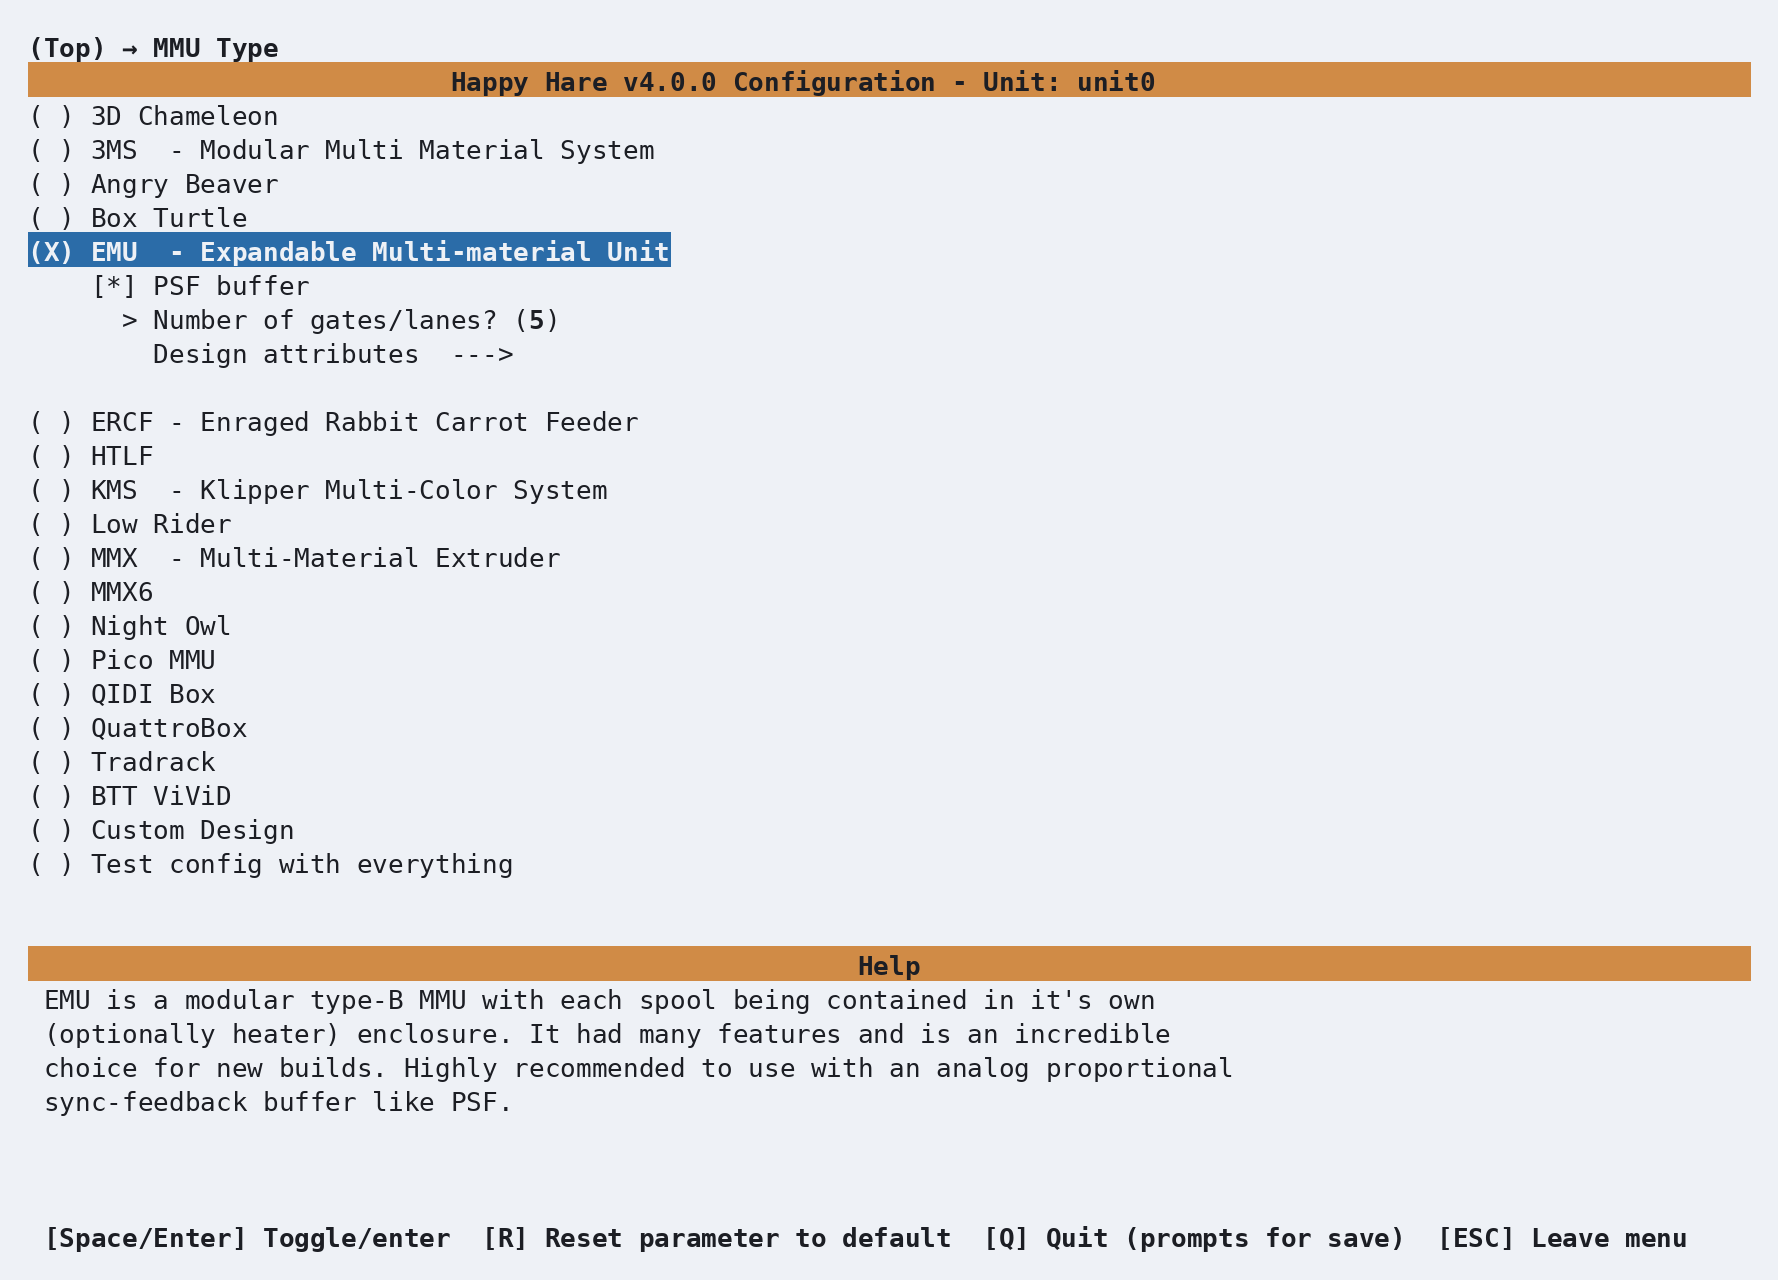
Move down to EMU and press Space to select it. Three things happen
immediately: the radio button fills in ((X) EMU Type-B), and new lines appear
indented underneath it — PSF Buffer, Number of gates, Design
attributes — options that only make sense once Happy Hare knows this is an
EMU.
Number of gates
Enter Number of gates to set the gate count to match your hardware:
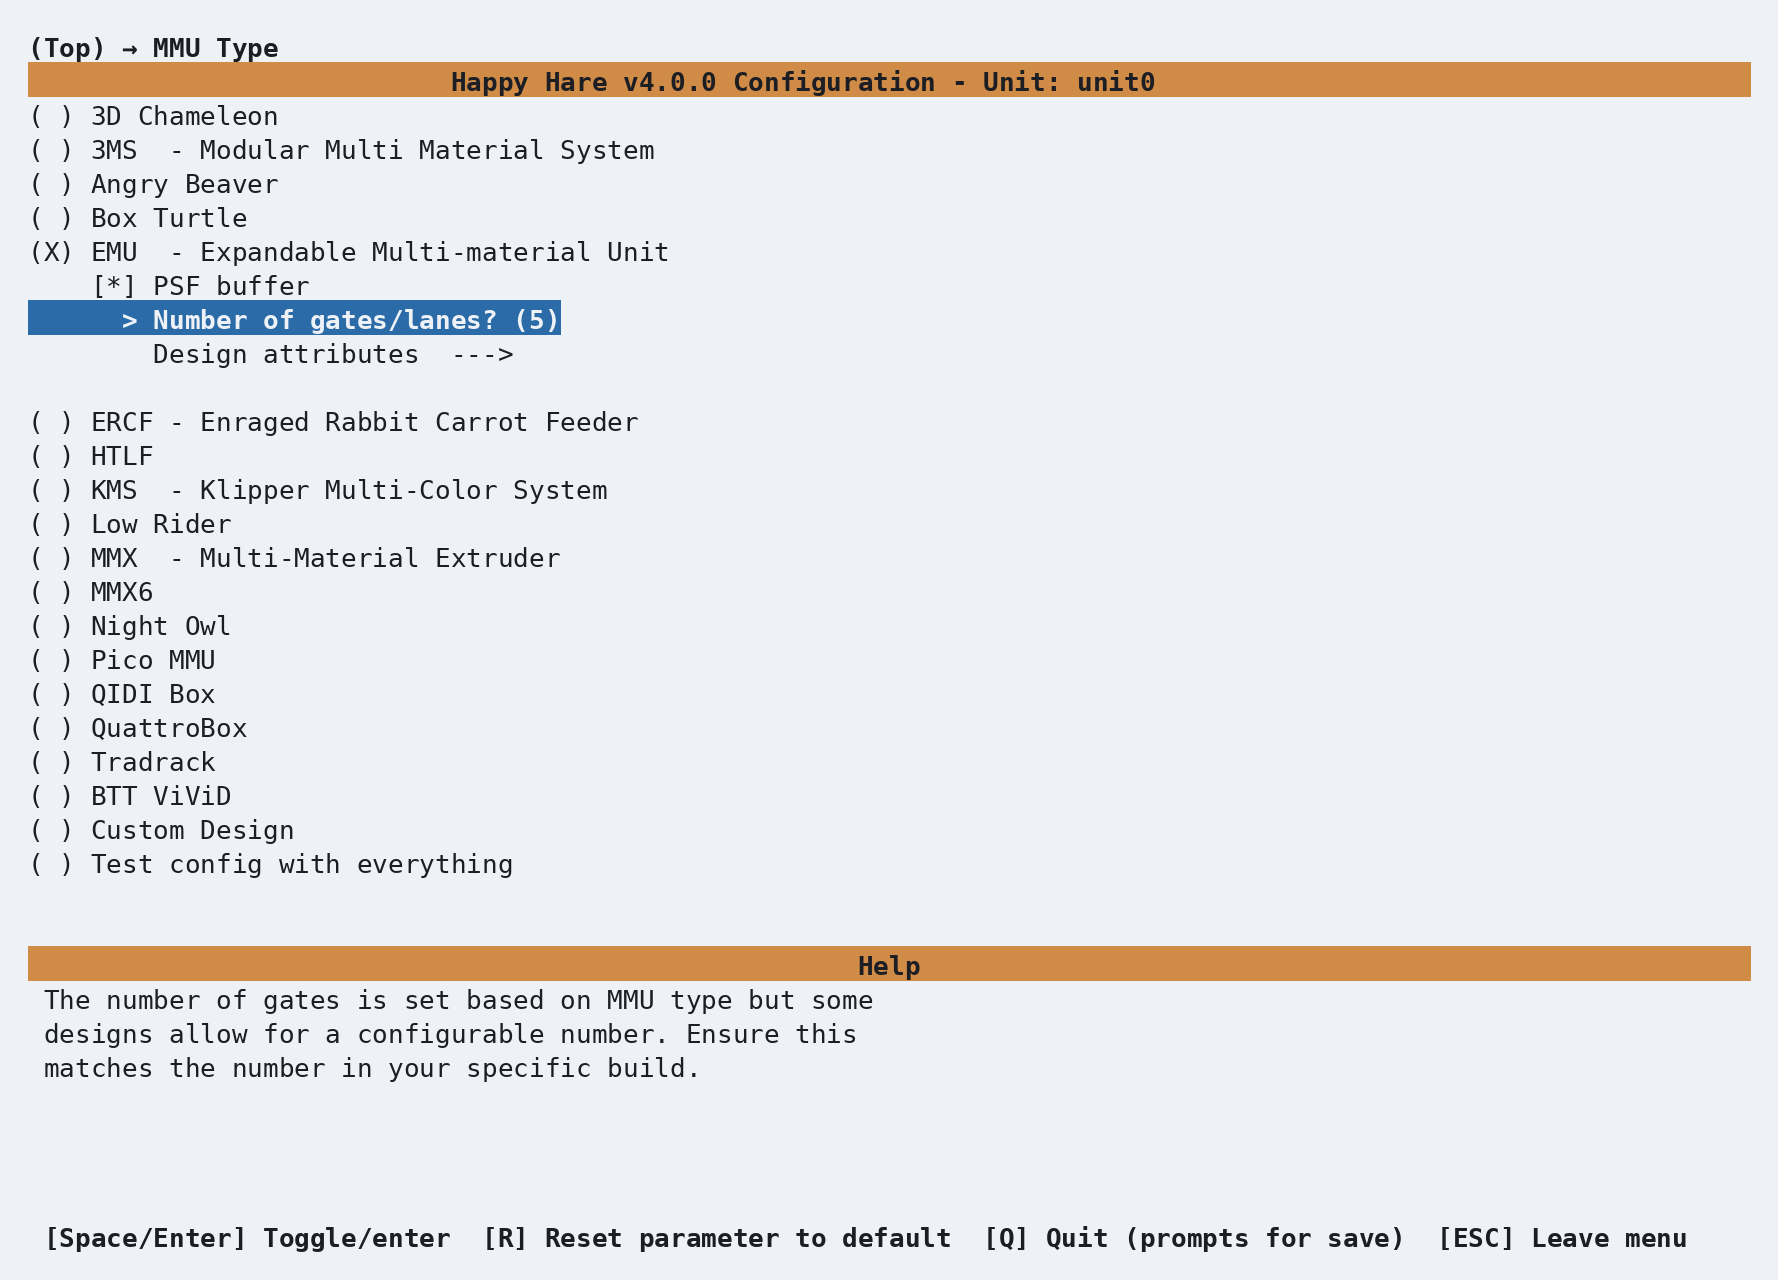
Set the number of lanes according to your build.
Board type
Back out to the top and enter Board type:
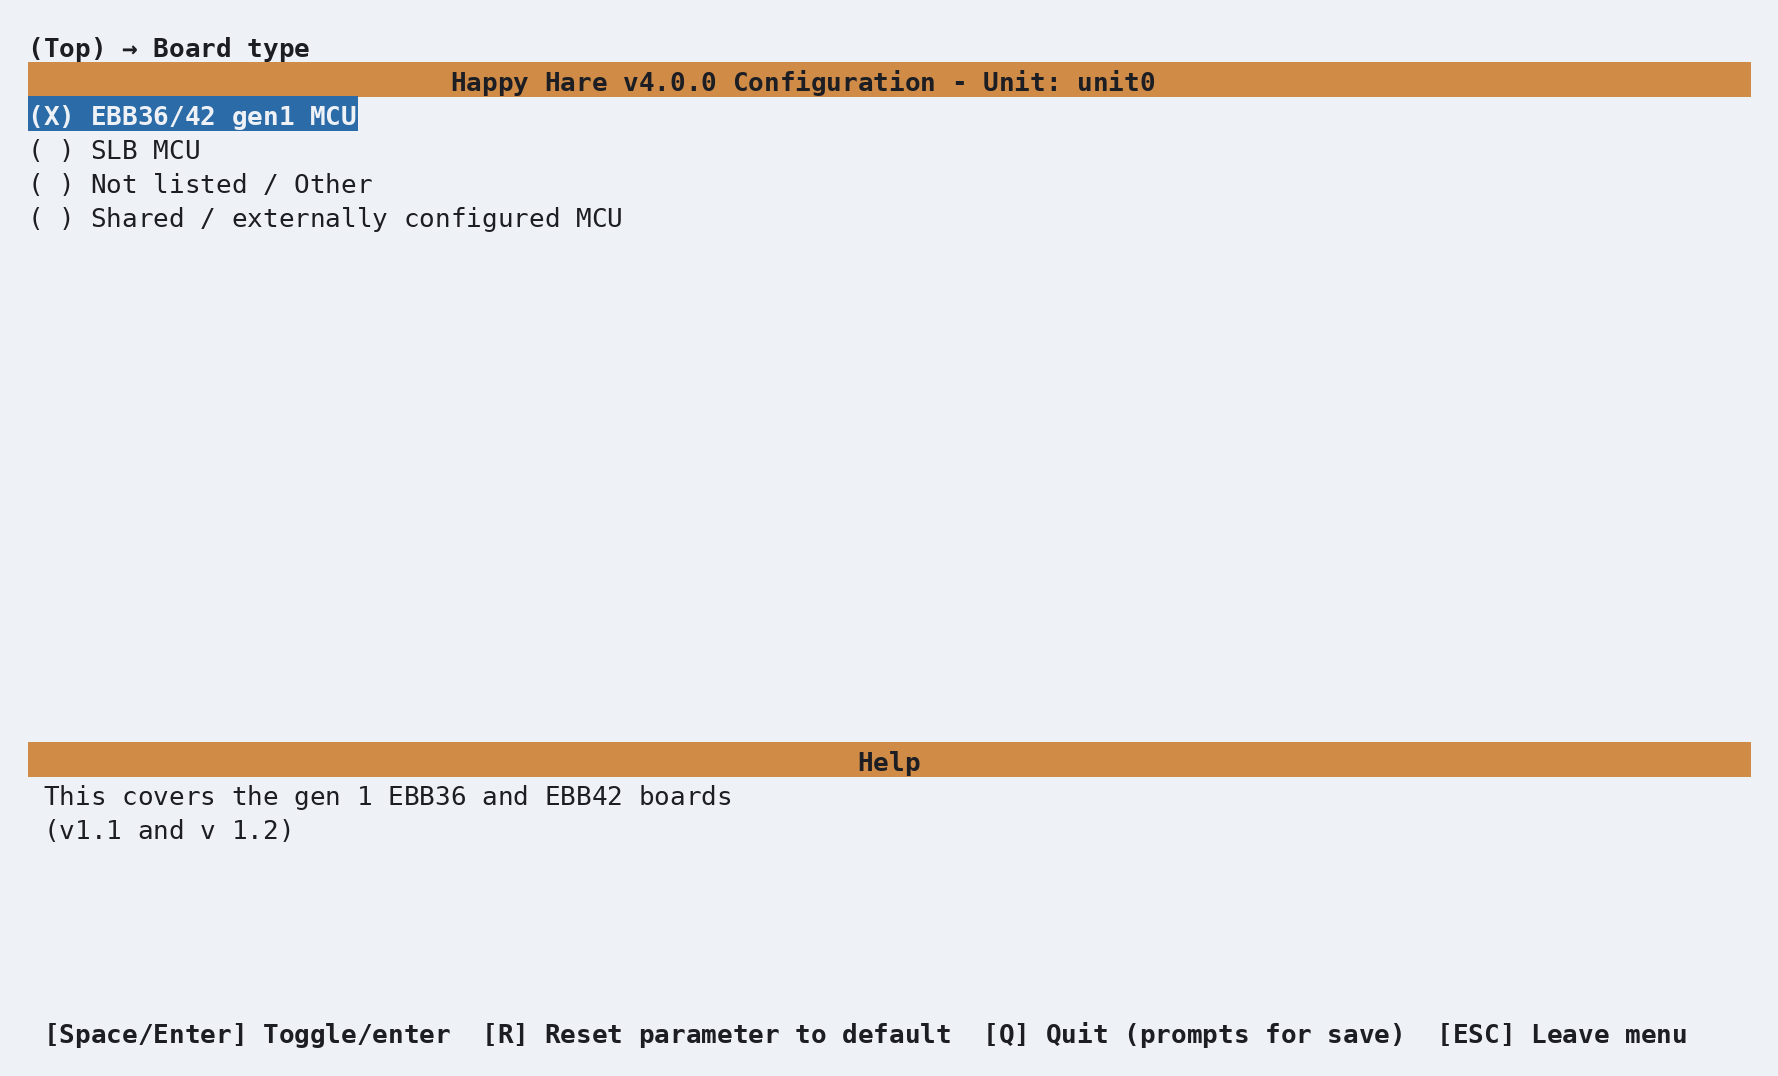
Because you already told it this is an EMU, Happy Hare has pre-selected SLB — the board purpose-built for the EMU. The pin defaults for every stepper, sensor and TMC driver on the rest of the menu come from whatever you choose here. If you have sourced a different board, select it here.
MCU connection
Next, enter MCU connection:
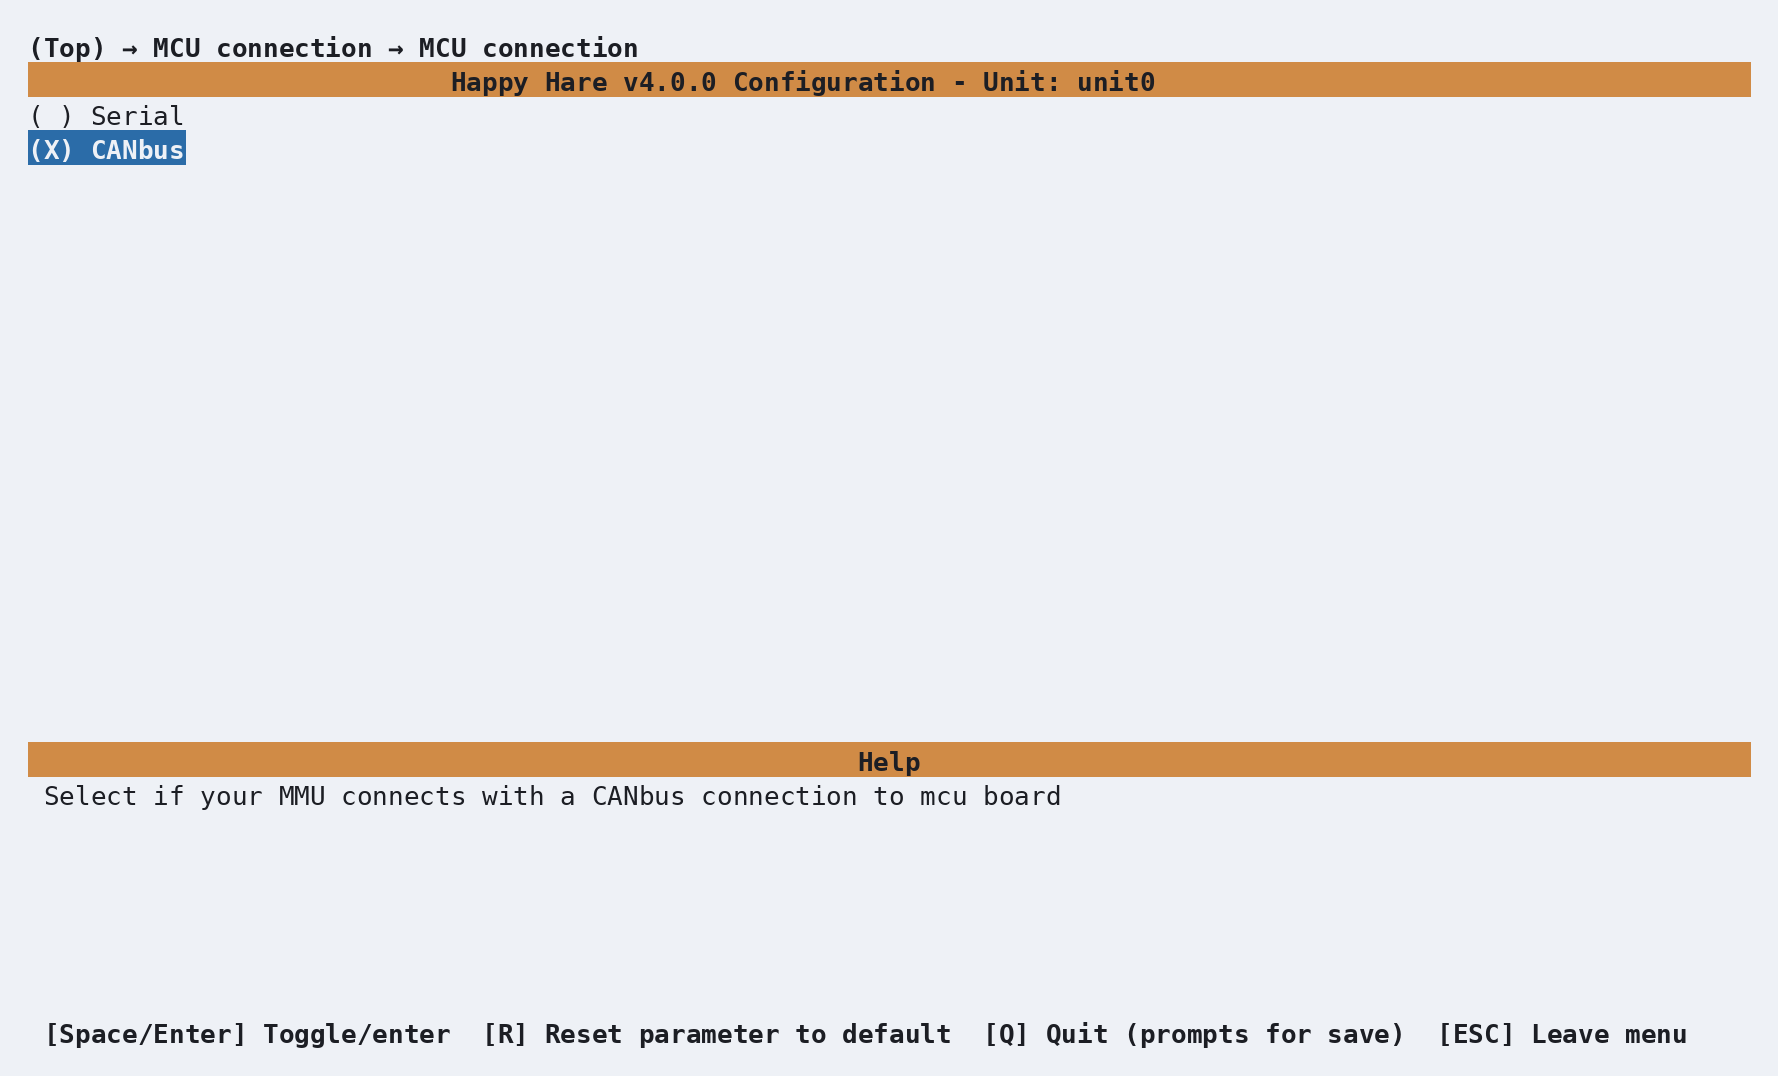
The EMU uses CAN bus communication. Each per-gate MCU (mmu0, mmu1, etc.)
communicates over CAN with its own UUID. The canbus_uuid for each unit must be
manually entered. You should have noted these down during the flashing step
while building your EMU - enter them here now.
MMU Features / Additions
Back out and enter MMU Features / Additions:
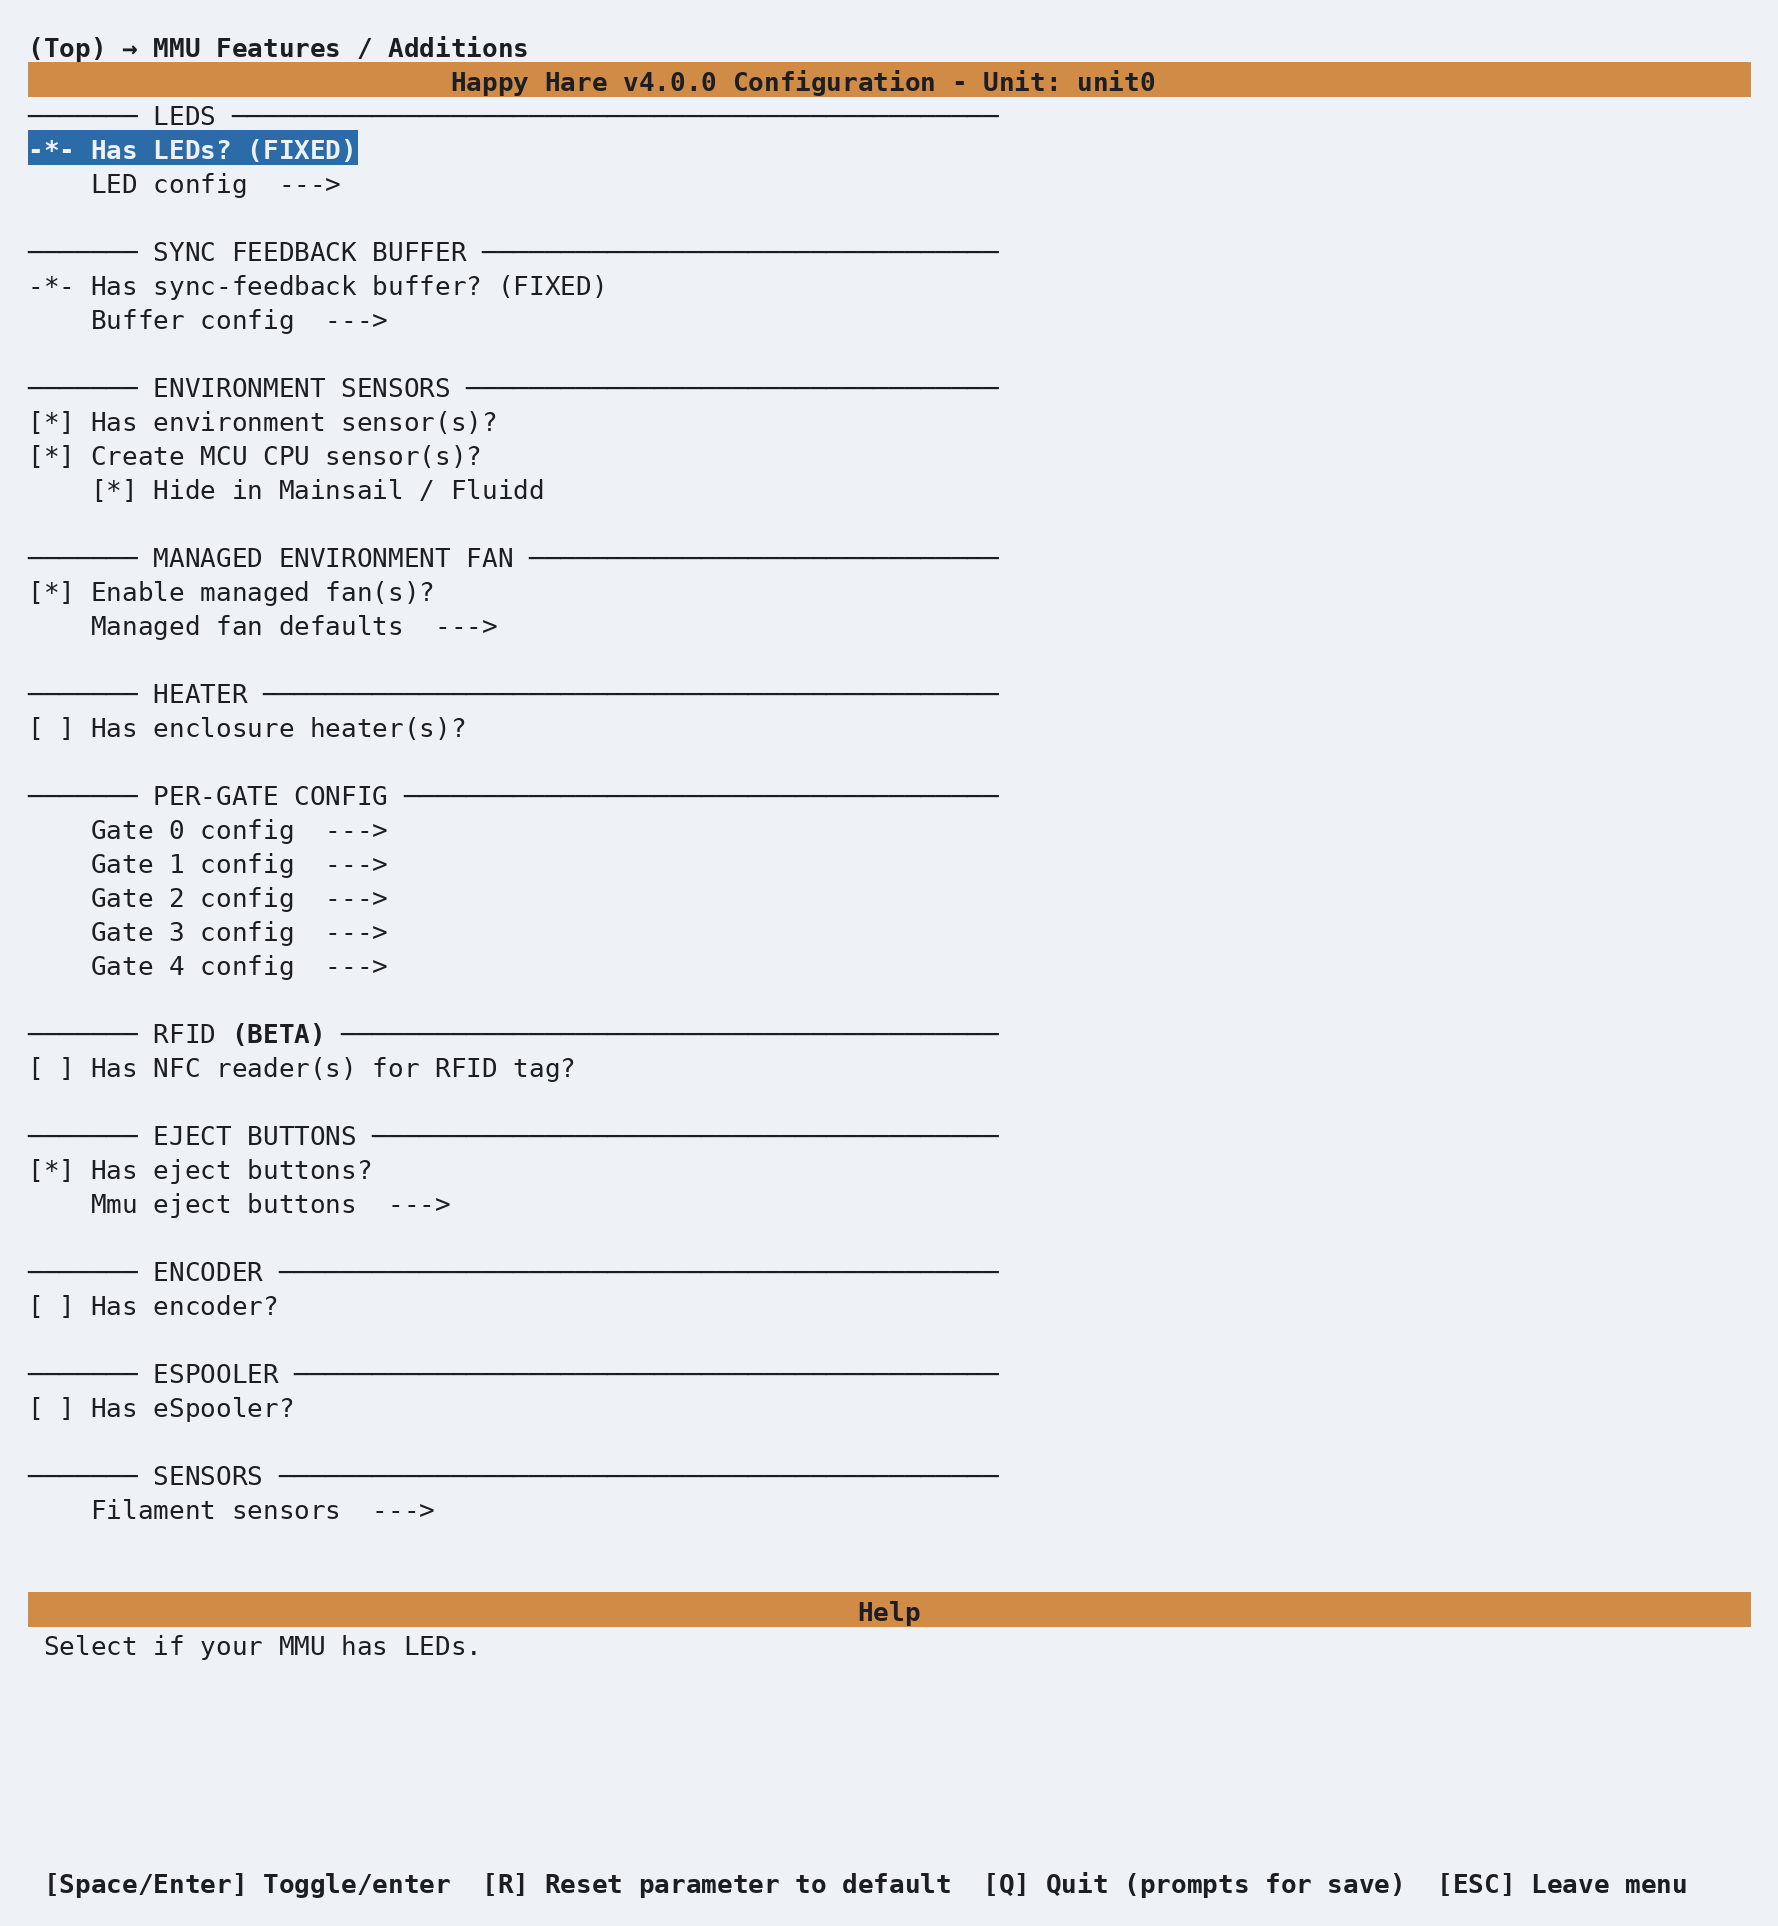
This is worth a look. LEDs and the selected sync-feedback buffer are part of the EMU profile. Environment sensors, managed fans and eject buttons start enabled as recommended EMU options but can be switched off when your build omits them. Enclosure heaters and RFID readers remain optional.
The new Per-gate config section groups each compartment's environment sensor, heater, managed fan and heater fan under Gate N config. Review those gate menus against what is actually fitted; leave a component disabled or its pin blank when that gate does not have one.
Pins: gear direction
This is the one setting on this page that's genuinely impossible to get right by guessing. Back out to the top, enter Pins / TMC, then Gear pins:
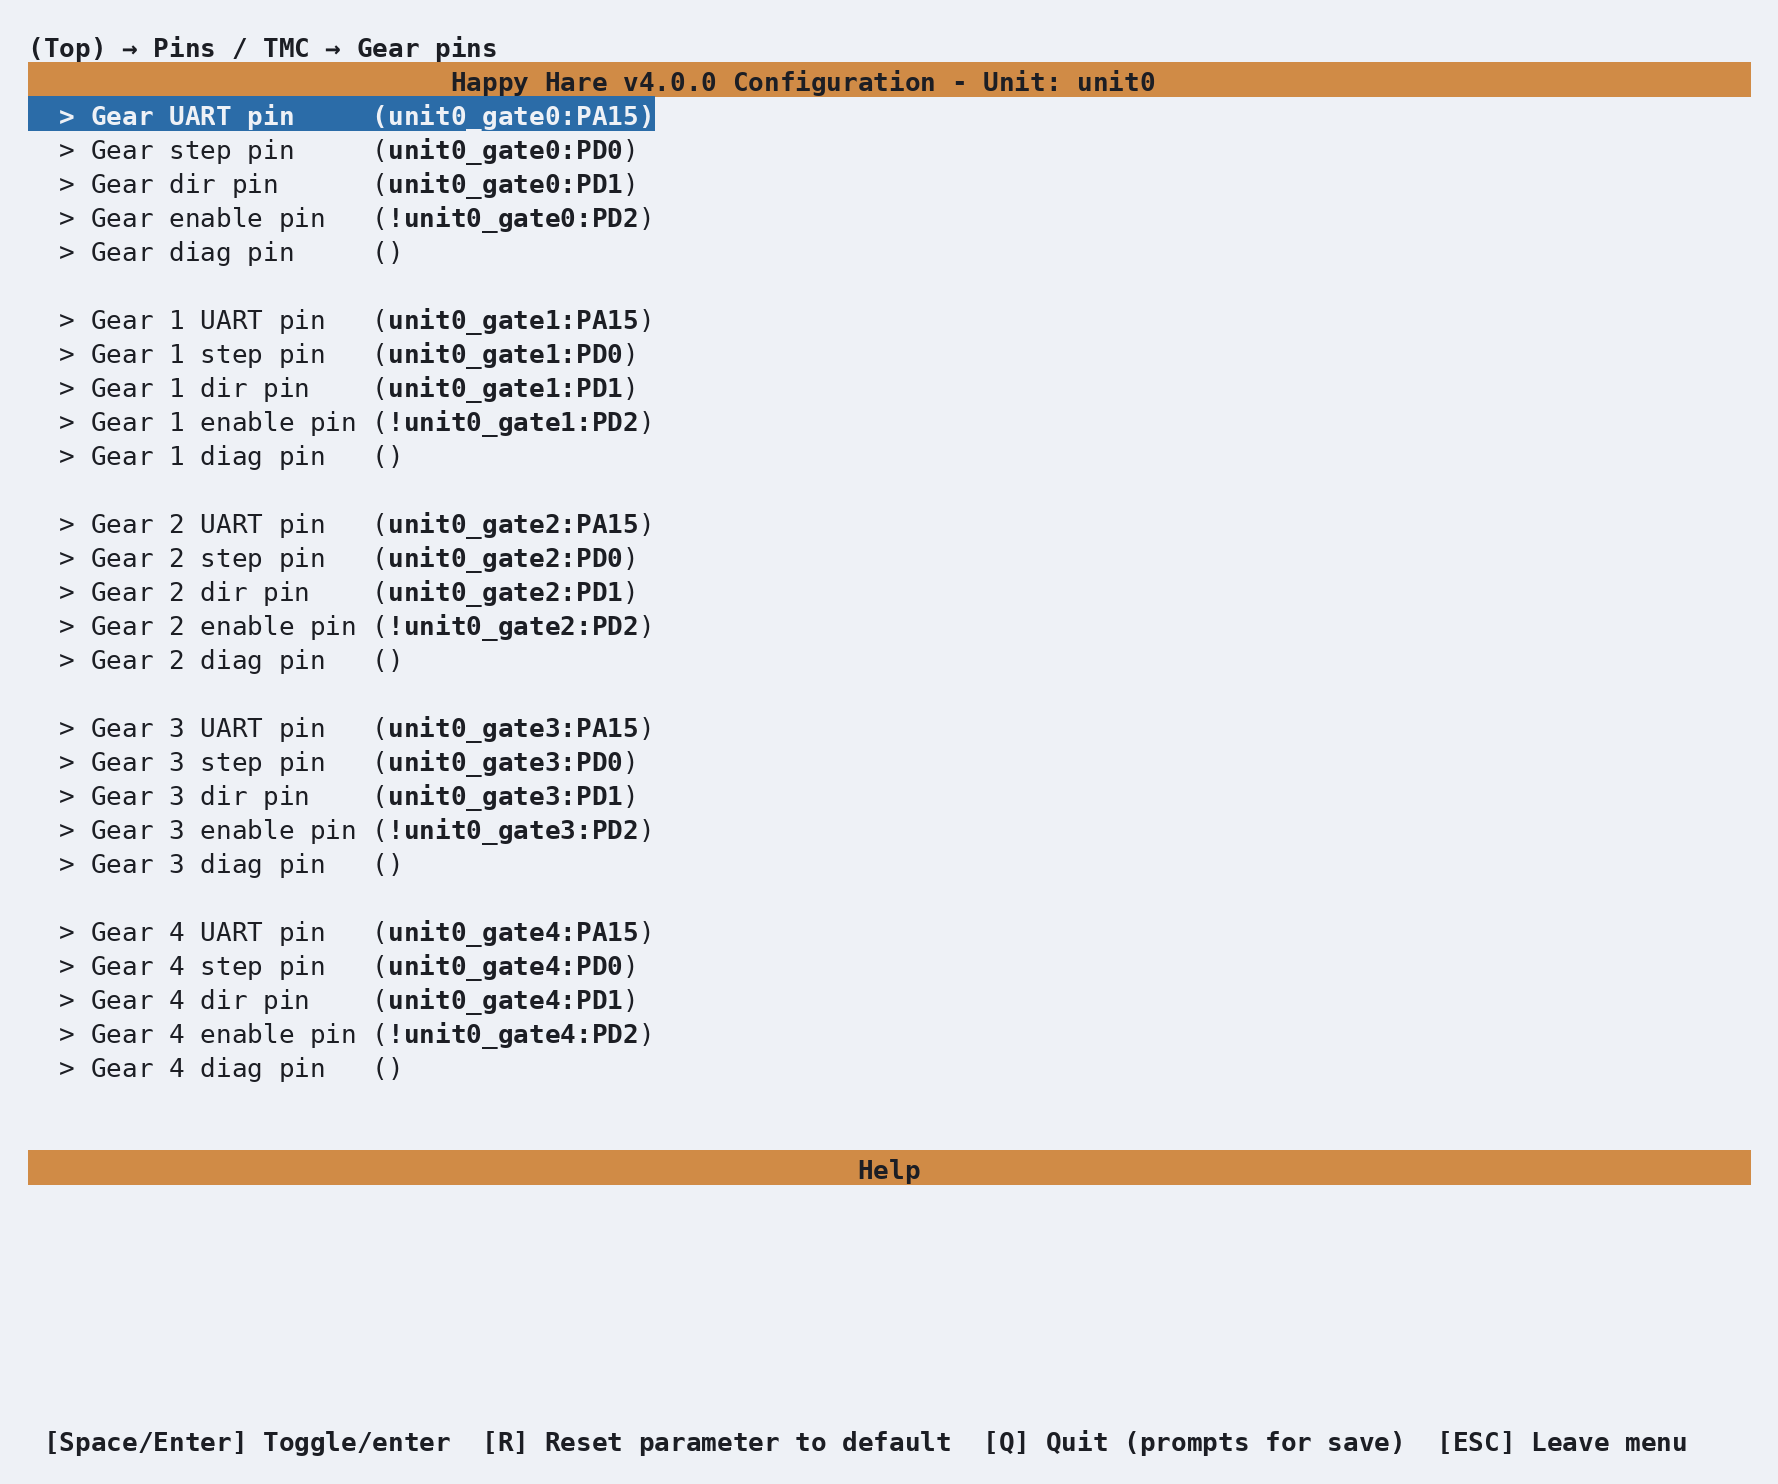
Every gate has its own UART, step, dir, enable and diag pin, all filled in from the SLB or EBB defaults you picked earlier. The one you're most likely to need to touch is dir — whether a gear stepper spins the "right" way depends on which way its cable happens to be plugged in, and no config file can know that in advance. You'll find out the first time you try to load filament and gate 0 (say) runs backwards.
Highlight Gear dir pin and press Enter to open its editor:
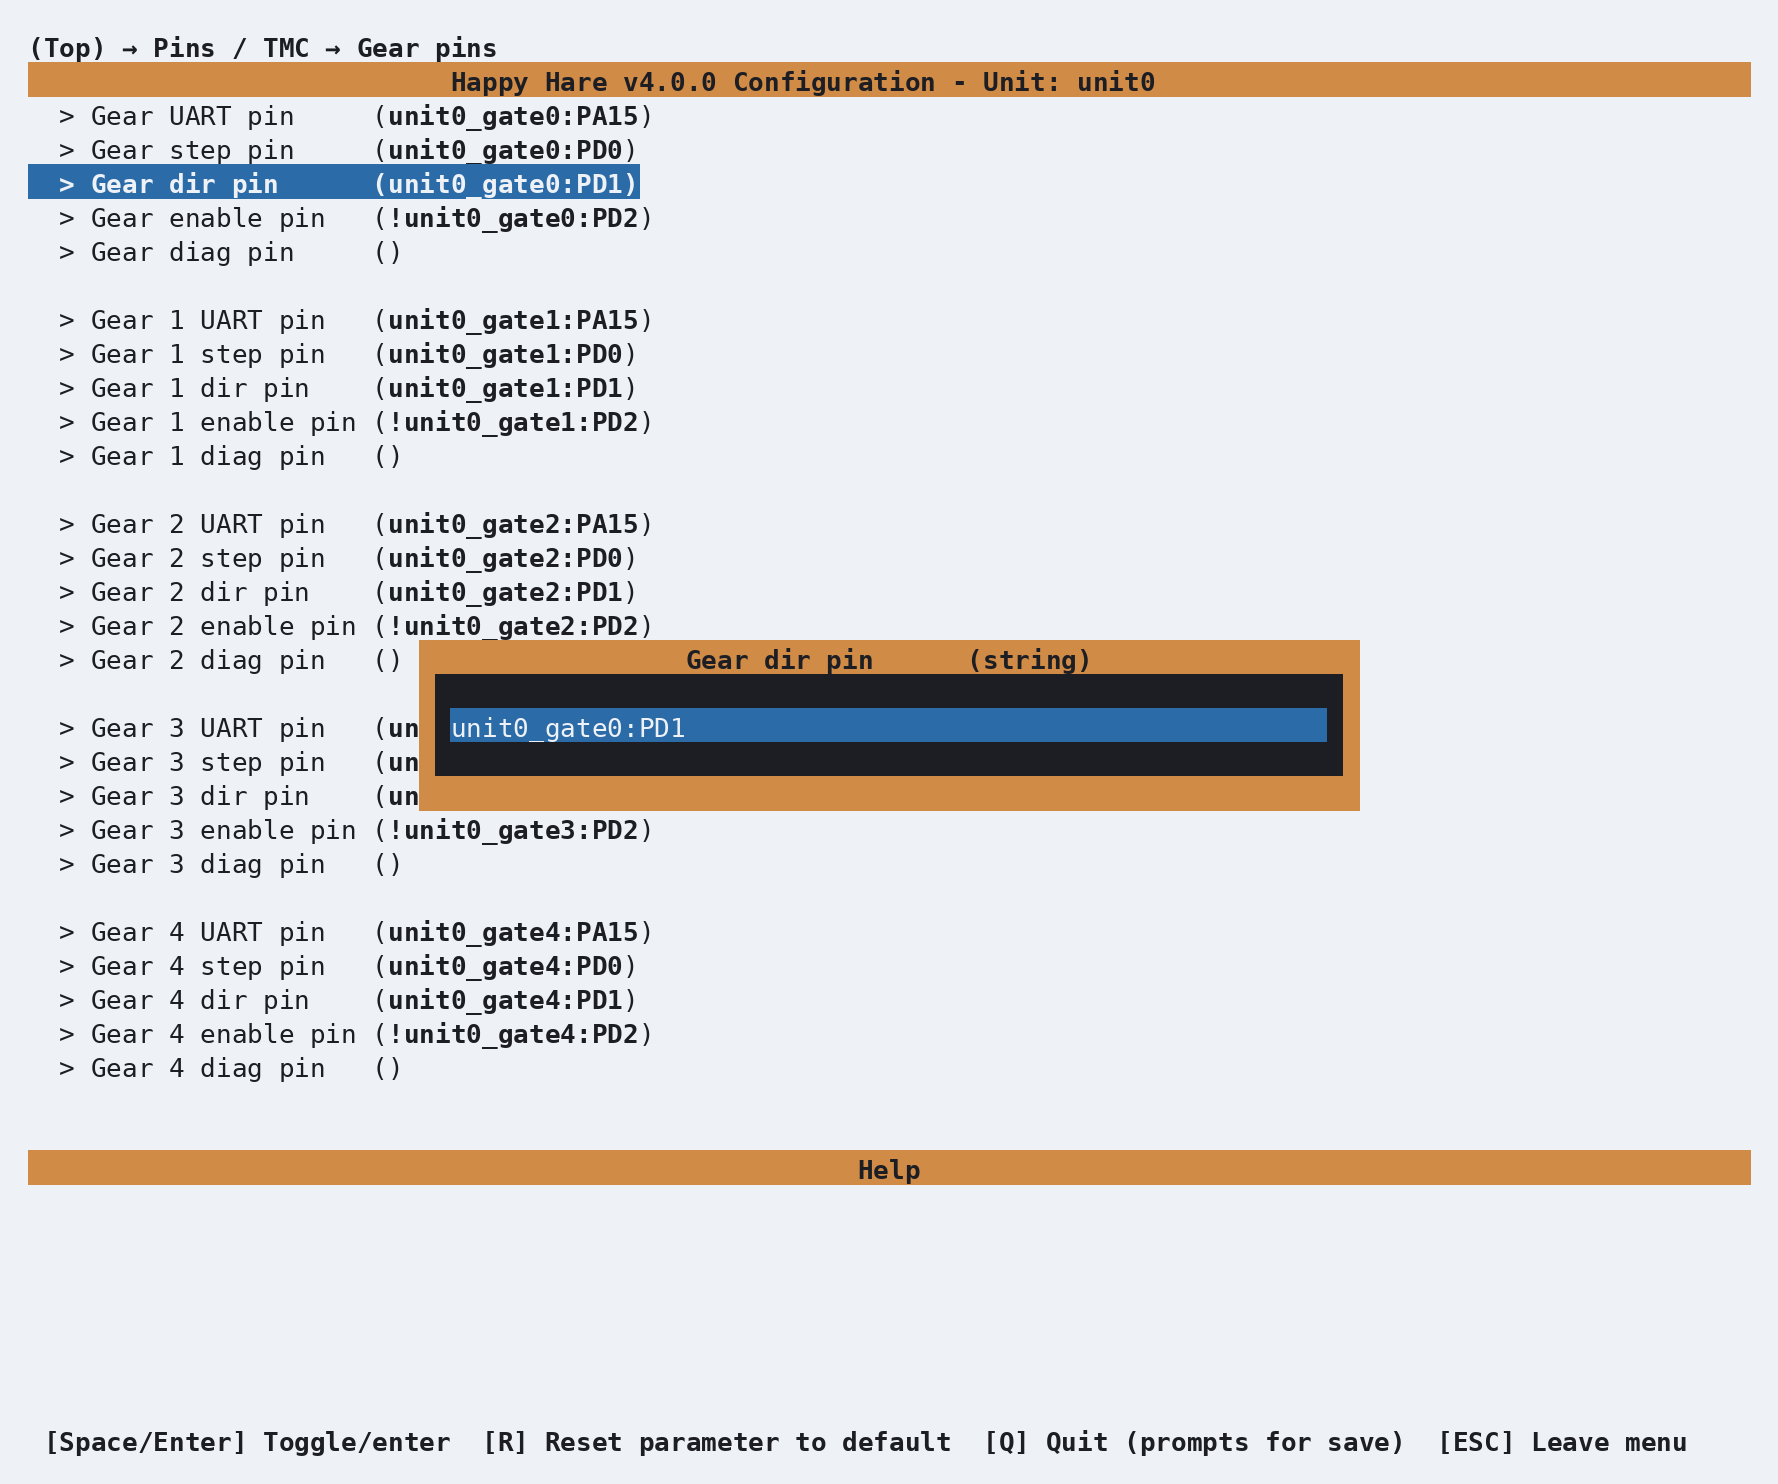
If that gear needs reversing, add a ! in front of the pin name — Klipper's
standard way of inverting a pin's polarity:
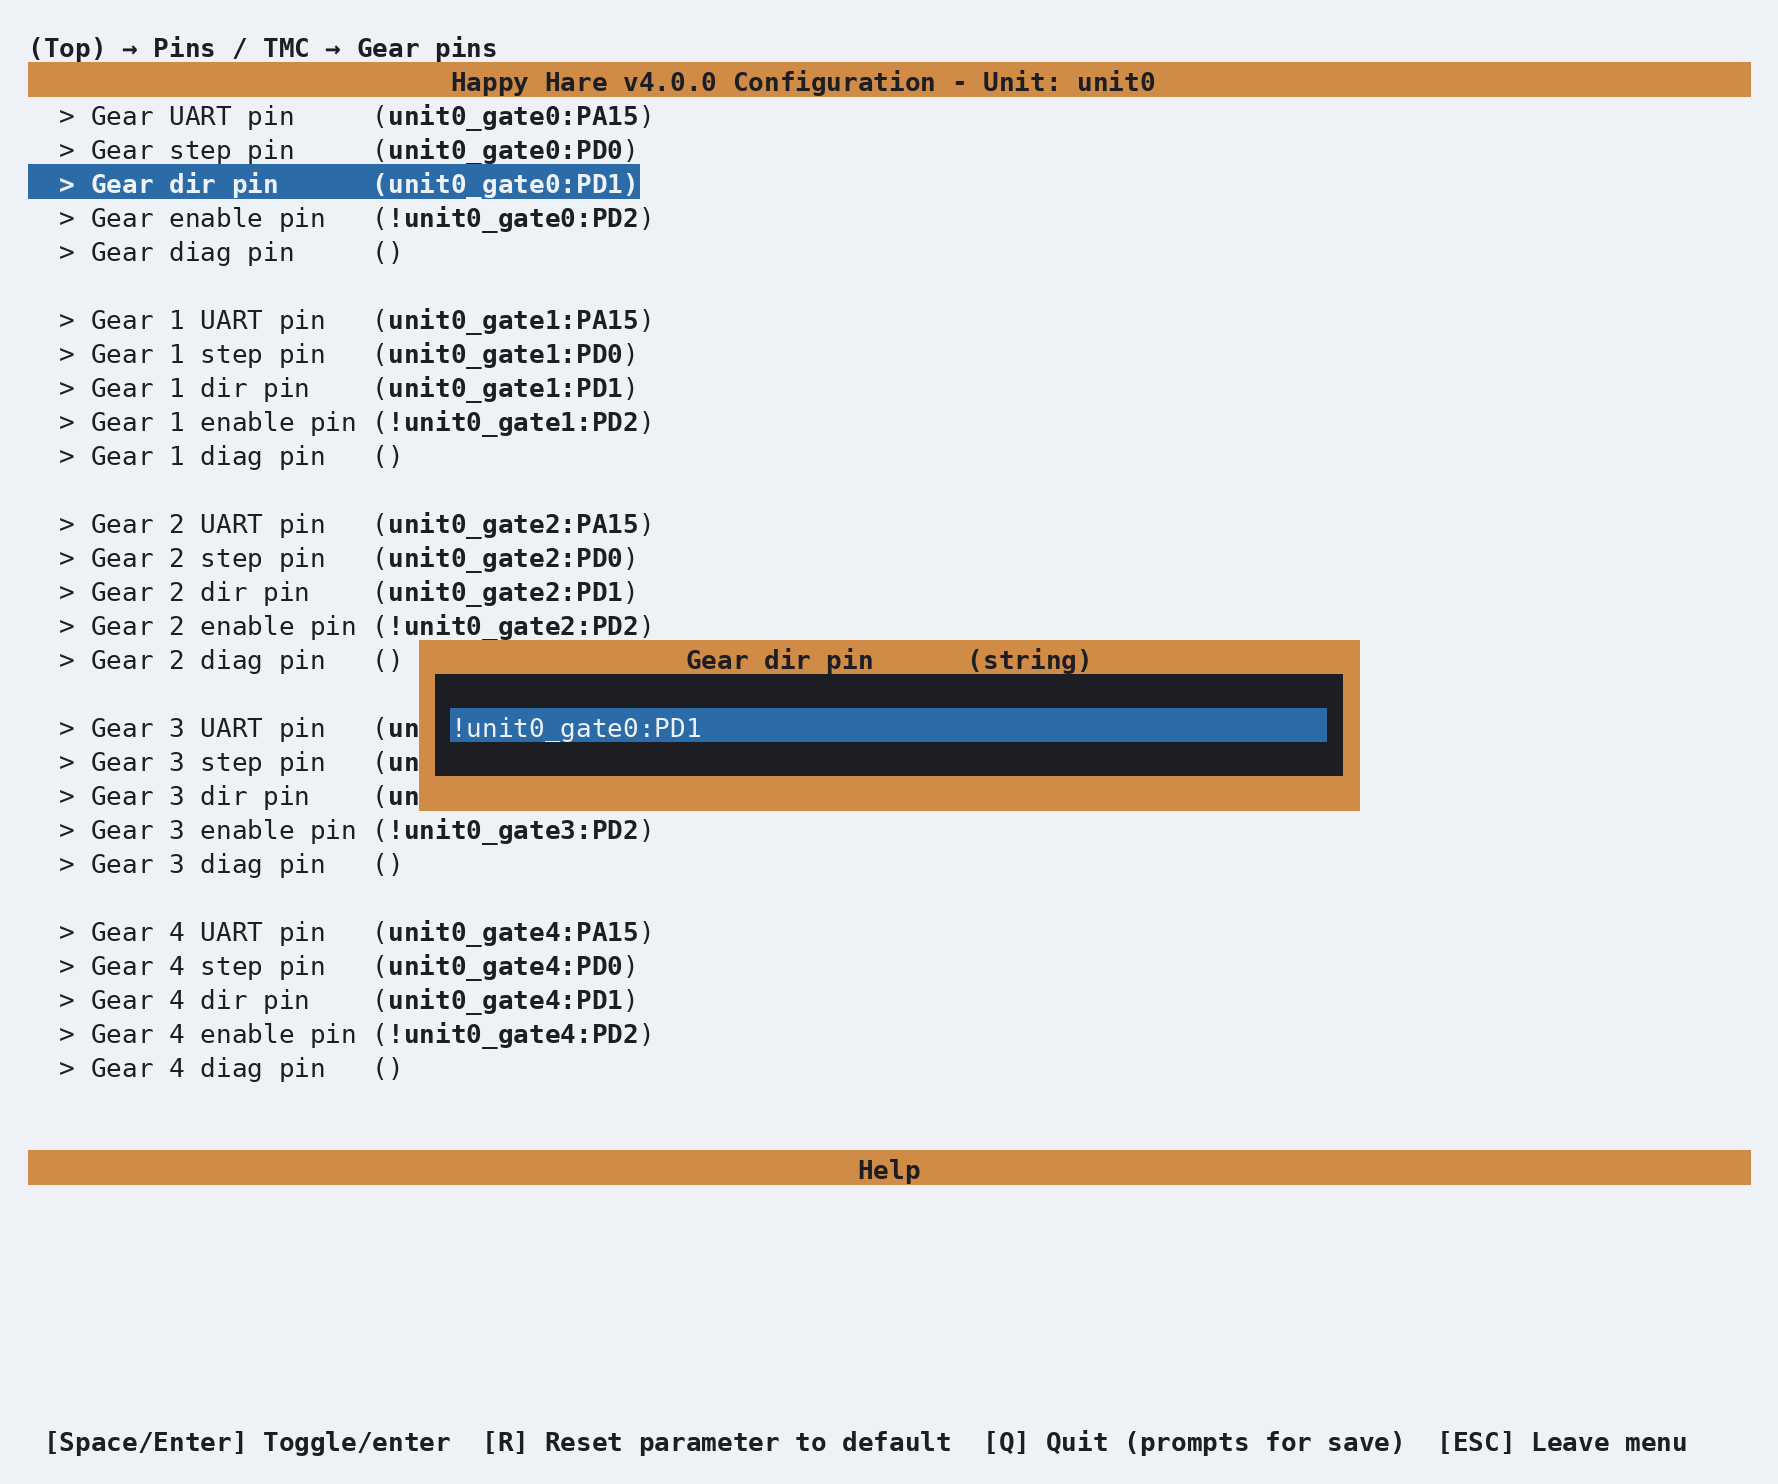
That's it — no rewiring, no .cfg files to hand-edit. Press Enter to accept the
change, or Esc to back out without applying it. And if you ever change a value
here and decide you'd rather have the default back, that's exactly what the
R key mentioned earlier is for: highlight the parameter and press R, and it
resets to whatever Happy Hare would have picked on its own.
Speeds configuration
Back out to the top and enter Speeds to review the motion parameters. The EMU defaults are conservative by design:
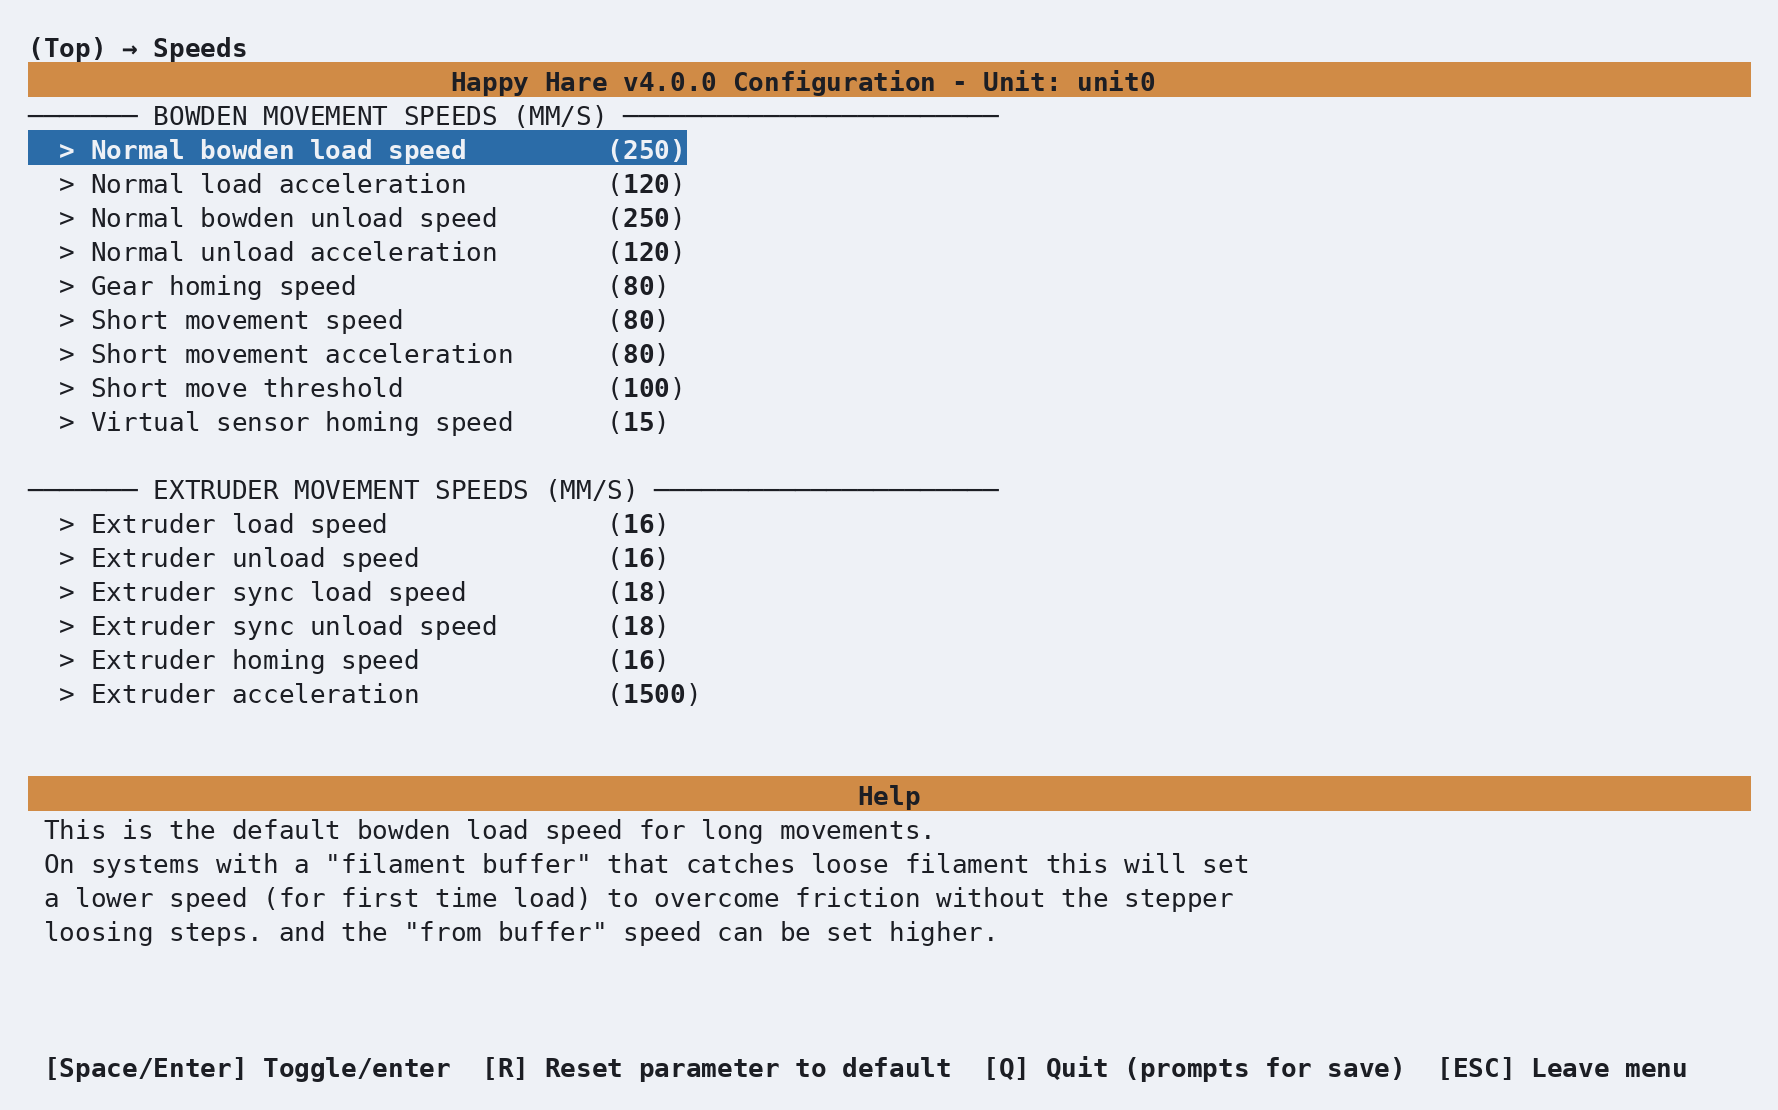
Key defaults for the EMU:
| Parameter | Default |
|---|---|
| Normal bowden load speed | 250 mm/s |
| Normal bowden unload speed | 250 mm/s |
| Short movement speed | 80 mm/s |
| Short movement acceleration | 80 mm/s² |
| Gear homing speed | 80 mm/s |
| Extruder load speed | 16 mm/s |
| Extruder unload speed | 16 mm/s |
These are conservative values suitable for production use. If you're experimenting or building a prototype, you can raise the short-move and homing speeds, but start with these defaults and adjust only if you have a reason to.
Picking a toolhead
From the top menu, enter Toolhead:
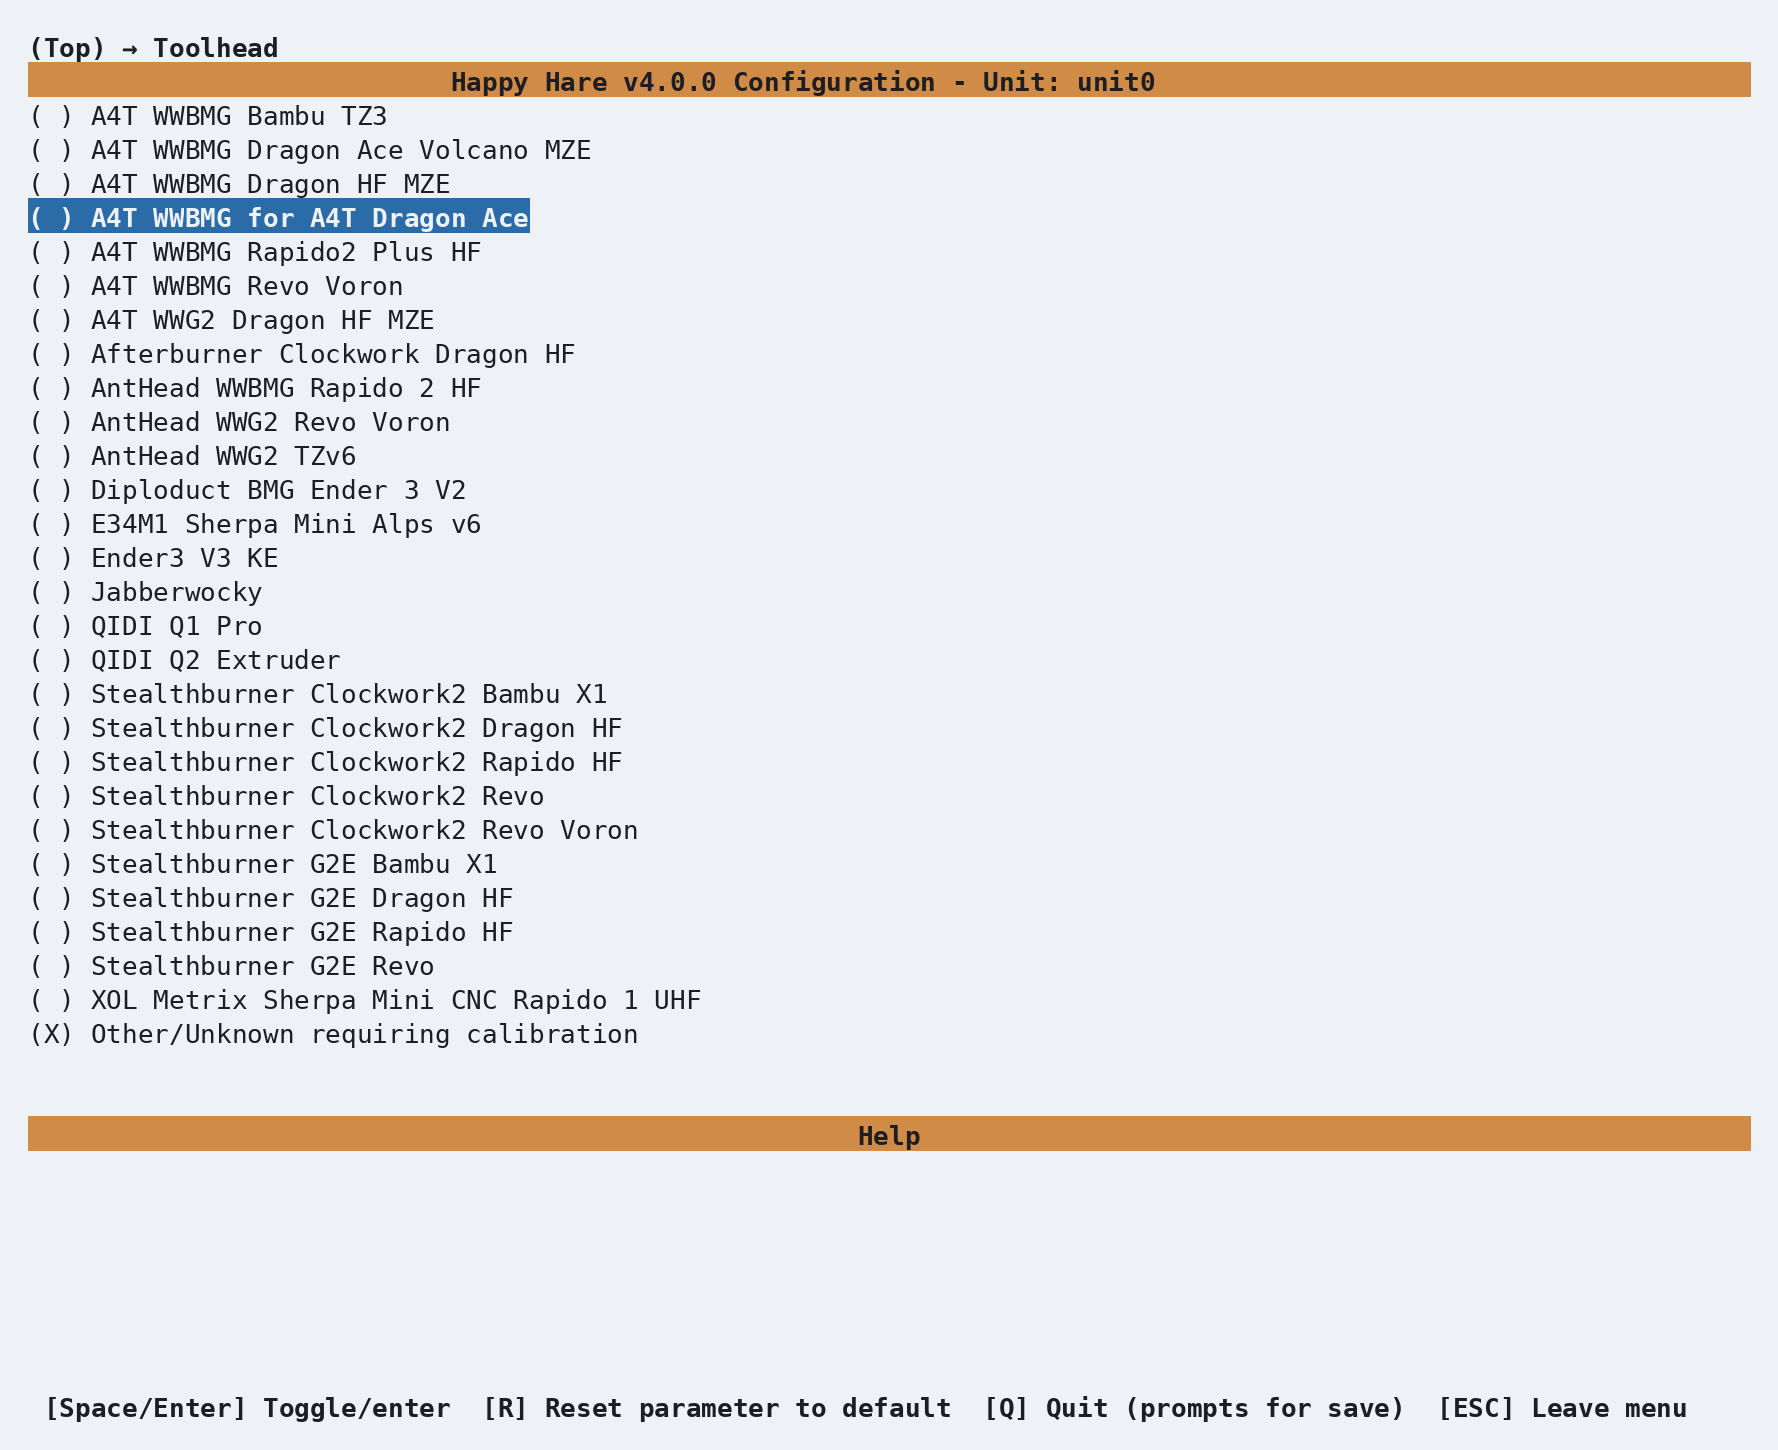
This step is entirely optional — skip it and Happy Hare falls back to generic "Other/Unknown" dimensions, which is a perfectly normal starting point. But if your toolhead (extruder - hotend combo) happens to be in this list, picking it gets you real, community-measured values instead of guesses, for free.
Back out and enter Toolhead sensors/settings to see the effect:
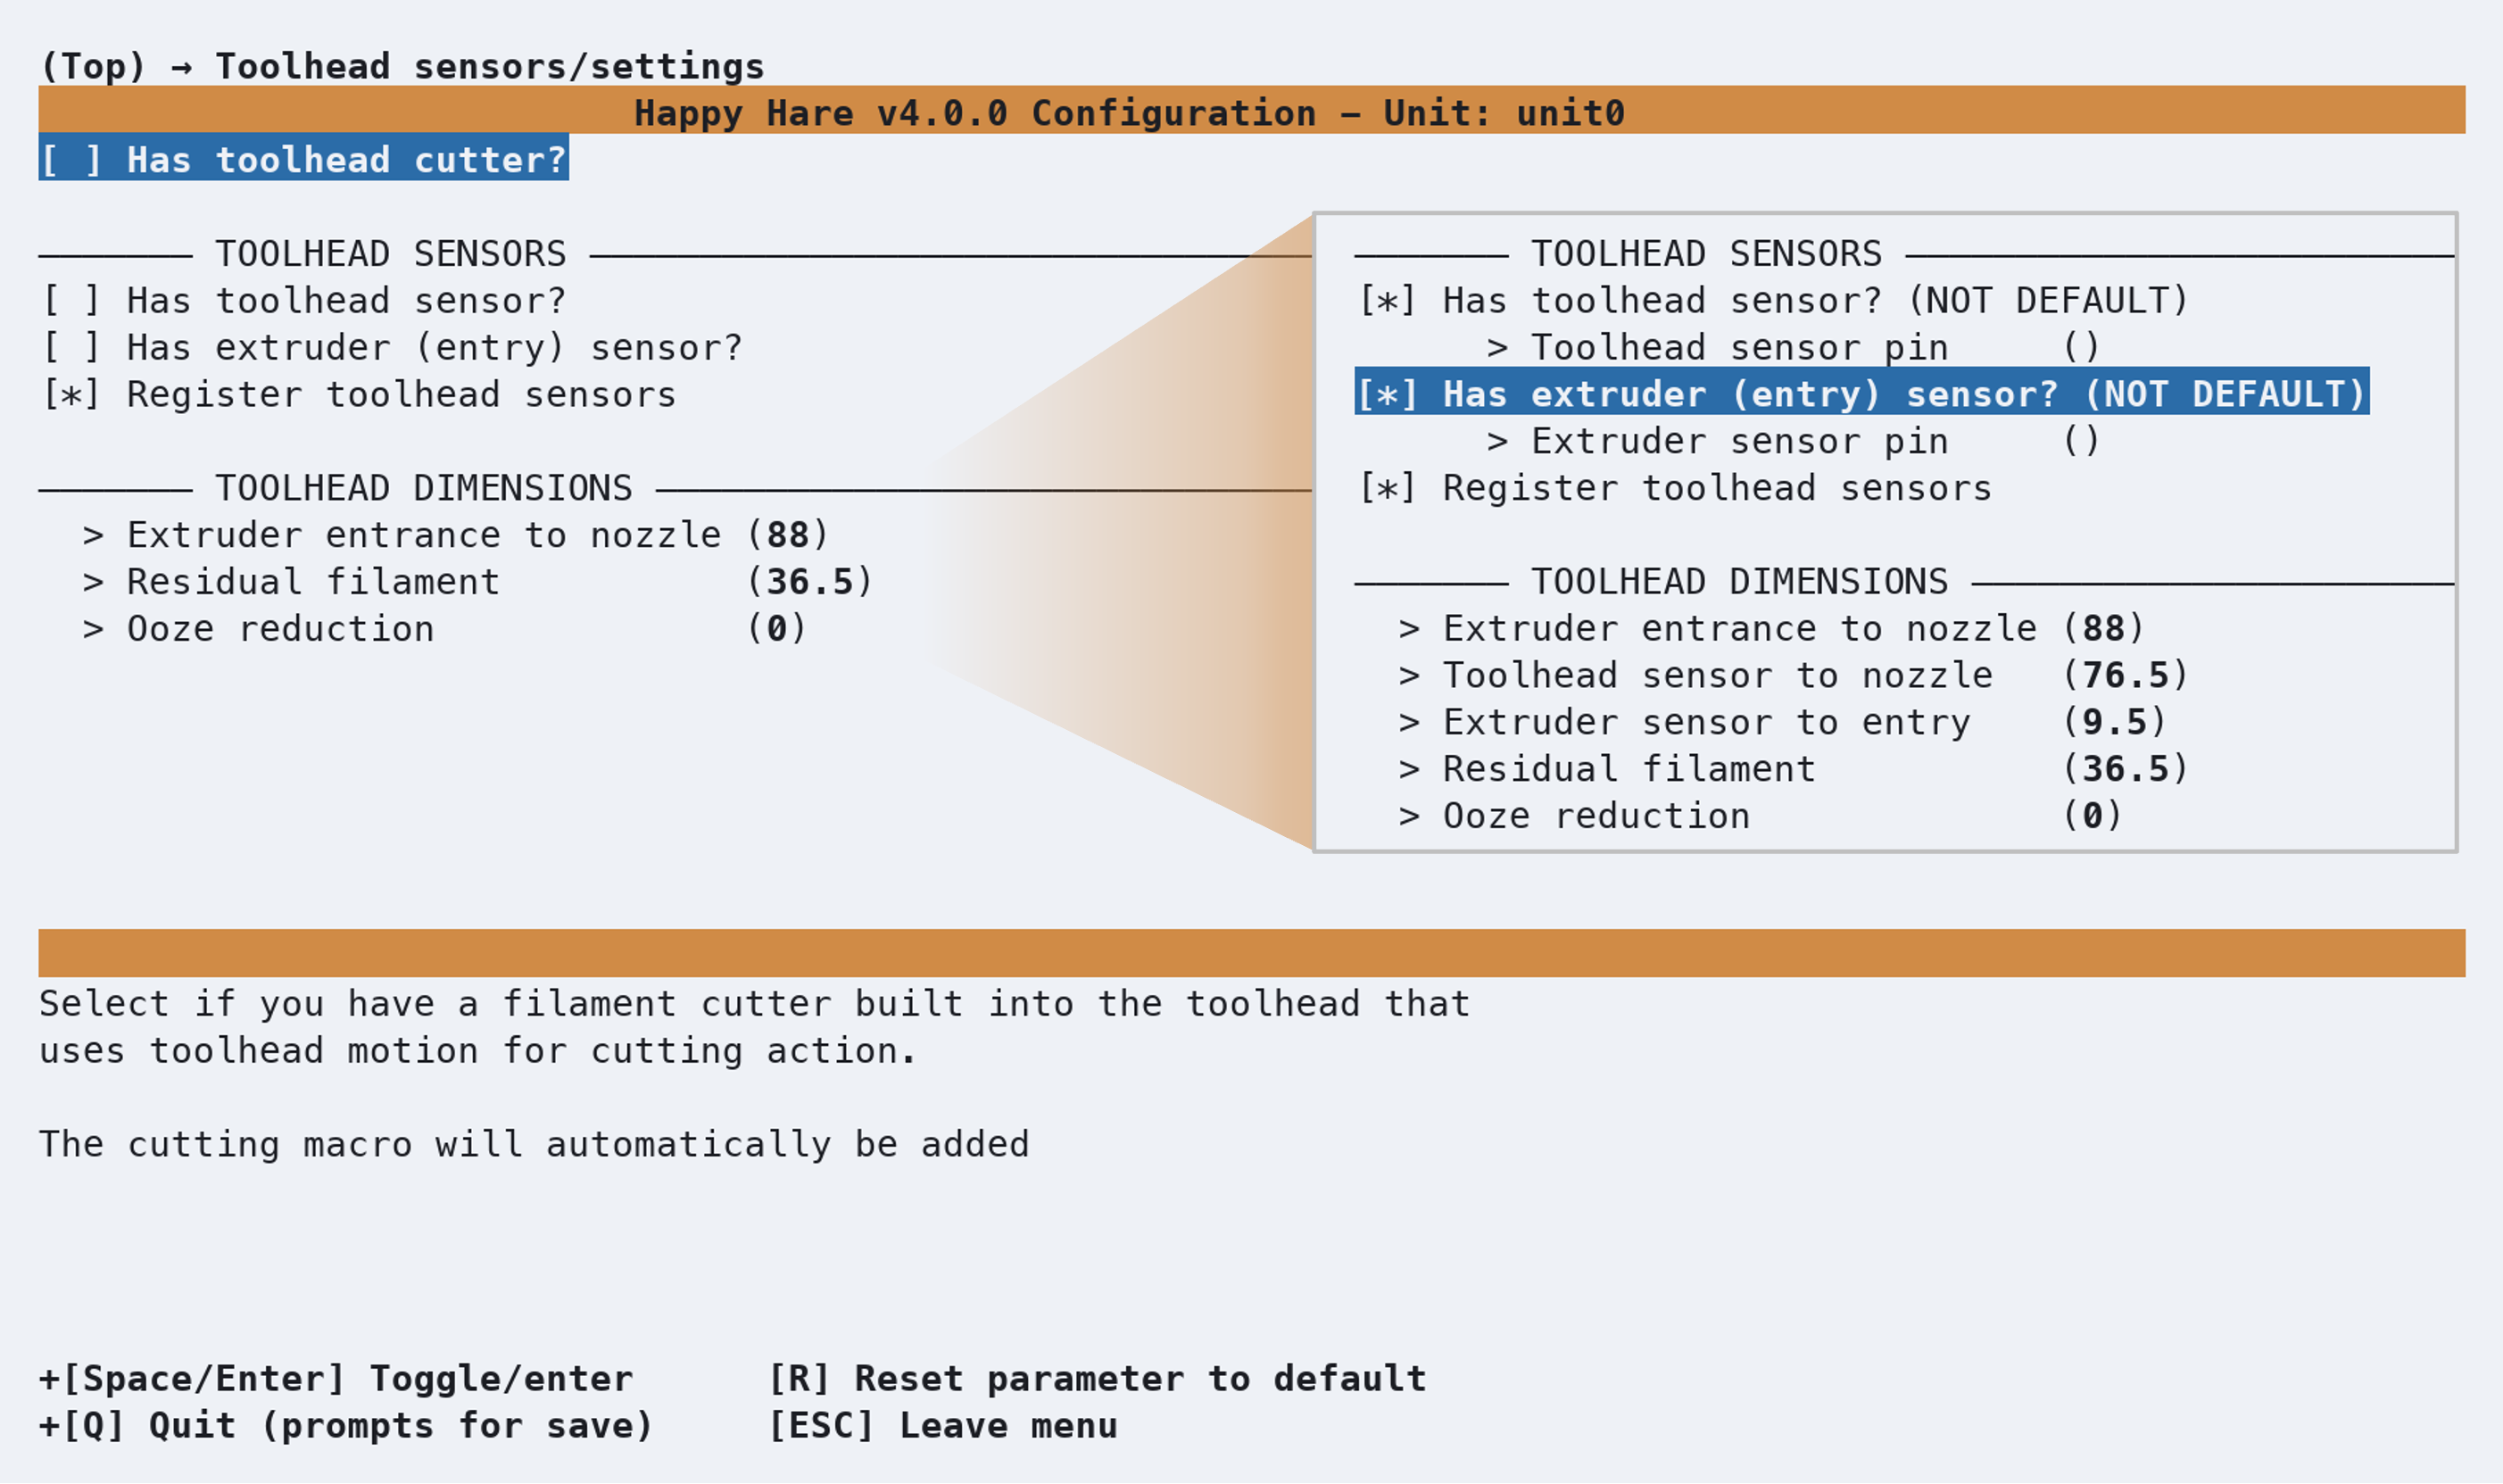
Extruder entrance to nozzle and Residual filament, under Toolhead dimensions, are already filled in — values measured by someone else on the same hardware rather than left at the generic default. The other two distances Happy Hare can use (toolhead sensor to nozzle, extruder sensor to entry) only appear once you've told it you actually have those sensors on your toolhead, higher up this same screen -- until relevant the values stay hidden here.
Contributions to the toolhead list are always welcome! If you would like to contribute your parameters to this toolhead database, please visit here to add your parameters to future installer updates.
This is a shortcut, not a substitute: even with a listed toolhead, you're still
better off learning to measure and calibrate your own eventually, since small
build variations and mods add up. But it's a genuinely good starting point, and
if your exact combo isn't listed, "Other/Unknown" plus manual calibration
(MMU_CALIBRATE_TOOLHEAD) is exactly as normal a
path as this one.
Saving, and coming back later
When you're done, press Esc from the top level (or Q) to get the save
prompt, and confirm. Happy Hare writes your .cfg files from what you chose.
The installer only forces menuconfig open automatically on that very first
run. After that, running ./install.sh again just upgrades in place — it won't
reopen the menu. To go back in and change something, use:
bash ./install.sh -i
This is the normal way to revisit any setting on this page — there's no need to
ever hand-edit the generated .cfg files directly.
Note
The one thing worth knowing: if you've hand-edited a .cfg file since
your last visit to menuconfig, -i will ask how to reconcile that —
Refresh (keep your manual edits, and just add new options), Replace
(regenerate everything from menuconfig, discarding direct edits) or Merge
(attempts to merge manual edits into menuconfig)
If you only ever configure through menuconfig, as this page assumes, option 2
(Refresh) is the recommended choice because it rebuilds your Happy Hare
klipper config files ensuring a clean config and any future update made to the
Happy Hare software.
Validating Hardware Setup
With Klipper accepting the config and no startup errors, confirm the physical mechanism actually does what Happy Hare thinks it does before calibrating anything or trying to print.
Gear stepper direction. Each gate has its own gear stepper, and which way it spins depends entirely on how its motor cable happens to be plugged in. Check each one — feed a scrap of filament in by hand first so you can see which way it moves:
MMU_SELECT GATE=0 MMU_TEST_MOVE MOVE=50
It should feed forward, away from the spool. If a gate runs backward, give that
gate's Gear dir pin a ! (see Pins: gear direction
above) and try again. Repeat with GATE=1, GATE=2, GATE=3, up to GATE=7
for all eight gates.
Sensors. Insert a short fragment of filament into a gate's entry by hand and check it registers:
MMU_SENSORS DETAIL=1
mmu_entry_0           --> TRIGGERED
mmu_entry_1           --> Open
filament_compression  --> Open
filament_tension      --> Open
Remove the fragment and confirm it goes back to Open. Do this for every gate
you plan to use, not just the first — a per-gate sensor is exactly as likely to
be miswired as a gear direction pin.
Sync-feedback buffer orientation. The EMU recommends proportional sync feedback (PSF) or a switch-based EMUSync with compression and tension sensing. Filament under compression (excess being fed in) makes the buffer extend; filament under tension (being pulled taut, not enough slack) makes it fully compress. Centered, at rest, it should read neutral. Move the shuttle by hand to each extreme and confirm:
MMU_SYNC_FEEDBACK Sync feedback: Neutral
If compression and tension read backward from what you expect, swap
compression_pin/tension_pin in mmu_hardware.cfg (or their inversions)
rather than second-guessing the mechanism.
LEDs. With filament at the gate, trigger a few status effects to confirm the NeoPixel strip is responding:
MMU_LED_EFFECT EFFECT=gate_status GATE=0
MMU_LED_EFFECT EFFECT=filament_color GATE=0
Each gate should light with the color mapped in PARAM_LEDS_COLOR0 through
PARAM_LEDS_COLOR20. If colors are wrong, verify the color table values match
your intent.
Calibration
The EMU needs a few calibration steps to get accurate filament tracking:
Gear rotation distance. Each gate's gear stepper needs an accurate
rotation_distance value. The EMU ships with a calibrated default of 22.7574
mm/rot, but this should be verified:
MMU_CALIBRATE_GEAR MEASURED=102.5
This measures the actual distance the filament moves for a known input rotation. Repeat for each gate if you have different gear configurations. See Calibration: Gear Rotation Distance for the complete procedure.
Bowden length auto-calibration. The EMU enables auto bowden calibration by
default (PARAM_CALIBRATION_BOWDEN_LENGTH = 1). This runs on first load and
measures the exact bowden length for each gate. No manual calibration is needed
for this step.
Sync feedback calibration. If you have a PSF buffer, verify the calibration
values in hh.json match your hardware. Key PSF values:
| Parameter | Value | Notes |
|---|---|---|
PARAM_SYNC_FEEDBACK_ANALOG_MAX_COMPRESSION |
0.9435 |
Max compression analog value |
PARAM_SYNC_FEEDBACK_ANALOG_MAX_TENSION |
0.0982 |
Max tension analog value |
PARAM_SYNC_FEEDBACK_ANALOG_NEUTRAL_POINT |
0.5275 |
Neutral point |
These values are set via macro variables after calibration. See the Calibration page for full details.
Checking Basic Operation
Outside of a print, confirm the basics work end to end on a gate you've already validated above:
MMU_SELECT GATE=0
MMU_LOAD
MMU_UNLOAD
Each should complete without error — no pauses, no "not calibrated" warnings you weren't expecting. If something goes wrong here, it's much easier to diagnose now than mid-print; see Operation: Debugging Problems if any of it doesn't behave as expected.
Slicer Setup
You now need to add some gcode hooks into your favorite slicer for start
g-code, end g-code, after layer change and on tool change. This is to
coordinate with the MMU during certain phases of a print. This is covered in
Slicer Setup. Jump to this section, make these
changes and return here.
Printing with MMU
Besides the slicer gcode hooks above, there's one real decision left before your first multi-material print: how purging between colors happens.
- Slicer-controlled — your slicer's own wipe tower, printed alongside the model. Simplest to set up; costs bed space and filament.
- Happy Hare-controlled — a dedicated purge macro runs at each toolchange instead of a wipe tower: either Purge: Simple (prints a purge line) or Purge: Blobifier (a dedicated purge/park station, more capable but its own hardware). See Purging without a wipe tower for how to disable the slicer's tower and hand purging over to Happy Hare.
Either way, the toolchange parking positions and movement (retraction, z-hop,
where the toolhead parks during a change) live in mmu_macro_vars.cfg, tunable
through Macro Variables in menuconfig — see Toolchange
Movement for what each setting actually does before
changing the defaults.
Once that's decided, slice something with more than one filament and run your first print.
What Next?
- Install KlipperScreen (Happy Hare edition) if you want a touchscreen front end, or drive everything from Mainsail / Fluidd — either works, and both are covered.
- From here, explore the rest of this site's Features section one page at a time as you actually need them — Spoolman integration, NFC/RFID tags, EndlessSpool, and the rest. Trying to absorb all of it before your first print is the fastest way to feel overwhelmed by an MMU that, day to day, mostly just works.